The device setup tool is a function to add and configure the devices.
Important feature: the multi select function (SHIFT or CONTROL) can be used for within the device setup page. Configure more than one device at a time or update the firmware of more than one device at a time (For the firmware update: LAN devices will update at the same time whereas wireless devices will update one after the other). This chapter might be useful: Wireless Device Recovery.
Print Screen 1 |
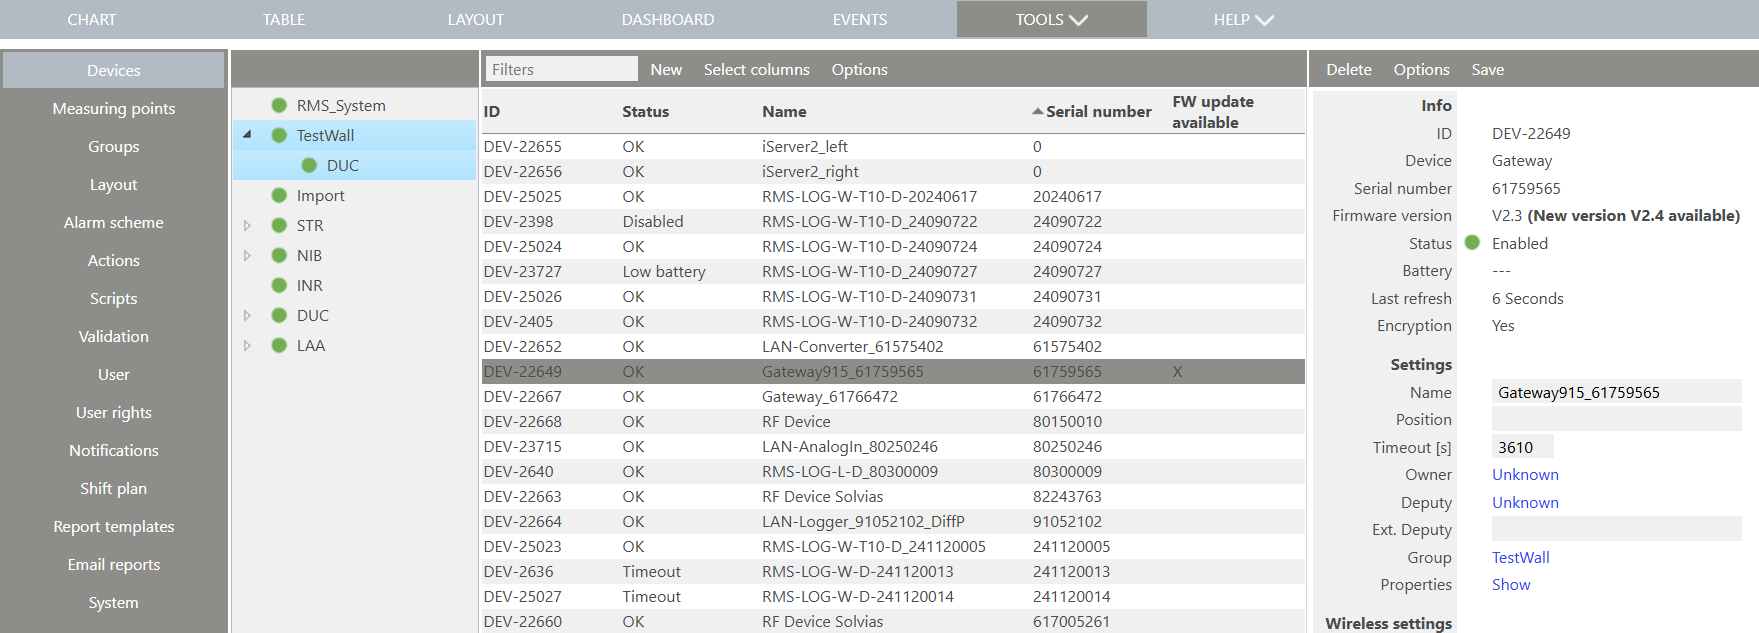
Under Groups, the user can select the group where the device is located or will be located. Once a device is selected, the page will populate with the necessary information.
Once a device selected, it can be deleted, options can be viewed or the configuration can be saved. 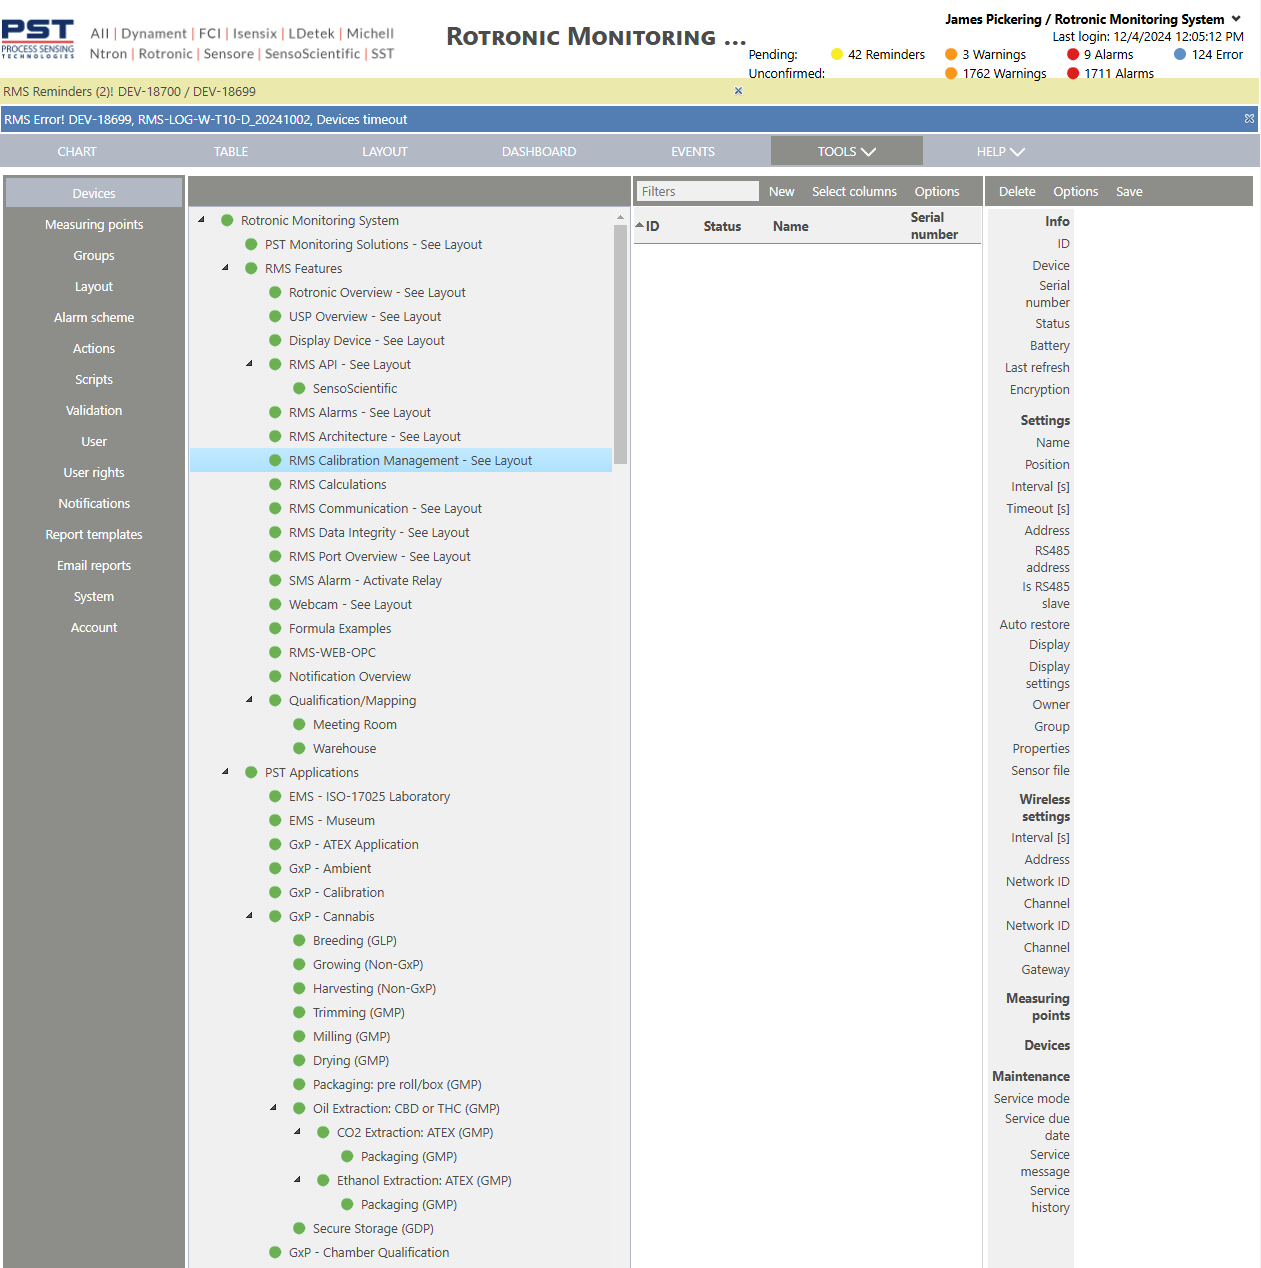
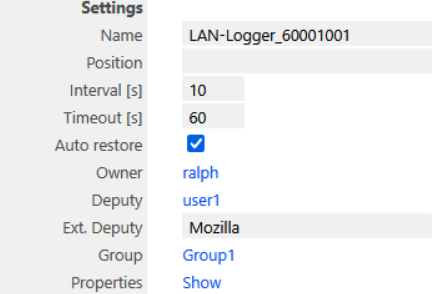
Info: Device Information. •ID: DEV-xxx automatically given by RMS. •Device: Device description automatically given by RMS. •Serial Number: Device serial number automatically given by the device. •Status: Device can be enabled or disabled by the user. •Battery: Device battery level automatically given by the device. •Last refresh: Device last refresh automatically given by RMS. •Encryption: Device encryption yes or no automatically given by RMS. Settings: Device Settings. •Name: User configured device name (Recommendation: device name + last 3 serial number digits: RMS-LOG-868 #123).
•Position: User configured device position (Recommendation: specific location: Fridge 2, top left). •Interval: User configured device log interval. •Timeout: User configured device timeout (Recommendation: 4*Interval). •Address: IP address for devices added via the RMS-CONVERTER-100 automatically given by the CONVERTER. •RS485 address: RS485 address for devices added via the RMS-CONVERTER-100 automatically given by the CONVERTER. •Is RS485 slave: Tick box automatically given by the CONVERTER. •Auto restore: Tick box automatically set but can be user configured. •Display: User configured selection of measuring points to be shown on a display. •Display settings: N/A. •Owner: User configured device owner (Recommendation: the person who should be contacted in case of an issue.). •Group: User configured device group (Recommendation: always put the device and the measuring point in the same group). •Properties: Click on properties to read out the device properties. •Sensor file: Load a T10 sensor file for the RMS-LOG-T10-WIFI-D. Wireless settings: Wireless Device Settings (Recommendations: Wireless Installations in RMS). •Interval: User configured device log interval that is defined during the initial pairing. •Address: User configured device address that is defined during the initial pairing. •Network ID: User configured device network ID that is defined when selecting the gateway during the initial pairing. •Channel: User configured device channel that is defined when selecting the gateway during the initial pairing. •Gateway: User configured gateway that the device is connected to. When the gateways are redundant, this gateway may change. Measuring points: Overview of the measuring points that are connected to the device. A quick link is available to access the measuring point directly. Devices: Add/Search for devices with the RMS-CONVERTER-100. Maintenance: all device maintenance can be logged within the audit trail. •Service mode: The service mode can be enabled and disabled. The service mode is then visible within the audit trail. •Service due date: The service due date can be configured and a reminder on the due date will occur. •Service message: A service message can be entered and will be logged in the audit trail: oTemplate: Replace battery. oTemplate: Replace filter. oTemplate: Replace sensor. oTemplate: Firmware update. oFree Text. •Services history: A link to the events tab with a filter on the event "Device Maintenance" and the target (DEV-XXX). View in the audit trail directly filtered for the device and service actions.
With the multi select function, devices can be deleted and the following settings can be changed before being saved: •Status. •Name. •Position. •Interval. •Timeout. •Owner. •Group. •WiFi connections. •Service mode. •Service due data. •Service message. |
|
Print Screen 2 |
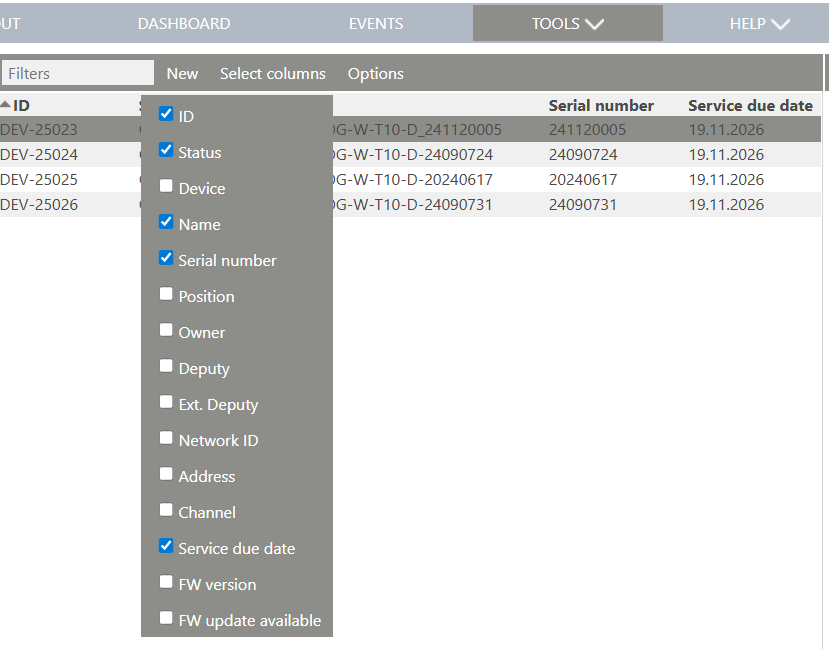
The columns shown in the device overview can also be selected. 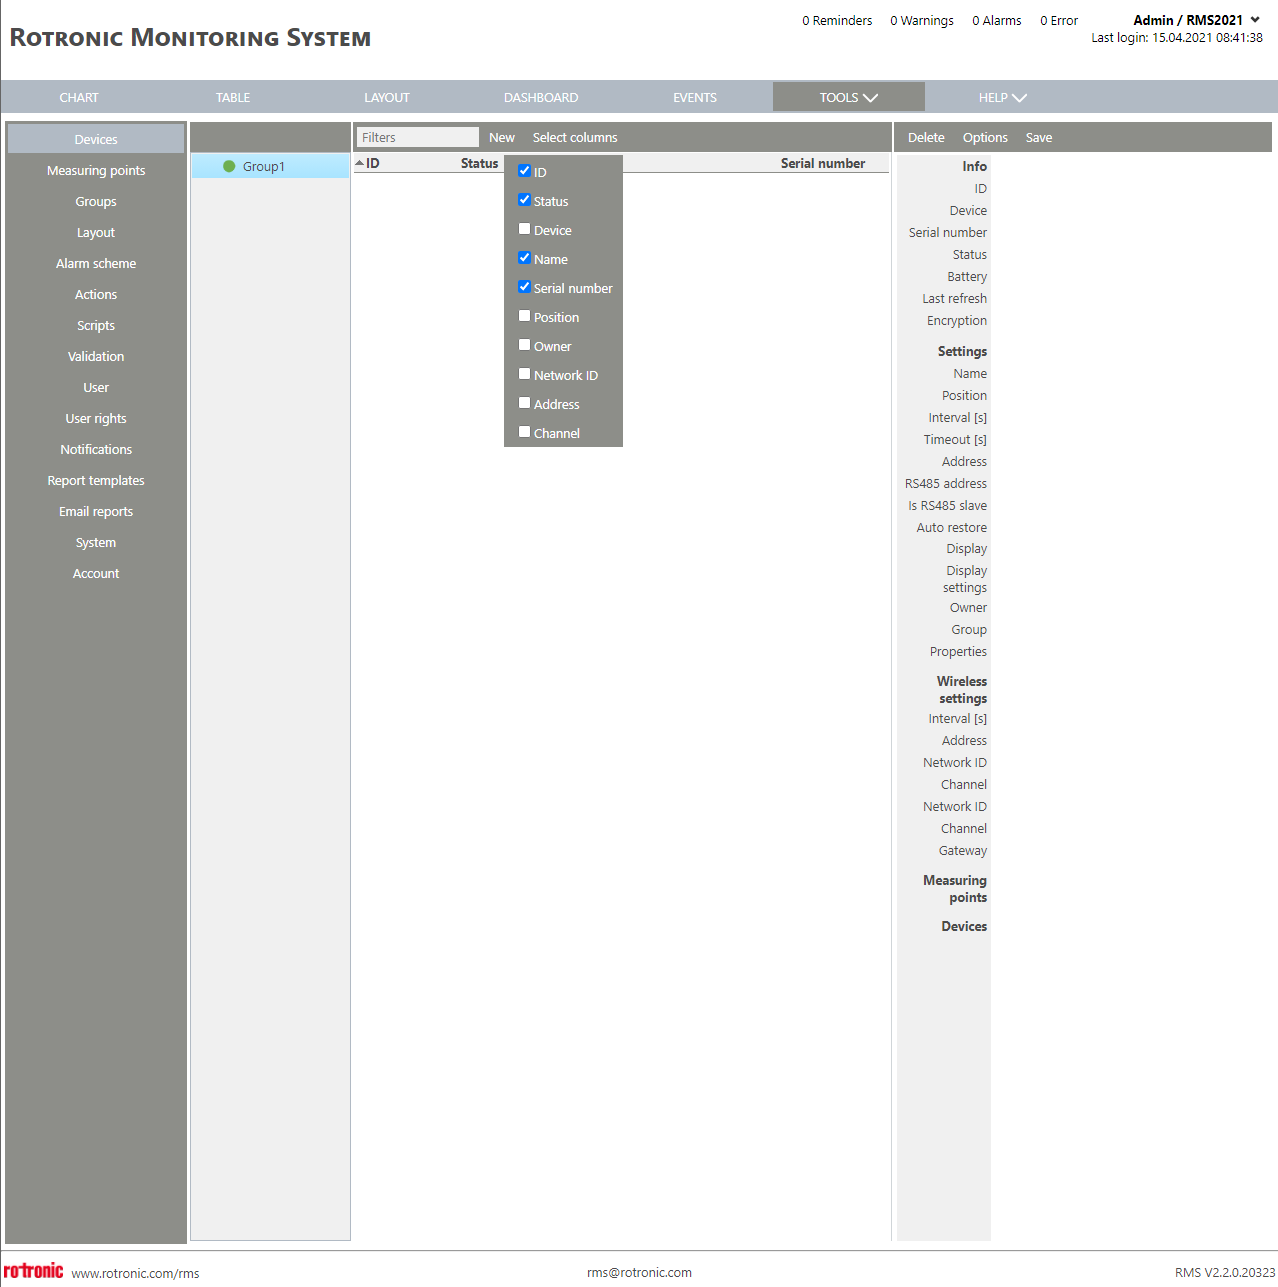 |
|
Print Screen 3 |
Add a new devices by clicking on new.
|
|
Print Screen 4 |
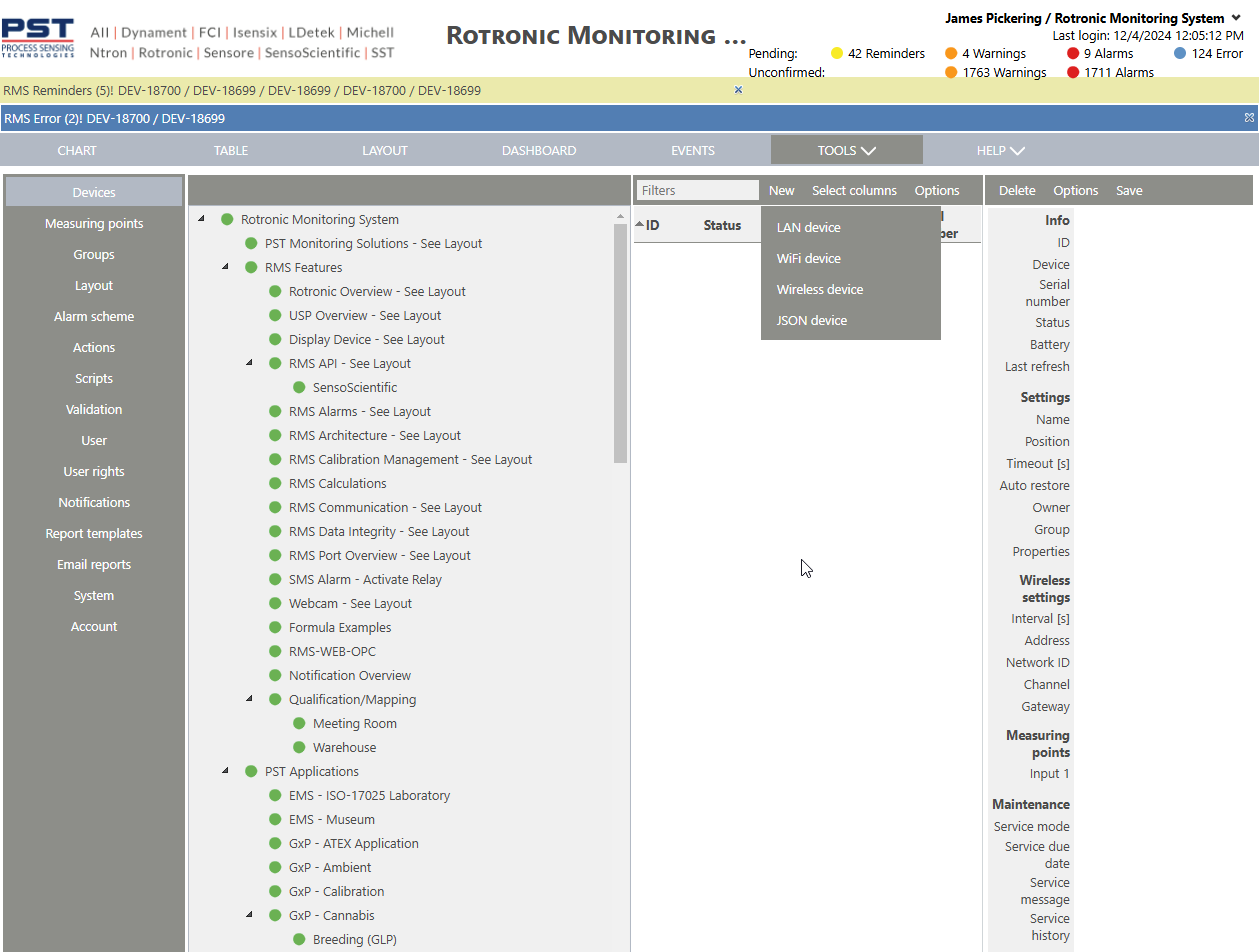
Click on wireless device to add a wireless device, a gateway will need to be selected prior to adding a wireless devices. 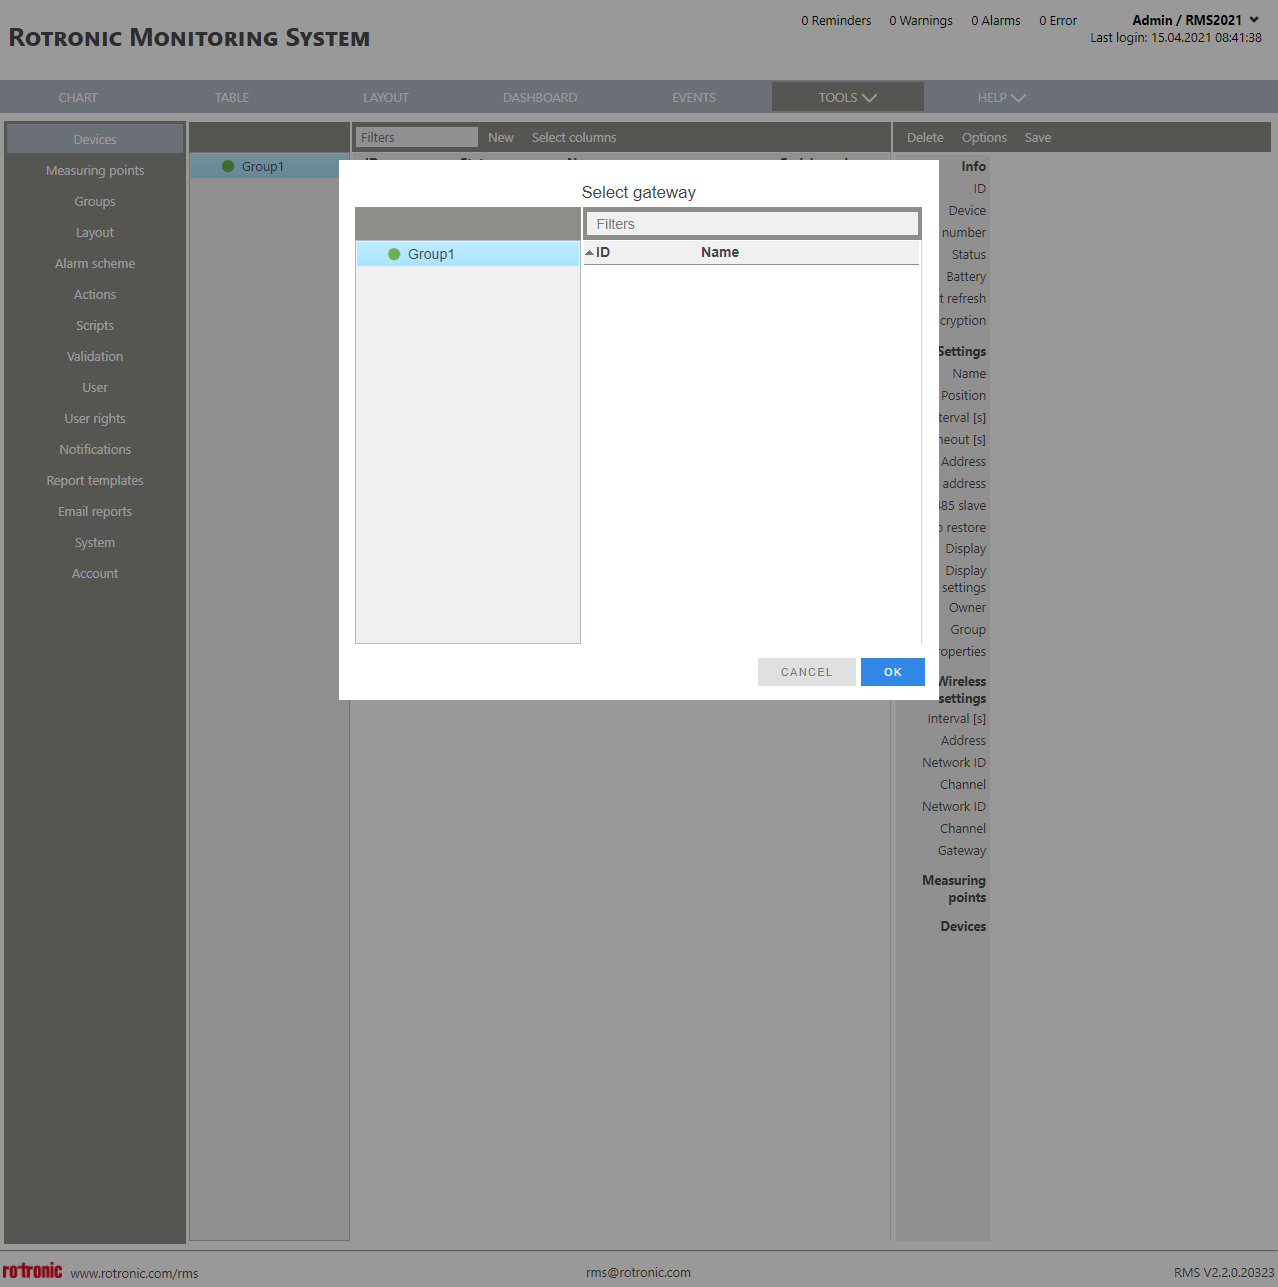 |
|
Print Screen 5 |
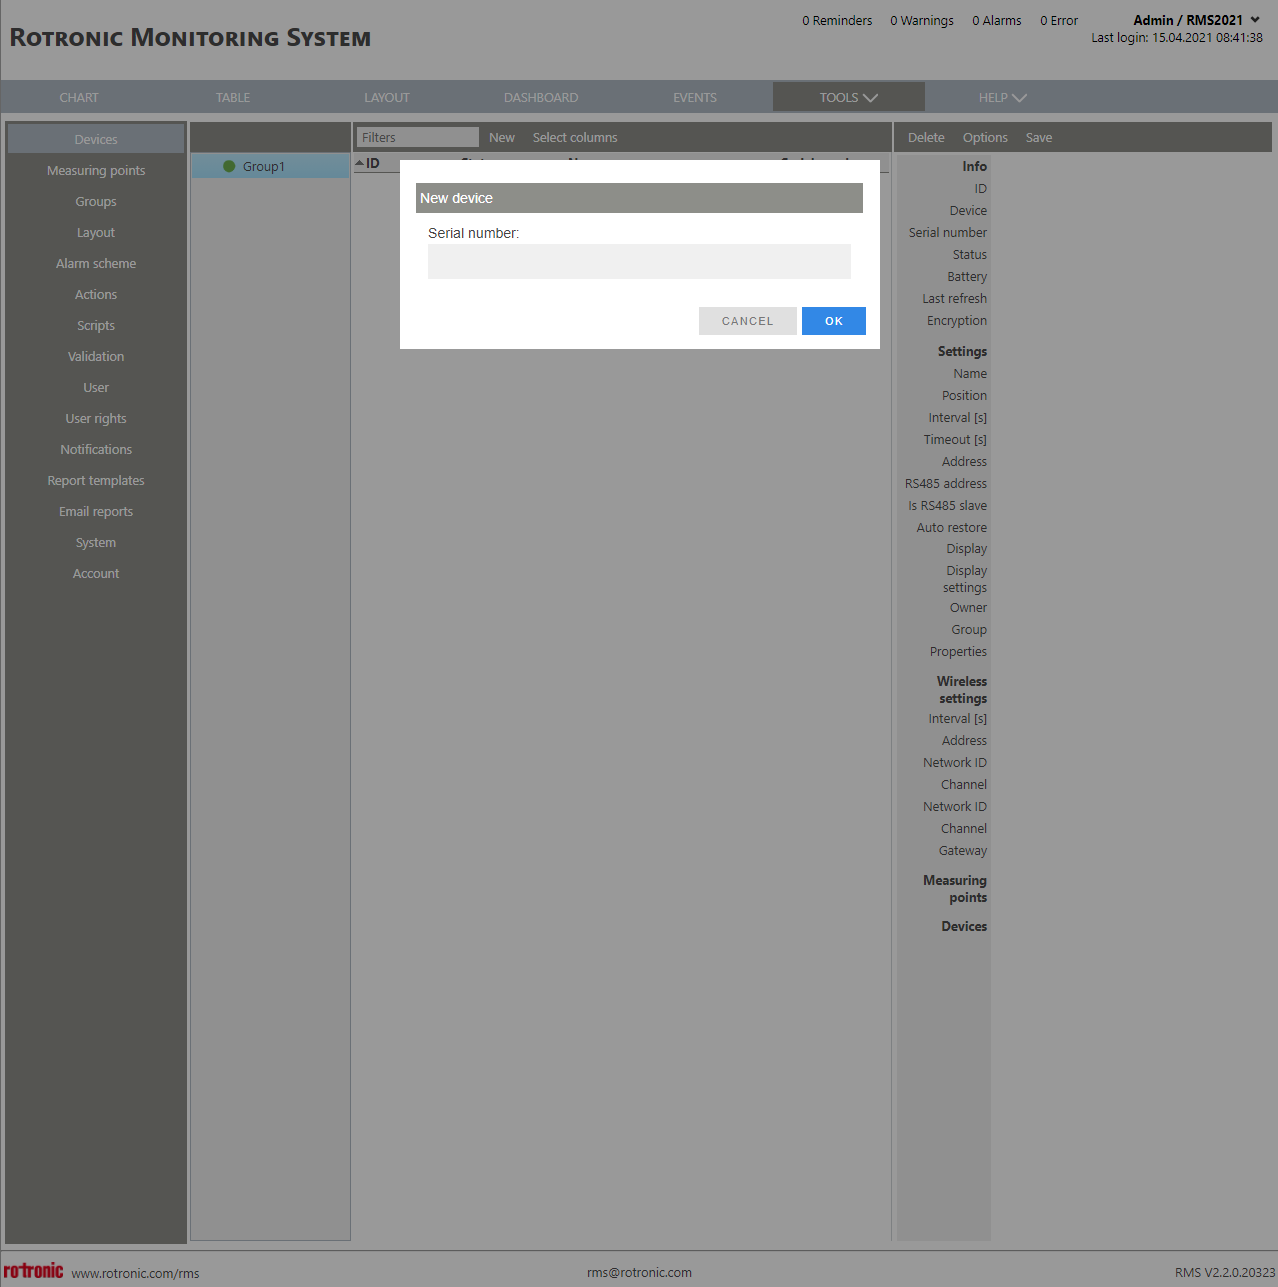
Click on LAN device to add a LAN device, the serial number is required to add a LAN device. |
|
Print Screen 6 |
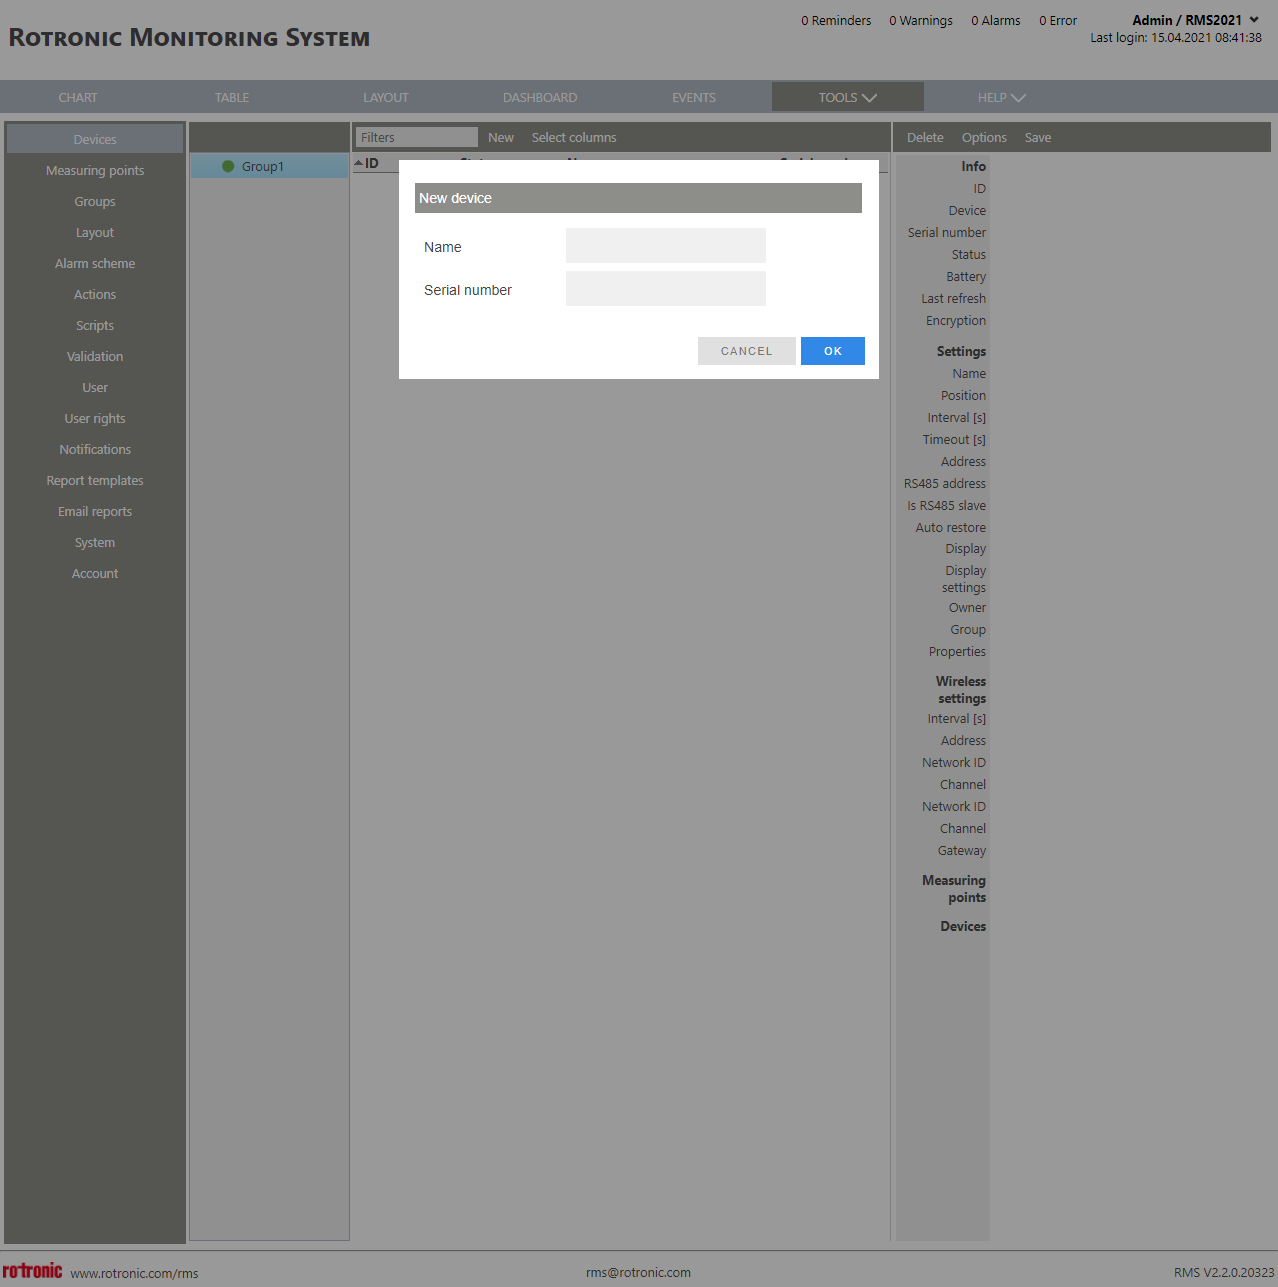
Click on JSON device to add a JSON device, the name and serial number is required to add a JSON device. |
|
Print Screen 7 |
Click on WiFi device to add a WiFi device, the serial number is required to add a WiFi device. |
|
Print Screen 8 |
The device specific menu offers the following tools:
Delete: the delete button is used to delete the device. WARNING if a device is deleted all of its history will also be deleted, including the measuring points (MPT). The recommendation is to use the archive function for the measuring points. If a device is to be deleted and added to the system again straight away, we recommend disabling the device and clicking on save before deleting it. If this is not done the system might not recognize that the device has been removed and the user will have to wait for a WebService recycle before being able to add the device again.
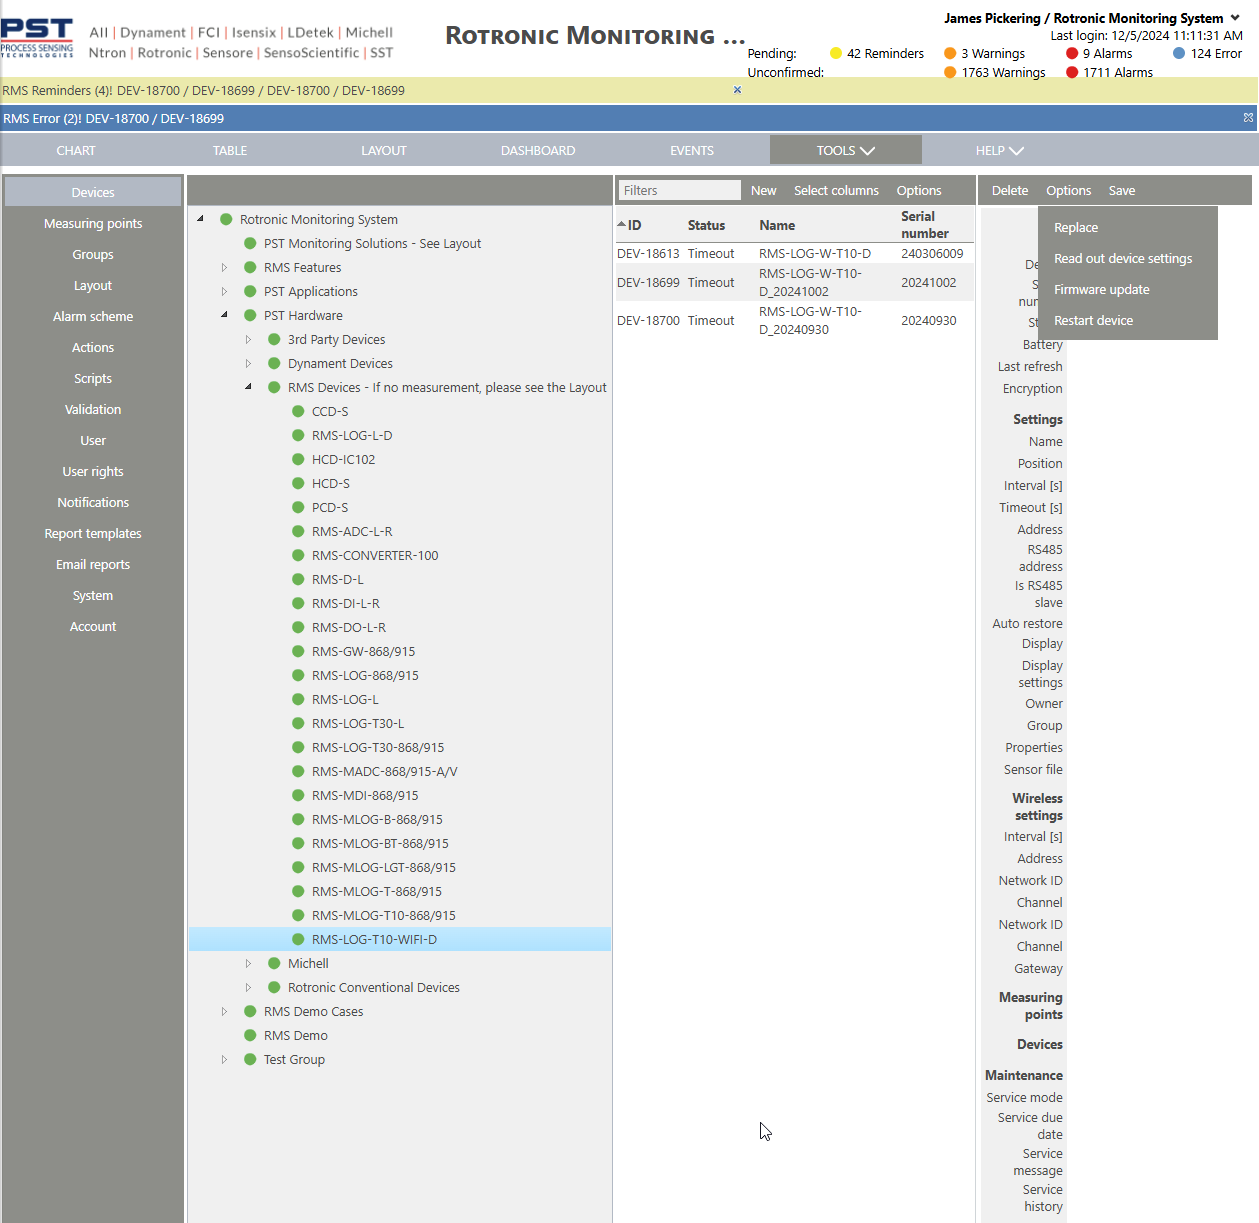
When options is selected, various options appear.
Options: •Replace: when a device is faulty and needs to be replace, use the replace function. The ID remains as well as all of the settings. The audit trail will show that the device has been replaced (serial number x to serial number y). •Read out device settings: click here to read out the device settings. Once clicked, the user must wait until the device refreshes before reading out the device settings. •Firmware update: click here to update the firmware. •Restart device: click here to restart the device (WiFi logger only).
Save: save the device settings. |
|
Print Screen 9 |
The group specific menu offers the following tools: 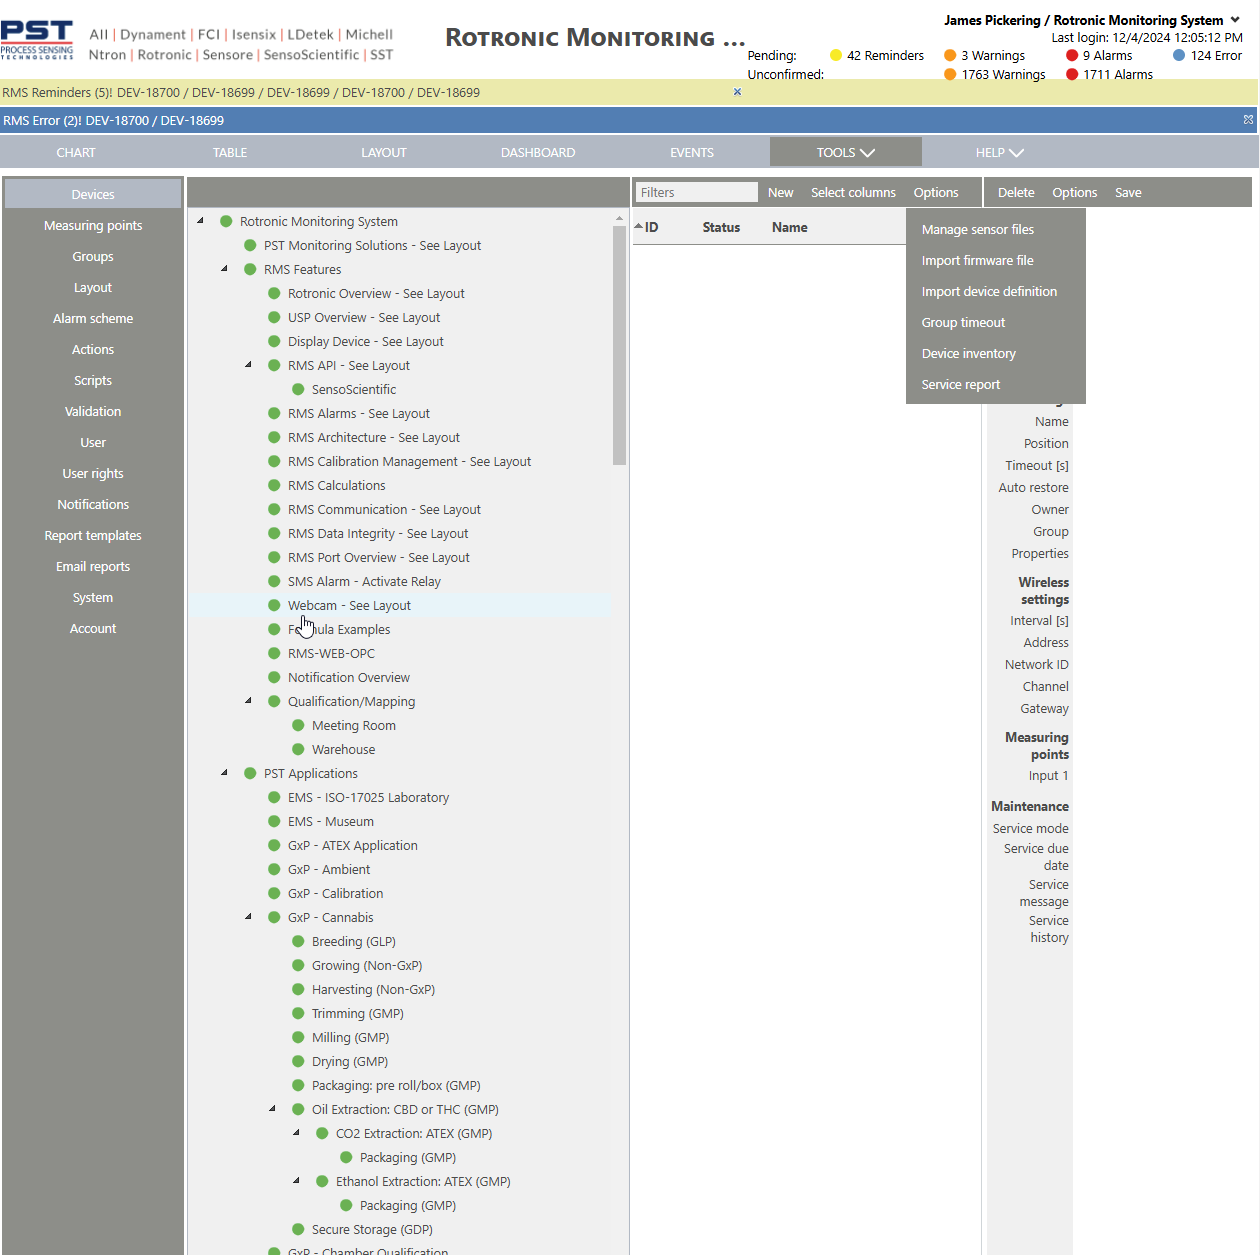
•Manage sensor files: manage the T10 sensors required for the RMS-LOG-T10-WIFI-D. •Import firmware file: click here to import a firmware file (.bin). The firmware file can be found under the documents: Tools>Documents Explained. •Import device definition: click here to import a device definition file (.prop). •Group timeout: A group timeout can be activated for all devices of a group. If activated, a timeout alarm will not be released when all devices of the group are offline simultaneously. •Device inventory: to find out what devices are in the group including the ID, device, serial number, firmware version, group location and a summary of the number of devices. (Recommendation: click on read out device settings and wait for a few minutes before downloading a device inventory to ensure that the latest firmware version is visible. If the read out device settings did not happen, it may happen that RMS-MLOG-B devices show as RMS-LOG-868/915 and HCD devices.). •Service report: click here to create a service report including: oTime and date of the report creation. oOverview of all service action on the device and corresponding measuring points. odevice specific services, including EVT number, date and description (including service and probe replace events). oNext service due date. oMeasuring point specific services, including EVT number, date and description (including calibration, adjustment and probe replaced events=. |
|
Print Screen 10 |
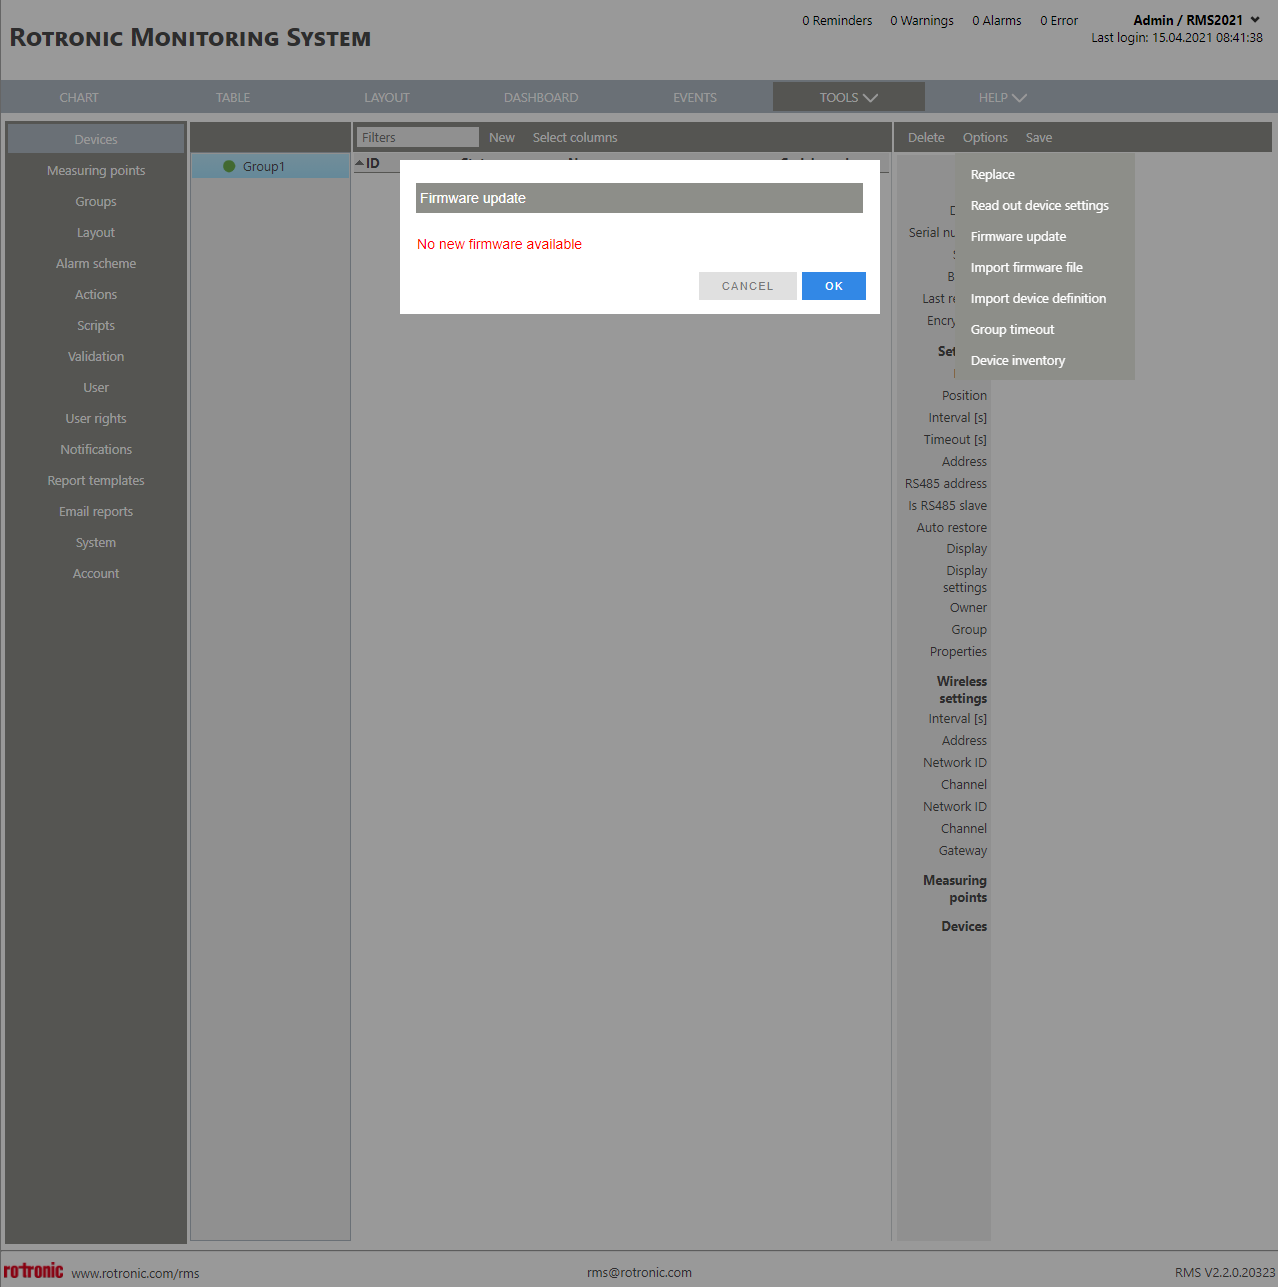
When firmware update is selected, RMS will offer the possibility to update the firmware or not. |
|
Print Screen 11 |
When import firmware file is selected, the user can search for a firmware on the local computer (.bin format). 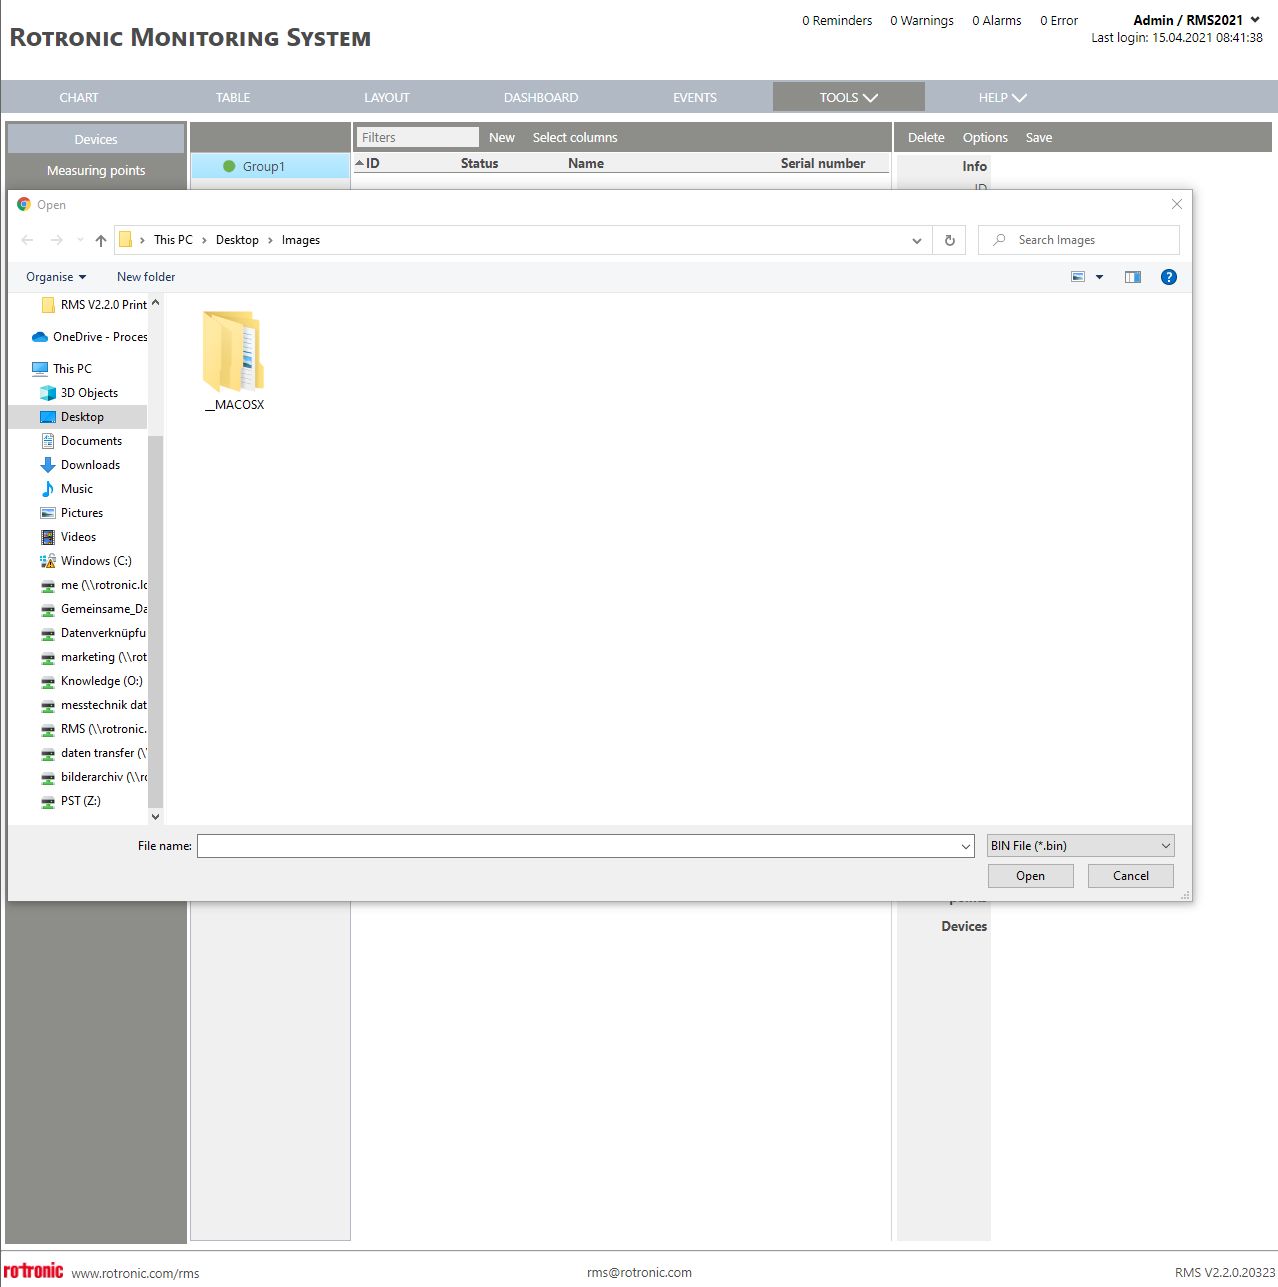 |
|
Print Screen 12 |
When import device definition is selected, the user can search for a device definition file on the local computer (.prop format). |
|
Print Screen 13 |
When group timeout is selected, the user can define that devices go into timeout. The user must enable the group timeout function via the tick box and select a time. Once the time reached, the devices will go offline. To remove the timeout, the user must re-enter the group timeout and remove the enable tick box. 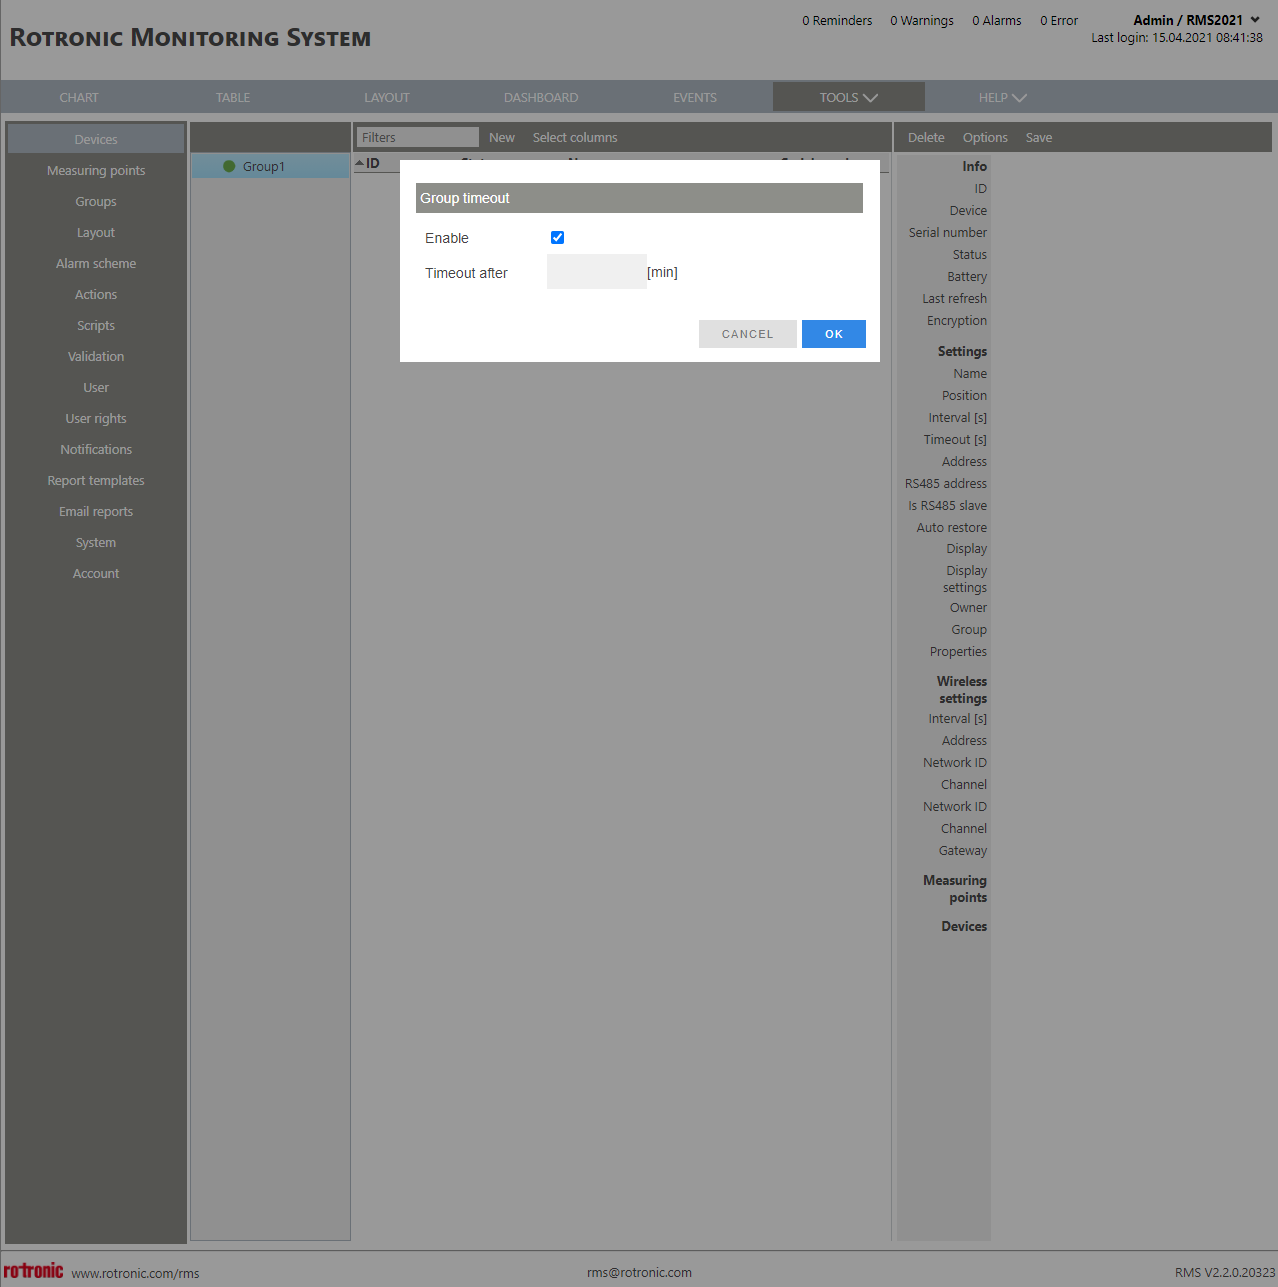 |
|
Print Screen 14 |
Two types of reports can be generated in this menu •Device inventory report •Service report
|
|
Update 2.8.0 |
Address, channel and network ID included into the device inventory The address, channel and network ID is also included in the device inventory (under Tools > Setup > Devices) report (csv file format).
Add a deputy user and external deputy user per device A "deputy" and an "external deputy" user can be defined per device. The deputy user must be an RMS user, the 2nd deputy can be written and stored in a text field. Specific user can be selected in a dropdown list. It can also be multi-selected by pressing the arrow button.
|
|
Update V2.9.0 |
Firmware update improvement When a new firmware update is available and the customer does a read out data, RMS will automatically recognise to see if the latest firmware is on the device. If not, a "Firmware Out of Date" reminder message will appear. The customer has the possibility to check all devices for firmware versions and automatically update then.
|
|
Update V2.9.0 |
New: The Service due date can be displayed The Service due date can be shown when the customer adds is at the Select columns
The Service due date is set at Maintenance at the device settings. When the date is reached, RMS sends out a Reminder notification of the type "Device Maintenance".
|
|
Update V2.9.1 |
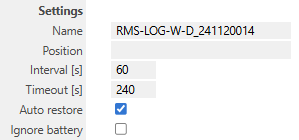
If the customer wants to use an external power supply for RMS-loggers instead of batteries, the battery monitoring can be turned off. By this way he will not receive low battery warnings notification.
 |
|
Update V2.9.1 |
Two new information were added to the device inventory export file at TOOLS > SETUP > Devices > Options > Device Inventory: •First line "sep=;" for excel •New column "name" with device name |
|
Update V2.9.1 |
Improved readout of device properties If device properties are not red out correctly because of a disturbed wireless transmision, a error message is shown to the user or a reload of the properties is done in the background. |
|
Update V2.9.1 |
Software update indication corrected RMS shows a new firmware update at TOOLS > SETUP > Devices > Firmware version if a new firmware file is available in the background. For that a new device property for the RMS ConvertSW was included. RMS-SW reads this property out and makes a firmware update available for the RMS ConvertSW. |
|


Updated: 21.05.2025