The user setup tool is a function to add and configure the user.
Print Screen 1 |
The user can select the various users (including the disabled and deleted users) to see the configuration. Once a user is selected, the page will populate with the necessary information.
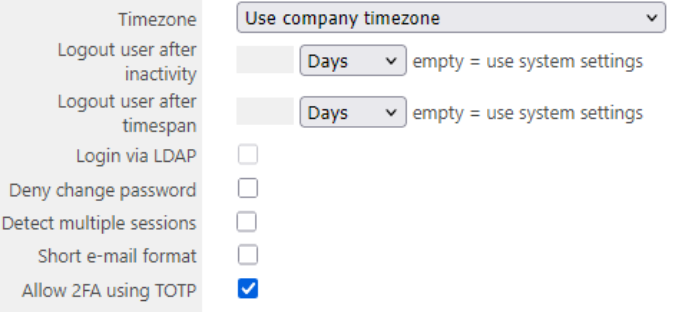
Once a user selected, it can be deleted and undeleted, logged out or the configuration can be saved. 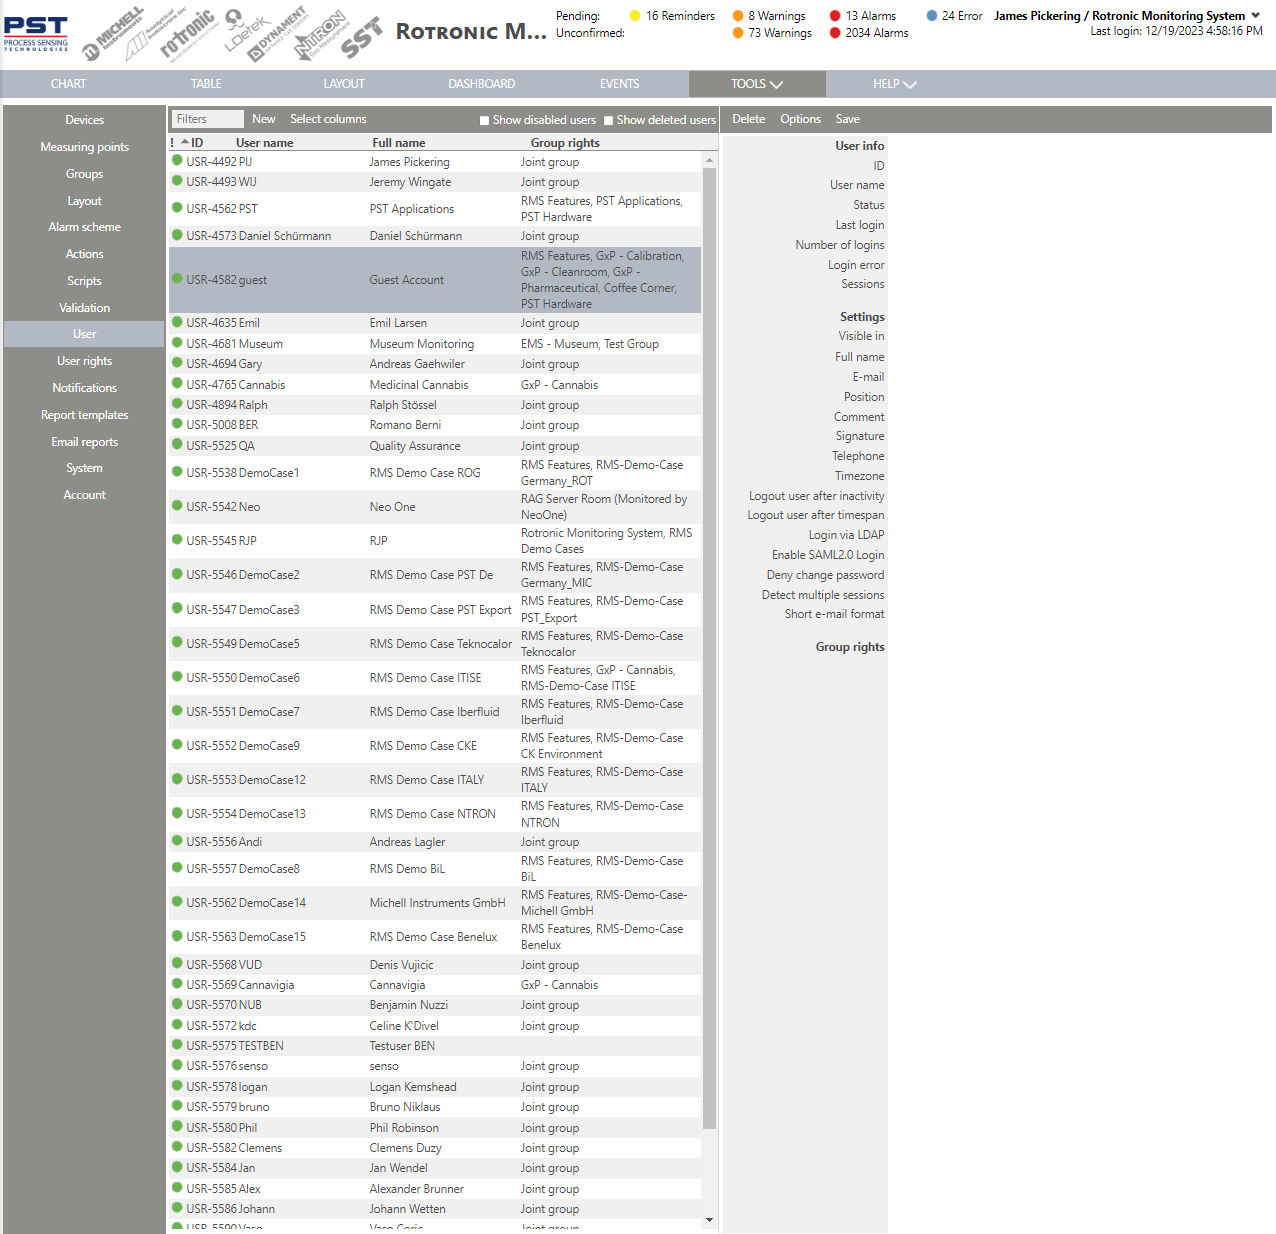 User Info: User Information. •ID: USR-xxx automatically given by RMS. •User Name: User defined user name used to login to RMS. •Status: User can be enabled or disabled by another user. •Last login: Last login time and date automatically given by RMS. •Number of logins: Automatically given by RMS. •Login error: Automatically given by RMS. •Sessions: After each login, a session number (SE-XXX) is assigned to the current session (reported in the audit trail). This session number is also reported when the user is logged out by the system. Settings: User Settings. •Visible in: User defined group where the user is visible. Rotronic recommend always having the user visible in Joint Group. •Full name: User defined full name. The full name appears as a signature in all documents and all audit trail events that the user has generated. •E-Mail: User defined E-Mail address that is used for all RMS actions and notifcations. •Position: User defined position (free text). •Comment: User defined comment (free text). •Signature: User defined signature (free text or review, approval, responsibility or authorship). The signature appears next to the full user name as a signature in all documents and all audit trail events that the user has generated. •Telephone: User defined telephone number (the international calling code is required "+xx"). •Timezone: User defined time zone. The user can choose between between the system timezone or a user defined time zone. oBrowser: The timezone shown in RMS will be based upon the user timezone. oReports: The timezone is shown in the report header. ▪If a user generates the report, then the user timezone is taken. ▪If the report is automated, then the timezone is defined in the creation of the automated E-Mail: Tools>Setup>E-Mail Reports Explained. oNotifications: E-Mails are sent using the users timezone. oAudit trail: ▪The event start and end time are shown in the user timezone. ▪The event details are shown in the company timezone only. •Logout user after inactivity: The user is logged out after the given inactivity time. •Logout user after timespan: The user is logged out after the given timespan. •Login via LDAP: Tick box automatically not set but can be user configured to define if the user logs in via the RMS credentials or the LDAP credentials. •Enable SAML2.0 Login: Tick box automatically not set but can be user configured to define if the user logs in via the RMS credentials or the SAML2.0 credentials. •Deny change password: Tick box automatically not set but can be user configured to define if the user has the possibility to change the password. •Detect multiple sessions: Multiple logins of the same user will be detected and a message will be displayed in the browser. •Short E-Mail format: Defined if the warning and alarm E-Mails are sent in the short format as defined in the system settings: Tools>Setup>System Explained. Group rights: User Group Rights. •Select a group: User defined selection of a group where the user has specific rights. •Select a user right: User defined selection of a user right that is used within a specific group.
Update V2.8.0: User visible in any group •It is allowed for a user to be visible in every group (also joint group) •If a user is visible in a group where he has no rights, he is visible for himself in his root group •Restriction: a user cannot place himself to be visible in a group where he has no rights
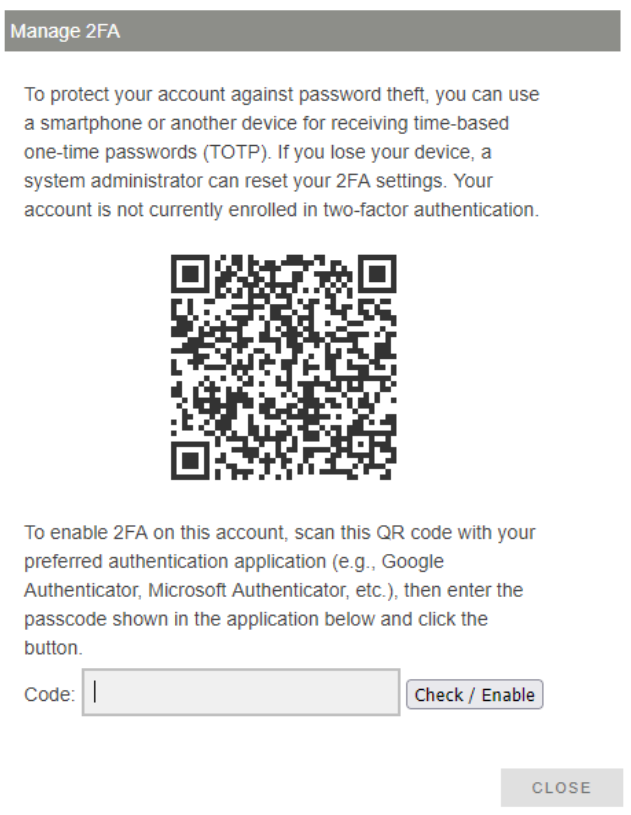
2FA using TOTP TOTP stands for Time-Based One-Time Password. It is a widely used method for implementing Multi-Factor Authentication (MFA). The core idea behind TOTP is to add a second layer of security to an account login. It requires two distinct factors to verify your identity: 1.Something you know: Your password. 2.Something you have: A dynamically generated code from a device you own, like your smartphone.
Under Tools > Setup > Users > choose a user and activate Allow2FA using TOTP - pls. see screenshot
On the top right edge of the window, pls. click on the user and click an Manage 2FA.
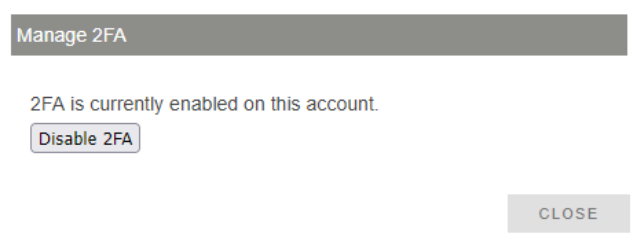
Pls. follow the next instructions:
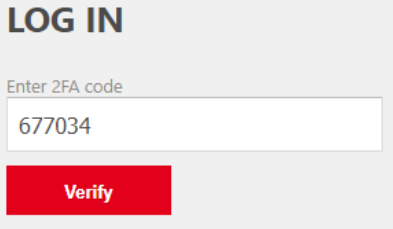
With the next Log in...
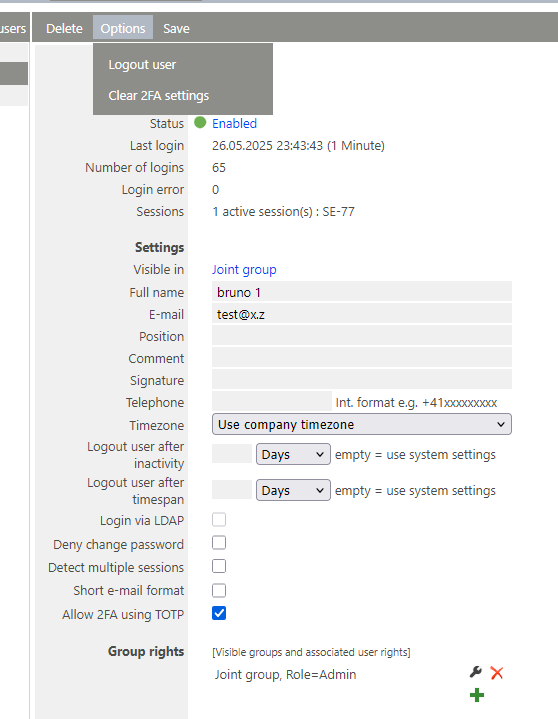
The RMS administrator can clear the 2FA for other users - as follows:
|
Print Screen 2 |
The columns shown in the user overview can also be selected.
When clicking on show disabled users and/or show deleted users, all disabled and/or deleted users will be shown. Please be aware that the show deleted users option will only be shown if the user logged into the system has the right to delete users. 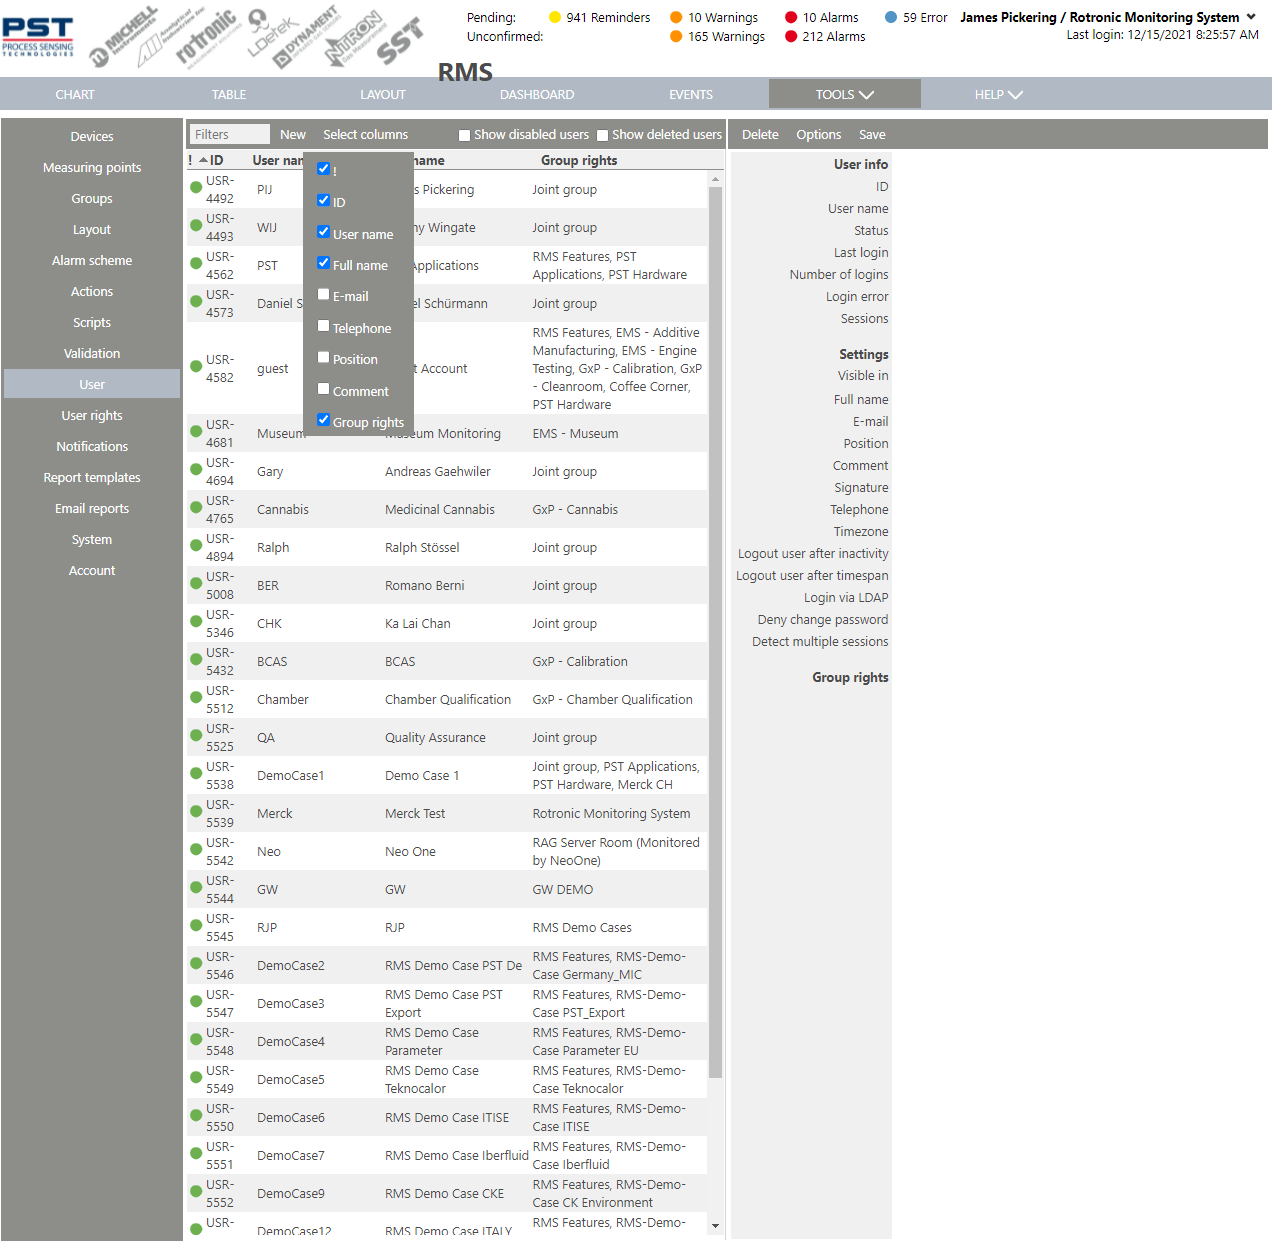
When a user is selected, they can be deleted. Under options, a user can be undeleted or logged out. |
Print Screen 3 |
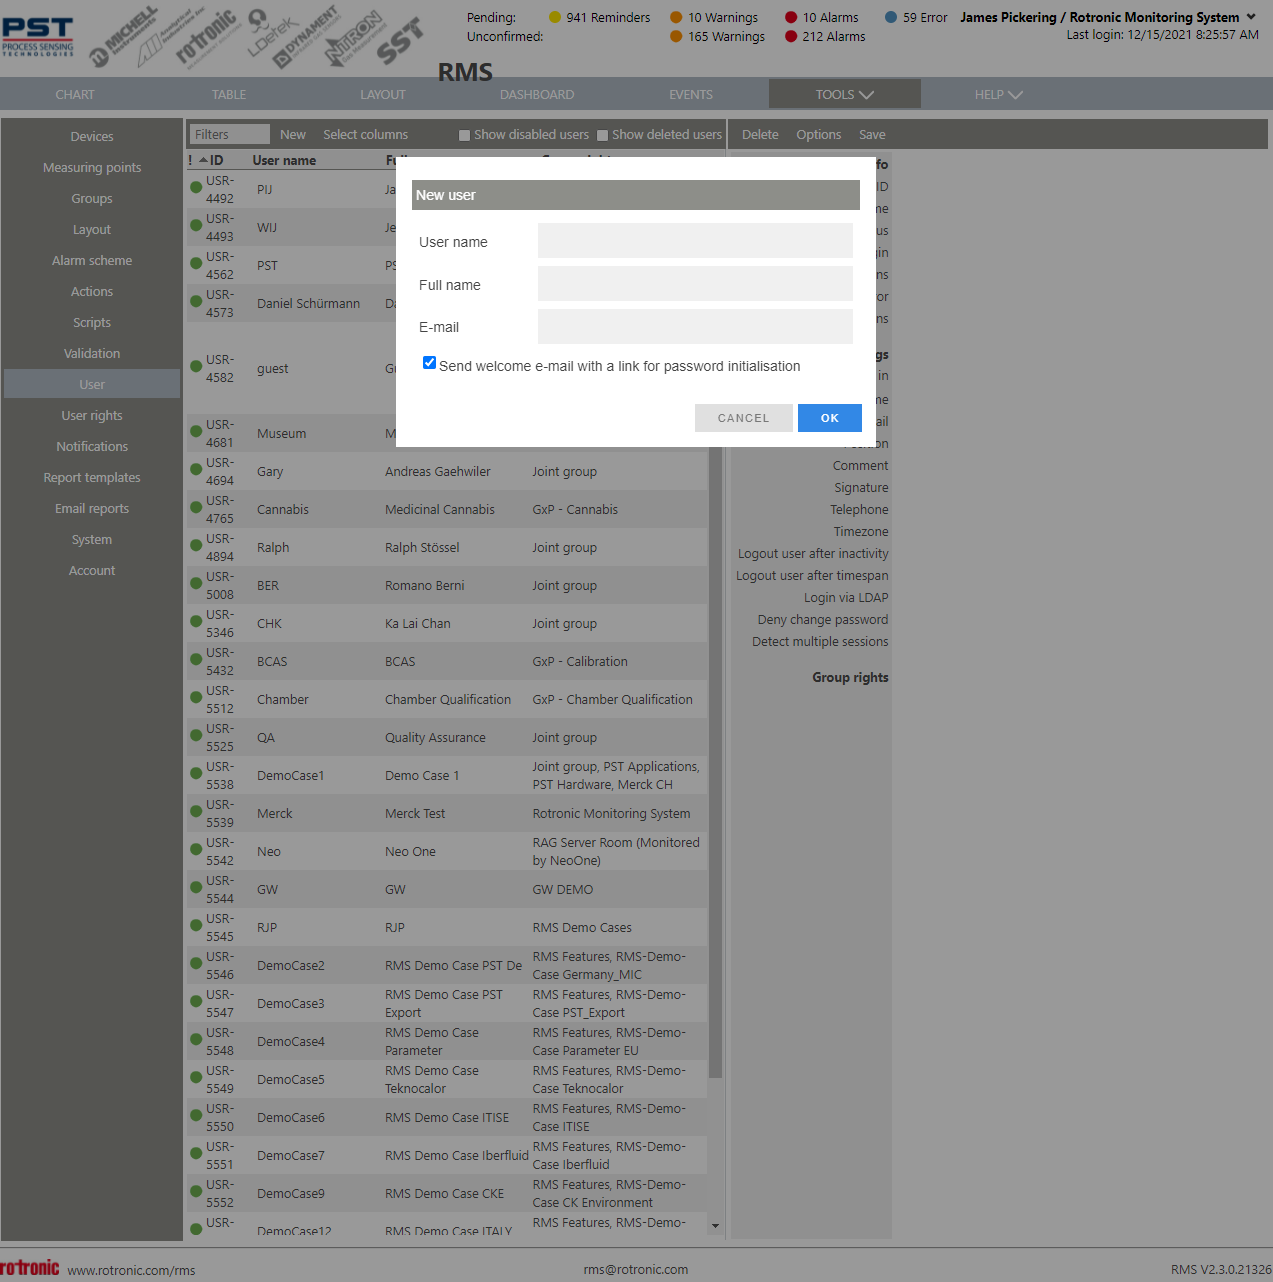
Add a new user by clicking on new.
When a new user is added, in order to invite the user to login to RMS and setup their password an E-Mail can be sent.
The invitation E-Mail is the following, when clicking on the link the user is sent to the login page:  •The link will expire after 24 hours. •The user must set an initial password. •After the expiration, the user can set a password by using the forgot password feature and reset password (via the login page with the company name and user name). •A forgotten password can be changed by using the the forgot password feature and reset password (via the login page with the company name and user name). |
Print Screen 4 |
The system will recognise when multiple sessions are active for the user that is logged in: 
It is possible to logout the other session via pushing on the blue button (not possible in mobile view). If the "x" is pushed, the message is suppressed for 60 minutes (not possible in mobile view). |
Update V2.9.1 |
New user property - "Blocked" user. •User cannot login (same as a disabled user). To be able to login again, the checkbox must be disabled. •A user is blocked after a certain number of failed login tries. •A blocked user can receive still alarm notifications.
 |

Update 20.05.2026