Step 1 |
On the desktop, double click on the shortcut:
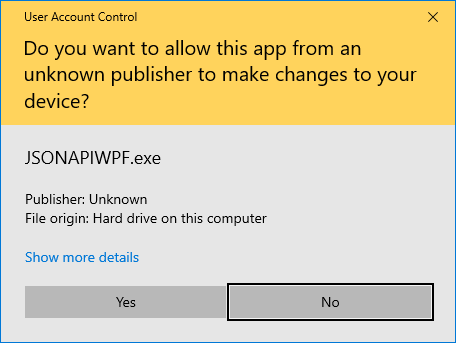
The User Account Control will ask if you want to allow this app from an unknown publisher to make changes to your device? Click on Yes:
|
||
Step 2 |
Login to the software with the following details:
Username: admin Password: admin
|
||
Step 3 |
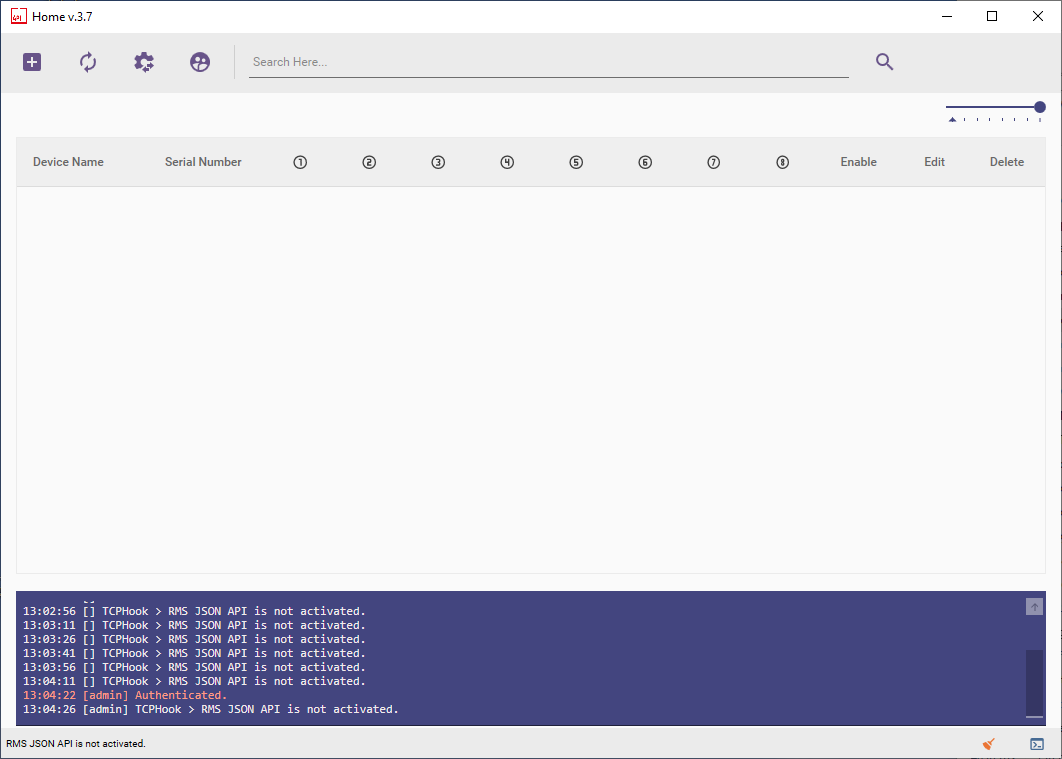
The software will open:
|
||
Step 4 |
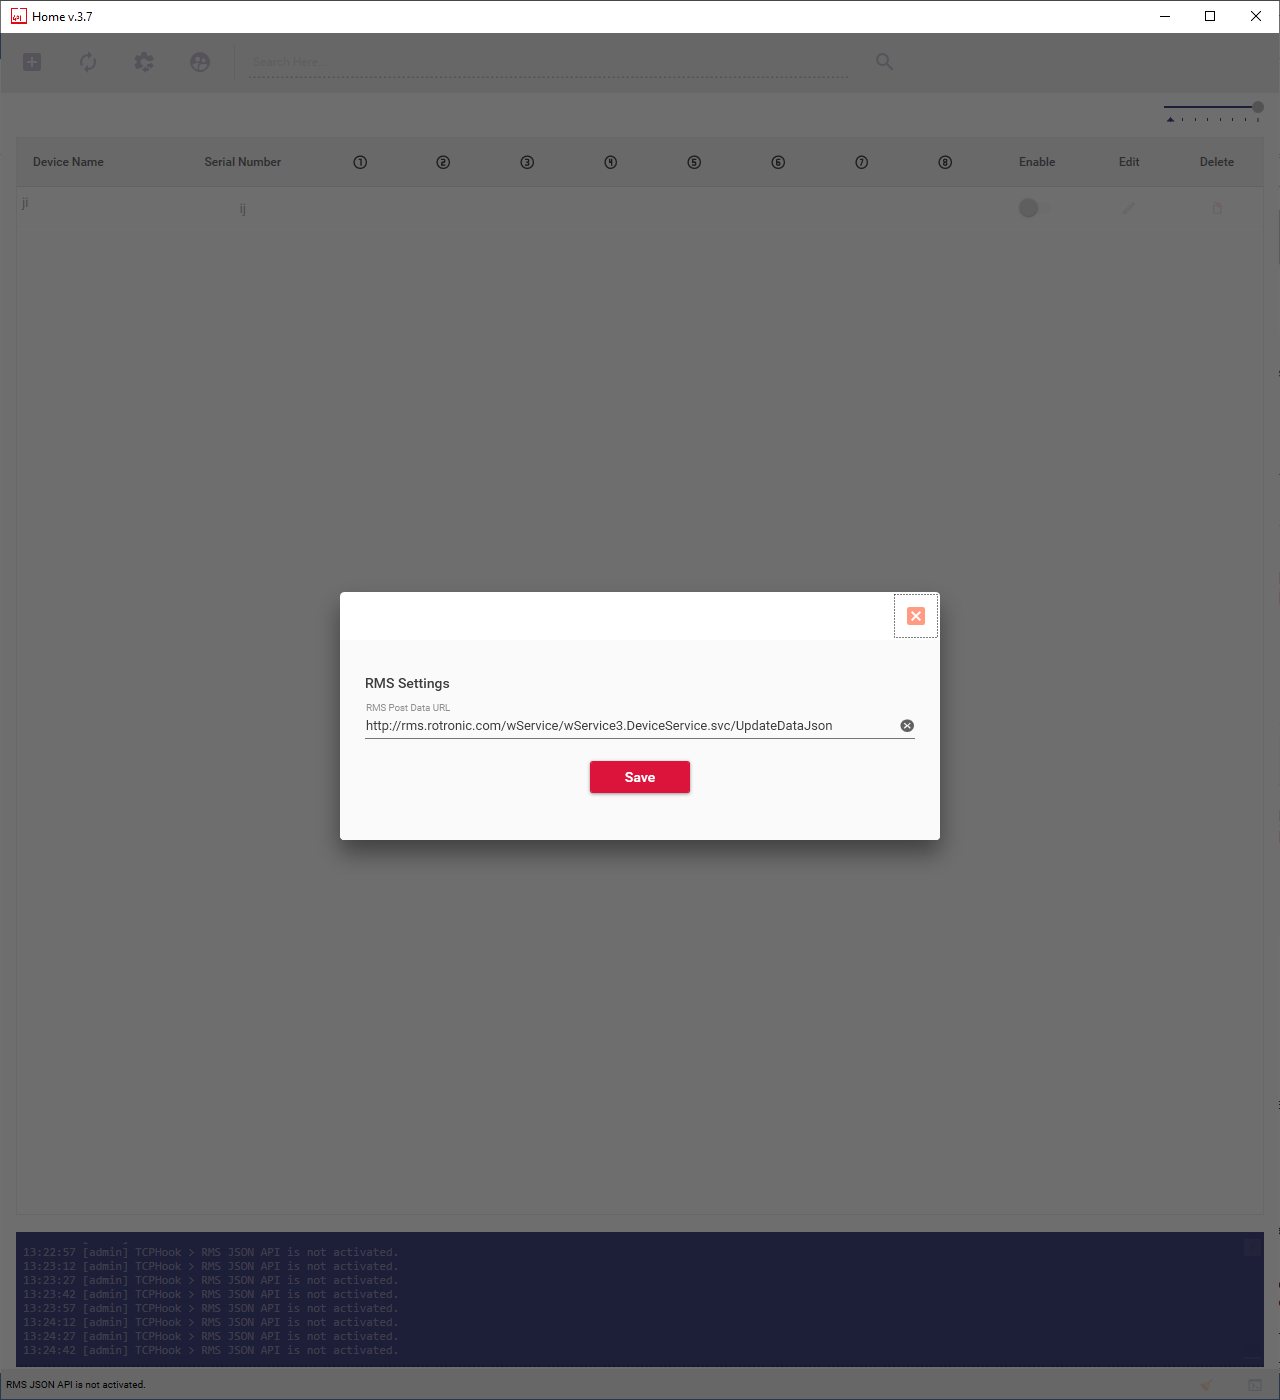
Click on the Settings overview and update the RMS Post Data URL if required:
For standard cloud applications, use the following RMS Post Data URL: http://rms.rotronic.com/wService/wService3.DeviceService.svc/UpdateDataJson
For on-premise solutions update rms.rotronic.com with the server ID. |
||
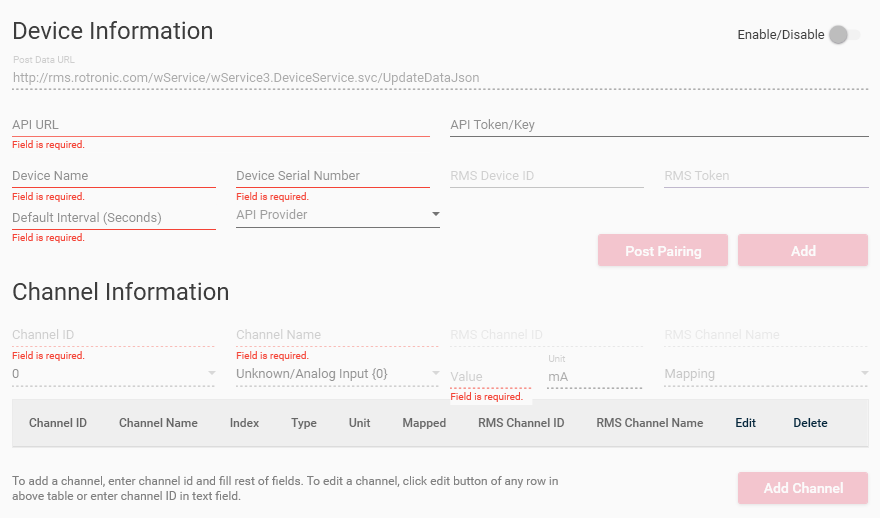
Step 5 |
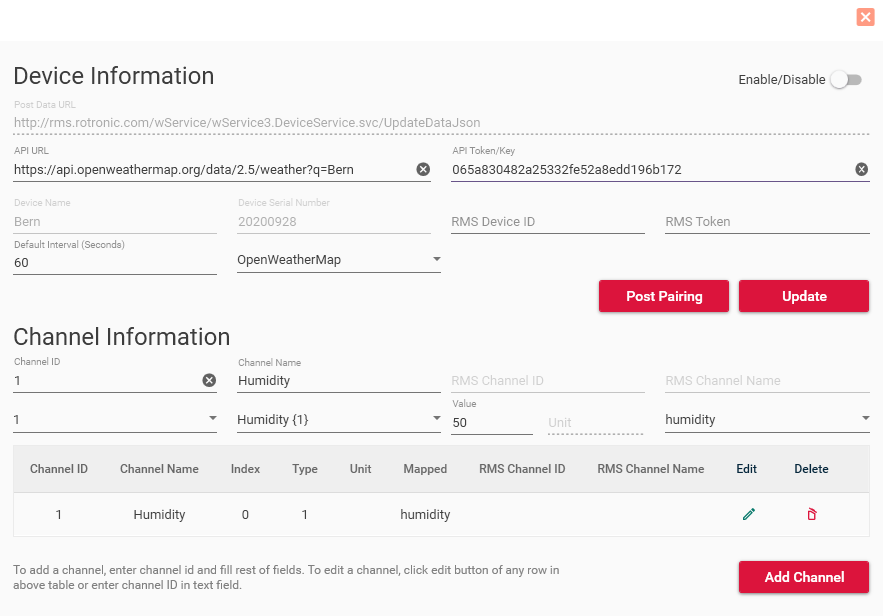
Click on add a new device and fill out all of the "Field is required" fields.
In the first case add the device information:
Add the API URL. What is the URL of where the data can be found. Add the Device name. The device name that will appear in RMS.
Add the Device Serial Number: The serial number of the device that will appear in RMS.
Add the Default Interval (Seconds). The log interval. Add the API Provider. A list of the integrated API providers that are in the RMS-JSON-API software. Add the API Token/Key. If a token or key is required to get data, then it can be input here.
Once everything is completed, click on Add.
Then add the channel information, we recommend adding all of the channels necessary before adding the device to RMS: Add the Channel ID (number). Add the Channel Name (text). Add the Parameter. Add a random value (number). Add the Unit when required. Add the Parameter from the Mapping.
Once the first channel added, click on Add Channel for the next channels.
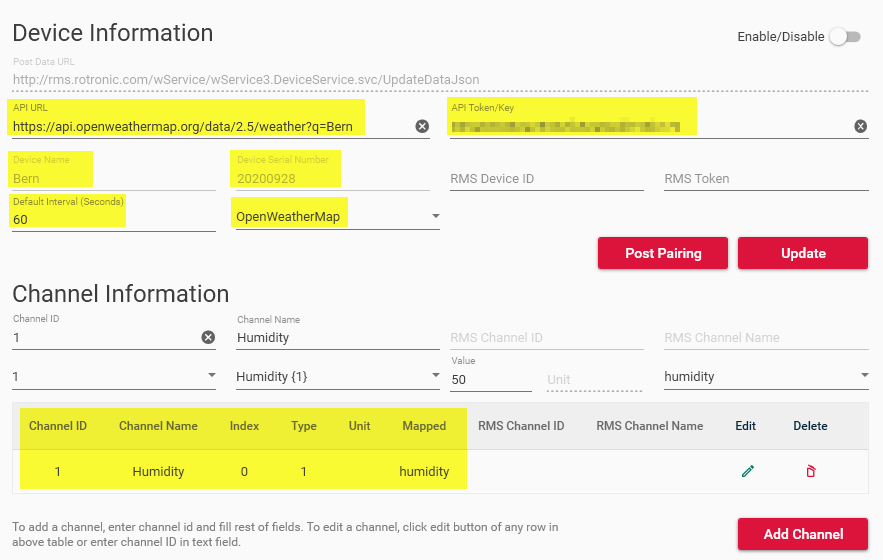
The device in RMS-JSON-API should look like this:
|
||
Step 6 |
Log into RMS: Log in to your RMS Account . |
||
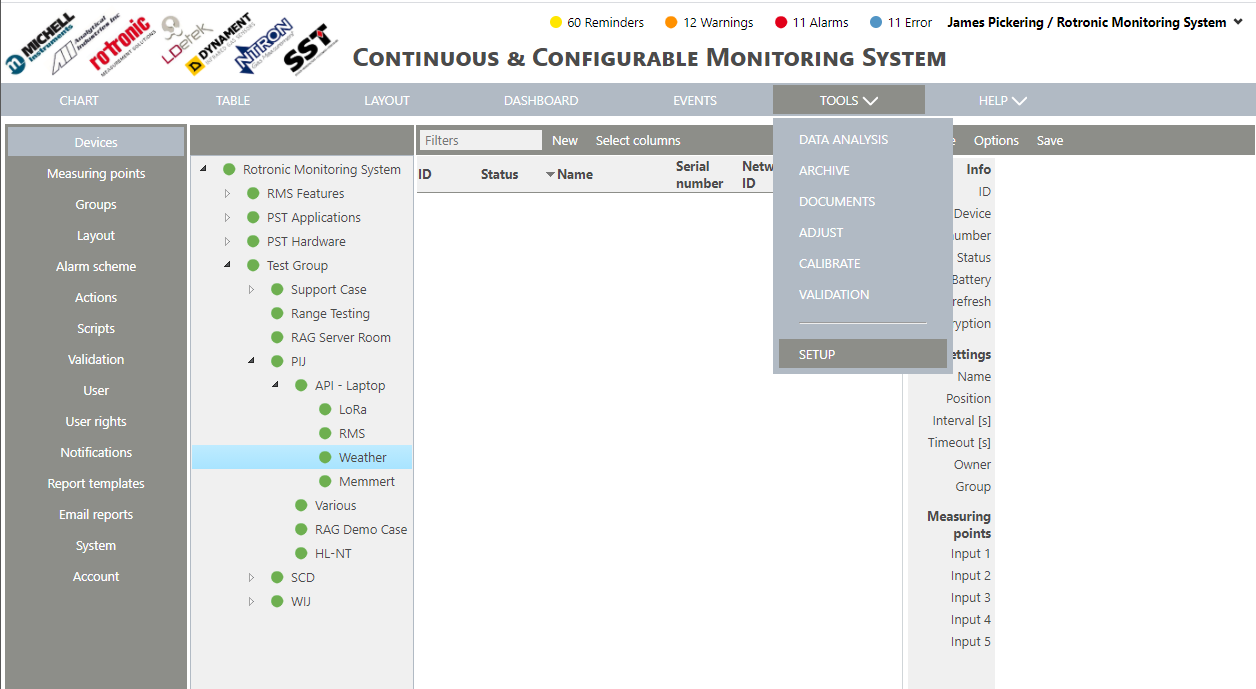
Step 7 |
Once logged into your company, click on "Tools">"Setup":
|
||
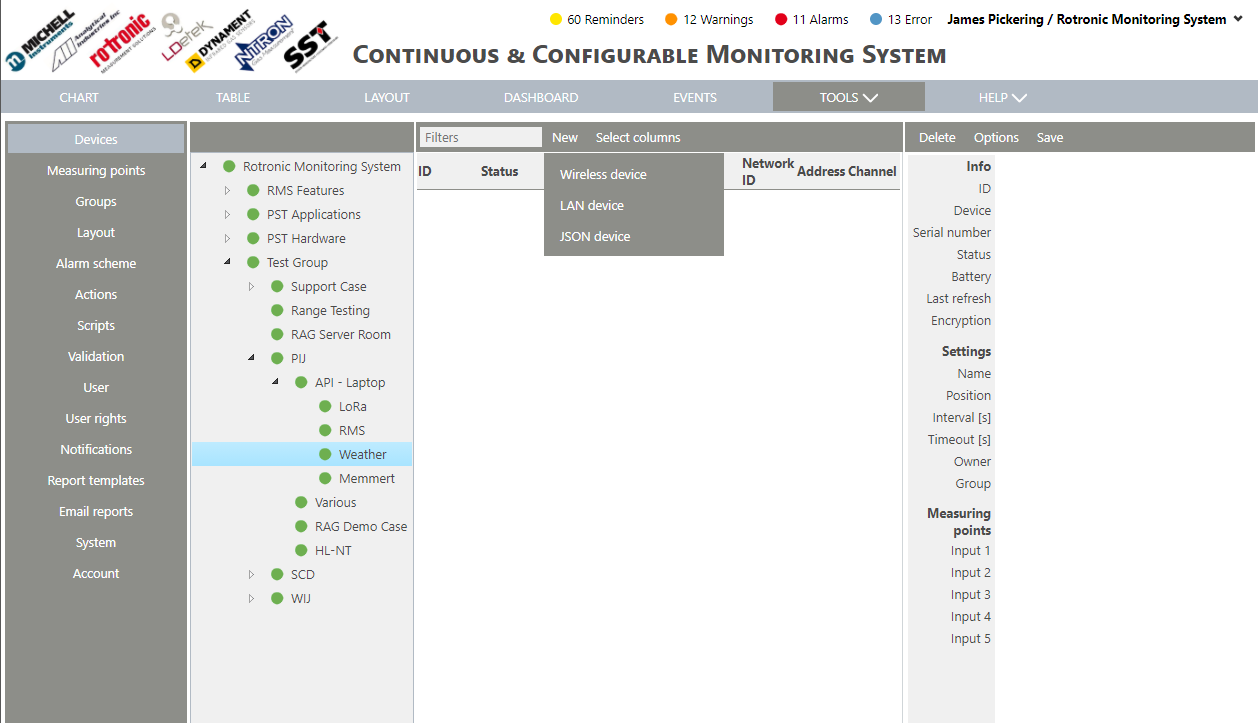
Step 8 |
Select "New" and click on JSON device:
|
||
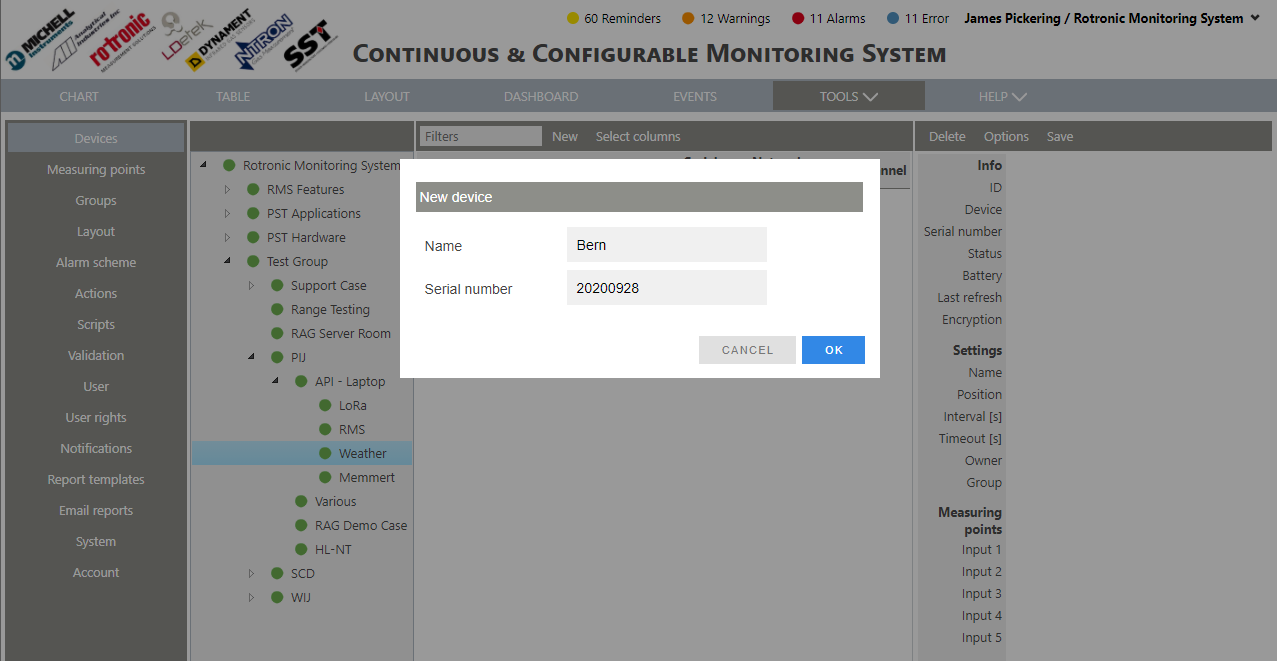
Step 9 |
Add the device name and serial number as defined within the RMS-JSON-API software:
|
||
Step 10 |
Switch back to the RMS-JSON-API software and click on "Post Pairing":
|
||
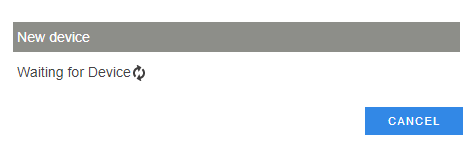
Step 11 |
Switch back to RMS and click on OK. RMS will wait for the device:
|
||
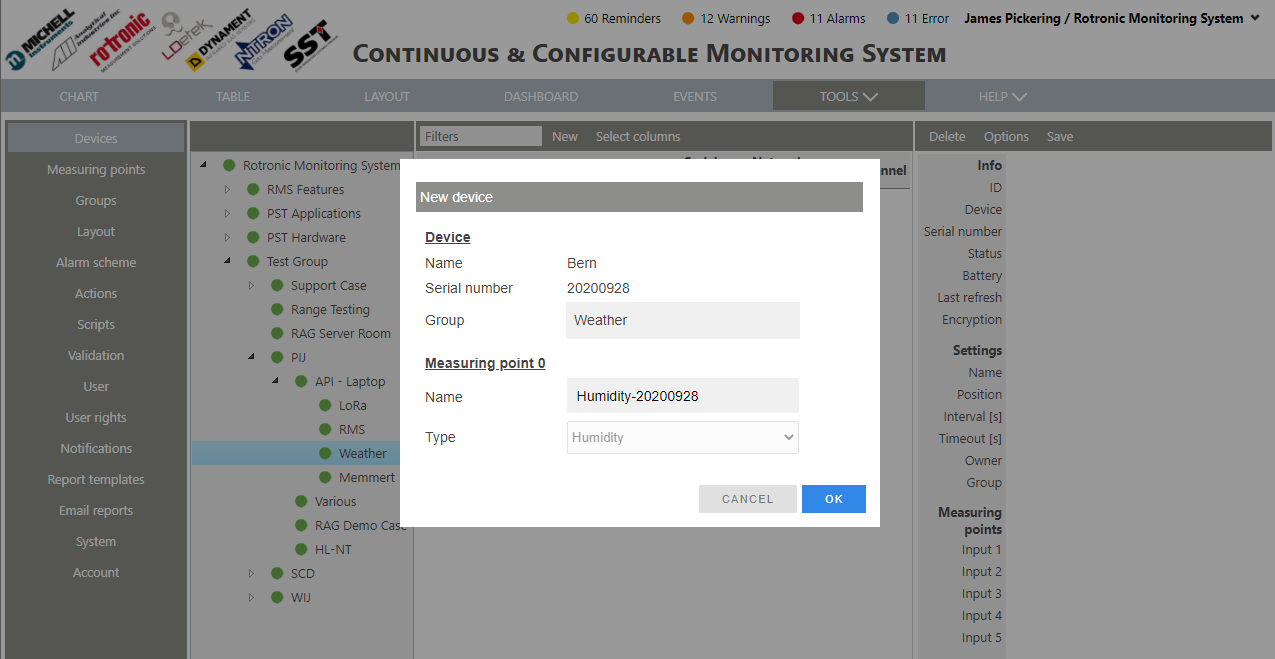
Step 12 |
When the device appears, update the Group and the Measuring point names, then click on OK:
|
||
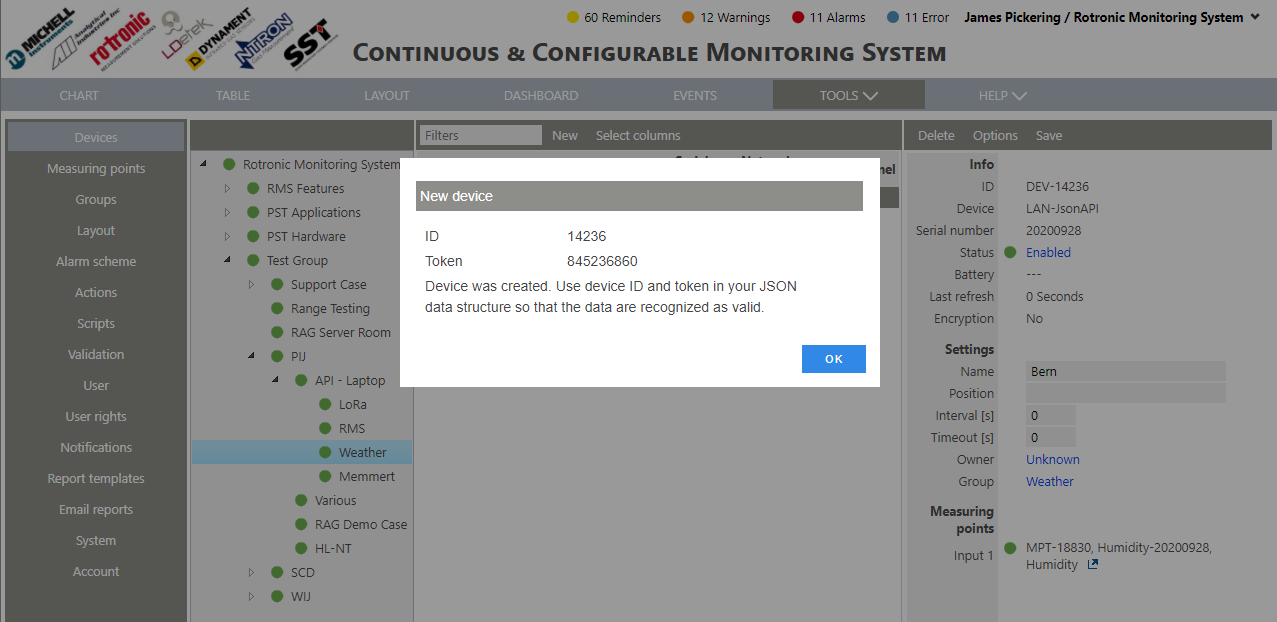
Step 13 |
RMS will then generate an ID and a Token for the new Device:
|
||
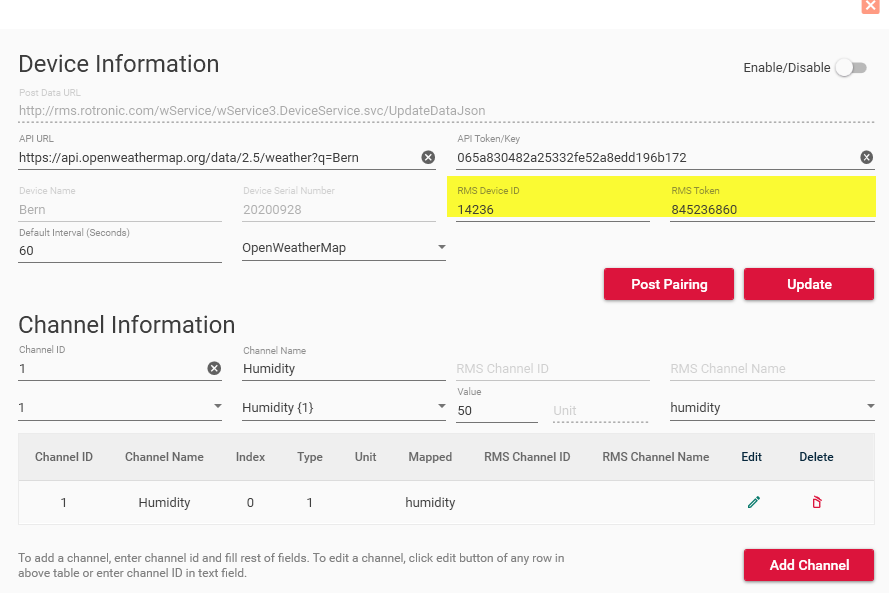
Step 14 |
Switch to RMS-JSON-API software and add the ID and Token and click on Update:
|
||
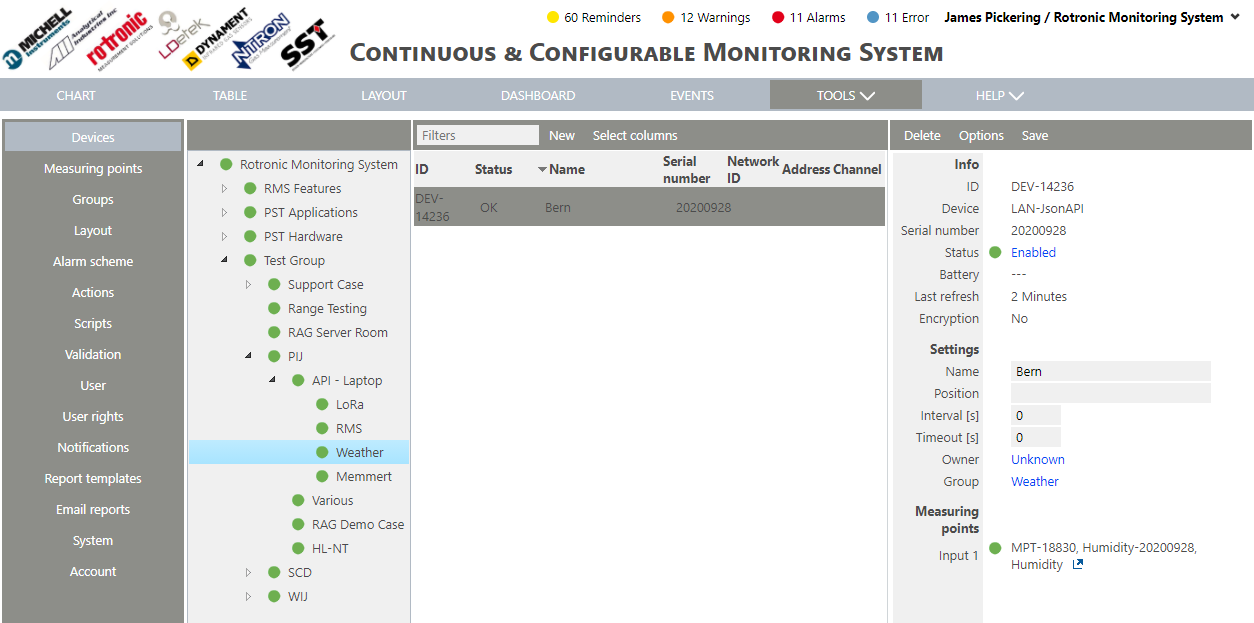
Step 15 |
Return to RMS and click on OK. The device is added to RMS:
|
||
Step 16 |
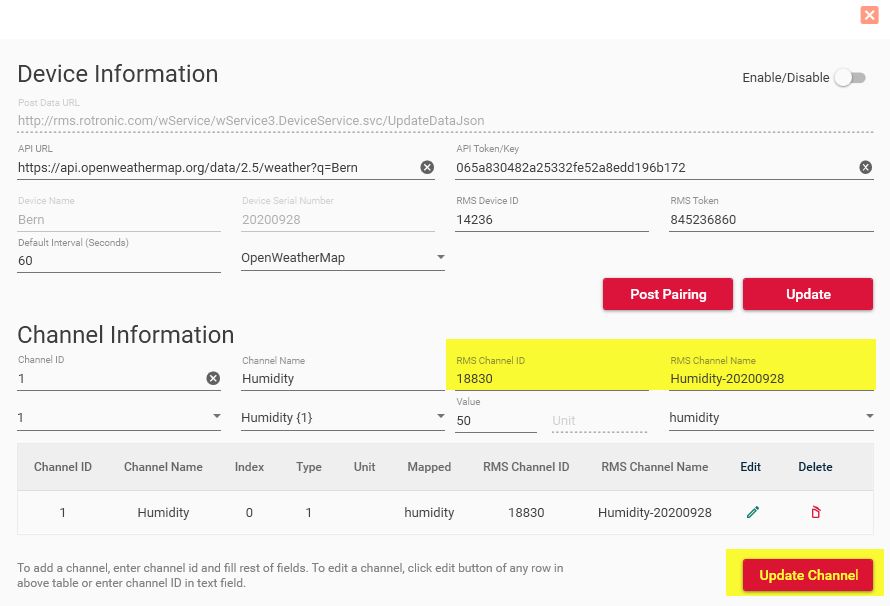
Take the MPT number and MPT name and add them to the RMS-JSON-API software.
Select the correct channel and click on Edit and update the RMS Chanel ID and RMS Channel Name accordingly, then click on Update Channel:
|
||
Step 17 |
On the RMS-JSON-API home screen, enable the device:
|