When an event appears within the audit trail, users can work on the events to add information necessary for when an audit occurs.
The RMS software gives the users the possibility to add confirmations and the options to use the various confirmations can be defined by the system admin. An internal standard operating procedure (SOP) is required to define when each confirmation is to be used and who can use each confirmation: Configure your User Rights.
•The idea is that a user can comment upon an event to give more details.
•If required, the event can then be inhibited to show that someone is working on a solution to the event.
•The event can then be confirmed by a user where a solution to the event can be stated.
•The confirm (QA) can be used by the quality team to ensure that the SOP's were followed correctly and if new SOP's need to be created or if a any other issues need addressing :Configure your Event Confirmation (2-Step Confirmation).
•The event can then be closed once the SOP is fulfilled.
Step 1 |
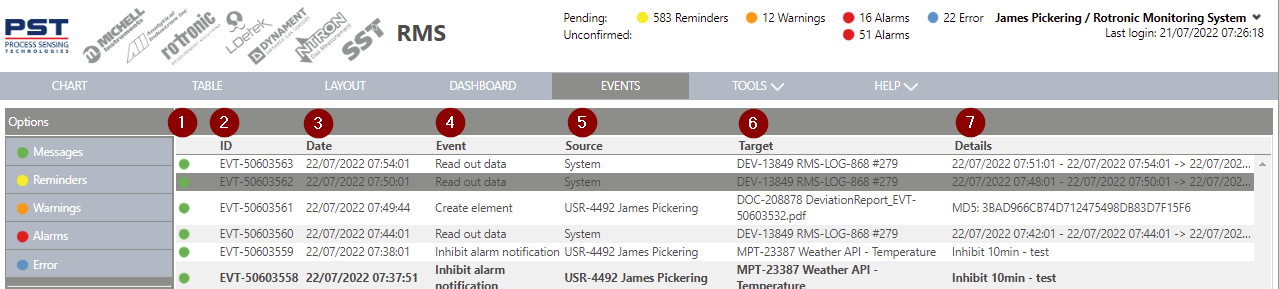
The audit trail events is used to see: 1.The information symbol. 2.All events (ID). 3.The time and date of the event (Date). 4.What happened: Audit Trail Events Overview (Event). 5.Why it happened (Source). 6.Where did it happen (Target). 7.Details (Details).
 |
Step 2 |
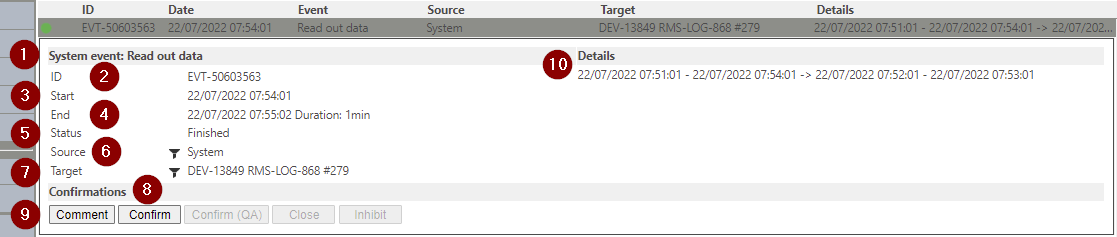
The overview of the details: 1.Event 2.Event ID 3.Start time. 4.End time. 5.Status. 6.Source. 7.Target. 8.Confirmations. 9.Confirmation buttons. 10.Details.
|
Step 3 |
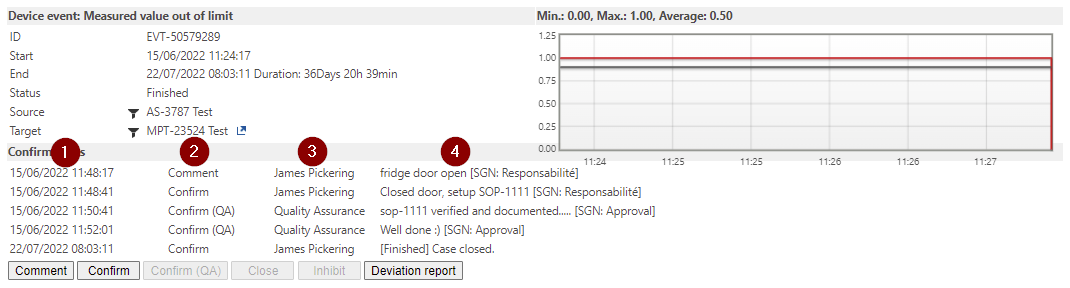
Overview of all confirmations: 1.Time and date of the confirmation. 2.Name of the confirmation: a.Comment. b.Confirm. c.Confirm QA. d.Close (a closed case with be confirmed and the details will state [Finished]). e.Inhibit. 3.User who carried out the confirmation. 4.Details, including the electronic signature.
 |
Step 4 |
Additional information for warning or alarm events: 1.The min, max and average. 2.A a graphical chart. 3.The possibility to create a deviation report.  |
Step 5 |
Additional information for data gap events 1.A data gap will show the possibility to try again (try again to download data).  |
Step 6 |
Using the shift or control button, it is possible to select multiple events and via the options button, work on multiple events at the same time: 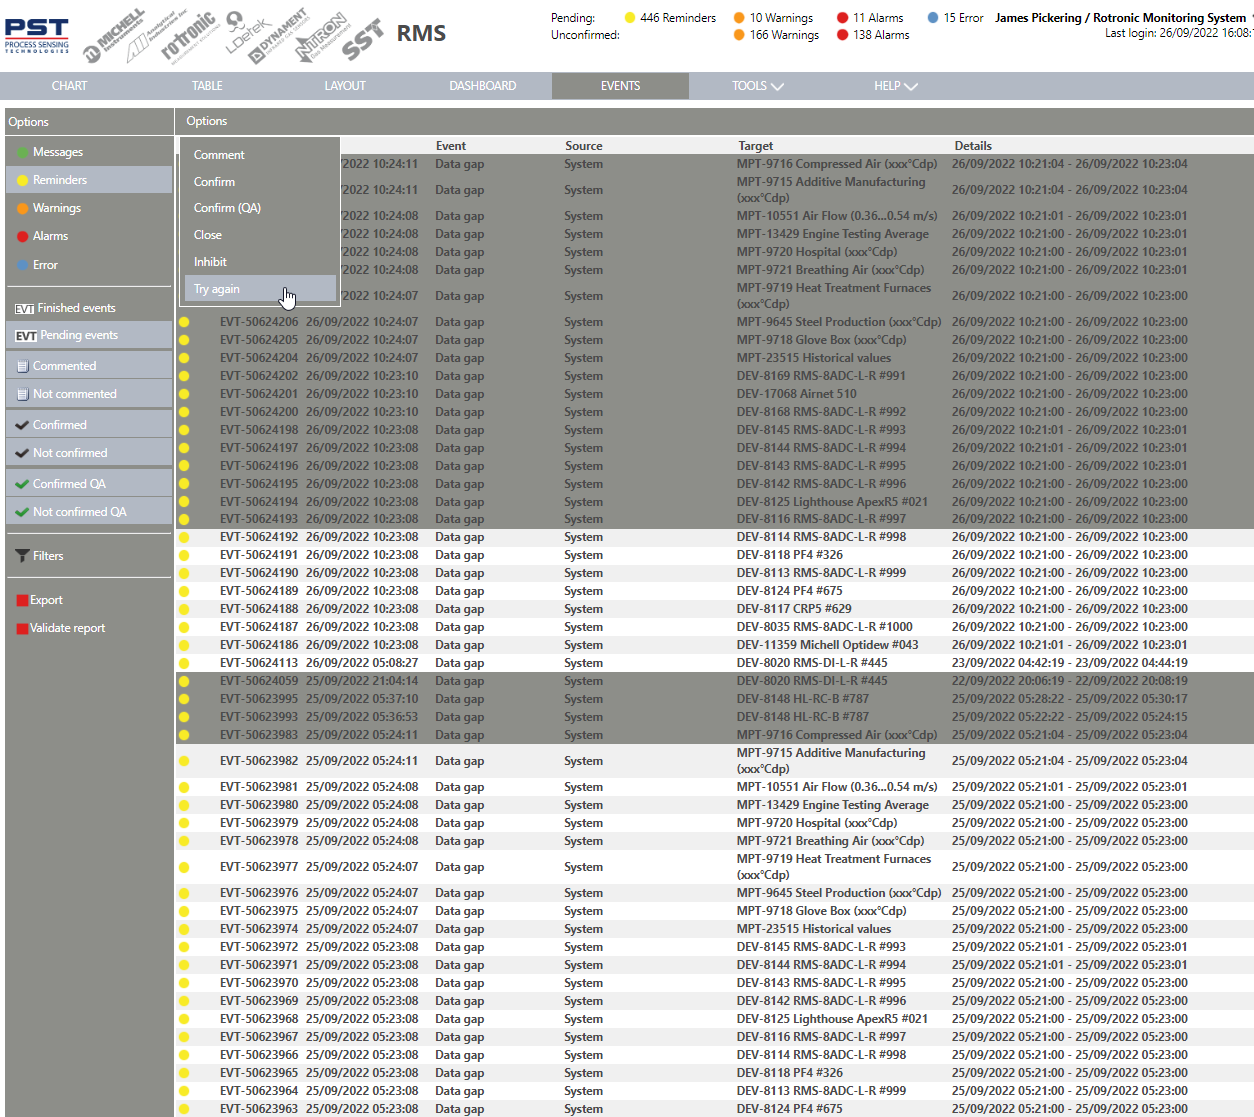 |