Within RMS, there is two ways to set alarms on a measuring point:
1.Alarm in the measurement point directly.
2.Alarm via an alarm scheme.
No matter where the alarm is configured, the configuration is done under the measurement point itself.
Step 1 |
From the start page, click on Tools>Setup>Measuring points and select the required measuring point, there is a menu called alarm, where the user can define what alarm should be applied to the measuring point: 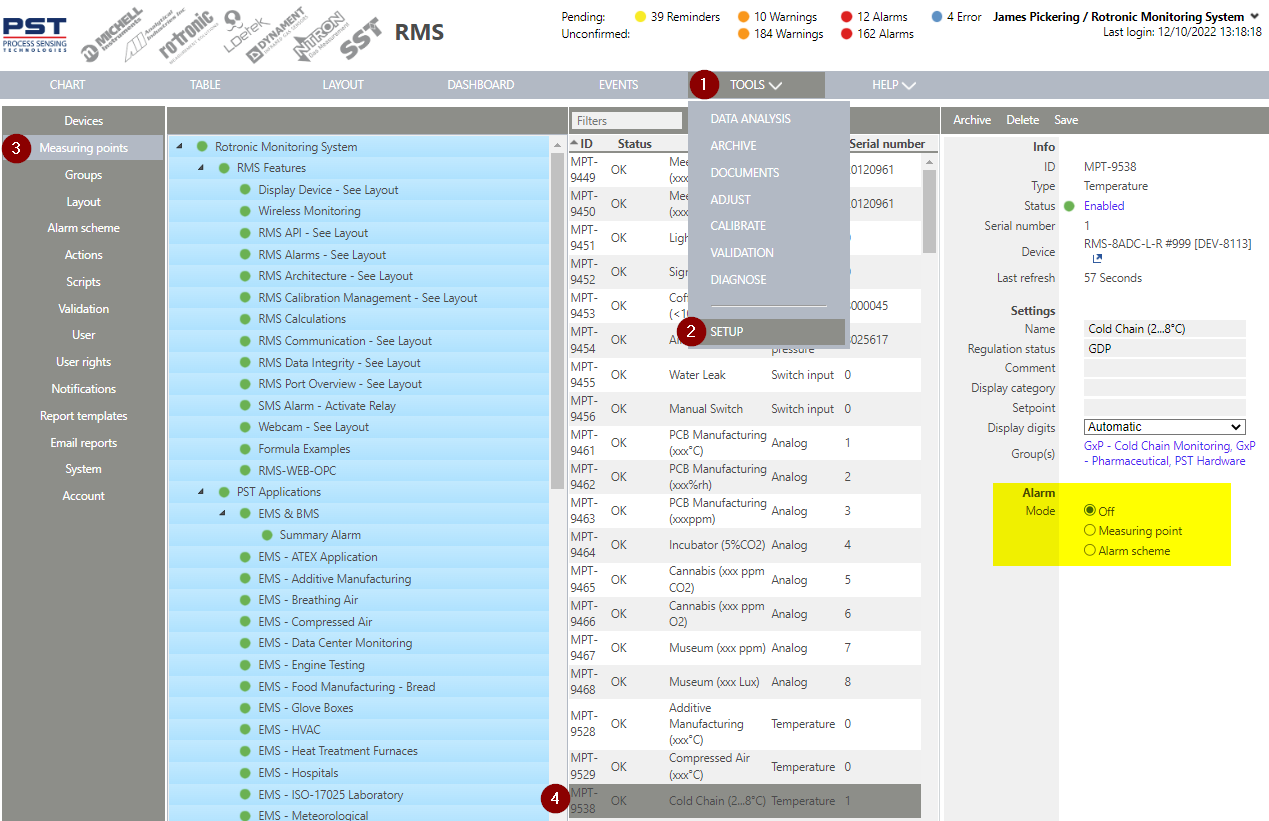 |
|
Step 2 |
Select on of the three options: 1.Off: there are no alarms set for this measuring point. 2.Measuring point: the alarms are only set for this measuring point. 3.Alarm scheme: the alarm comes from a predefined alarm scheme (this is recommended when multiple measuring points have the same limits).
It is important to note that the alarm scheme offers many more options than the alarm on the measuring point. |
|
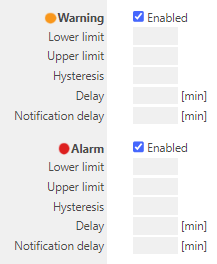
Step 3 |
Alarm on the measuring point: 1.The user can set a warning, with a lower and upper limit, a hysteresis (Understanding Hysteresis), a delay and a notification delay. 2.The user can set an alarm, with a lower and upper limit, a hysteresis (Understanding Hysteresis), a delay and a notification delay.
|
|
Step 4 |
Alarm via the alarm schema: from the start page, click on Tools>Setup>Alarm scheme and Add an Alarm Scheme. Setup the alarm scheme based upon the following chapter: Tools>Setup>Alarm Scheme Explained. |
|
Step 5 |
From the start page, click on Tools>Setup>Measuring points and select the required measuring point and select the required alarm scheme from the menu: 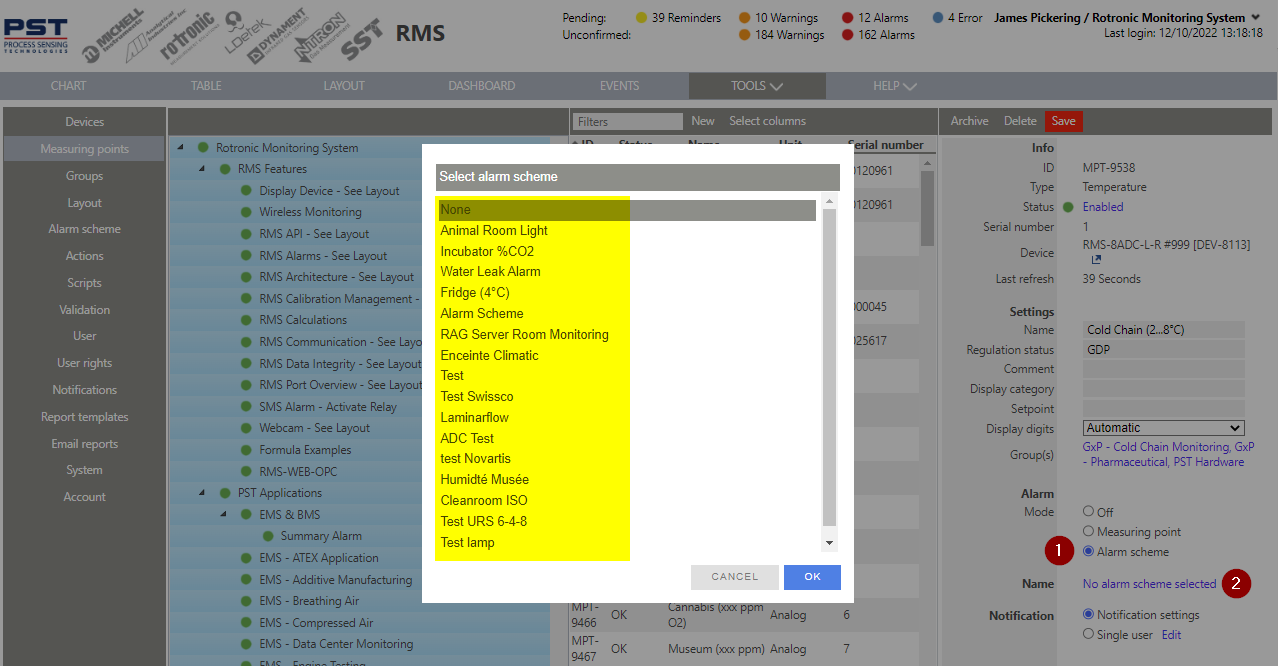 |