When using multiple servers, ensure that this chapter is carried out on the server where the RMS application/software is installed.
Step 1 |
Using the Windows search function open the Server Manager app.
Select 2: Add roles and features. 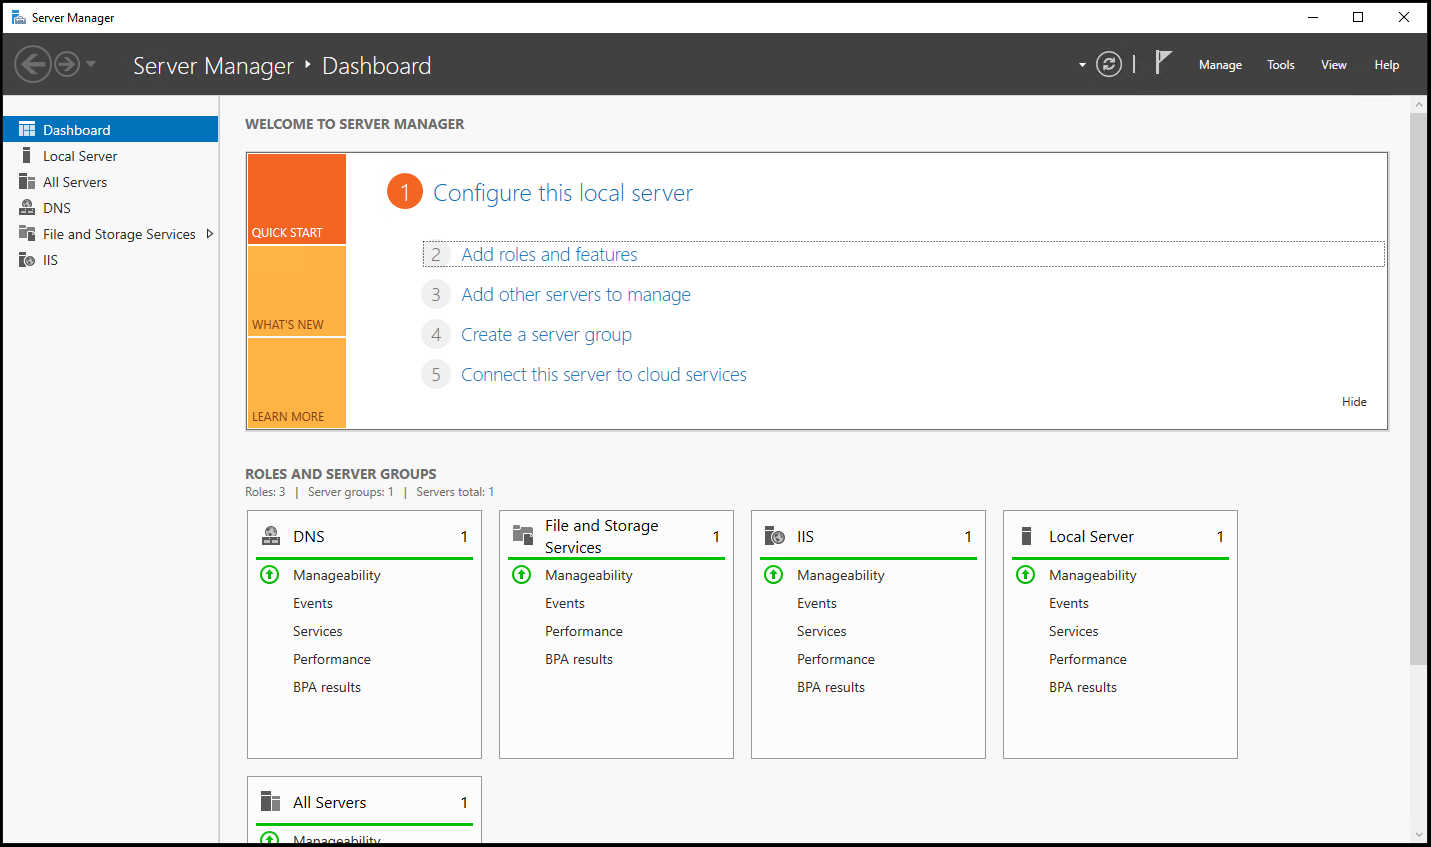 |
|---|---|
Step 2 |
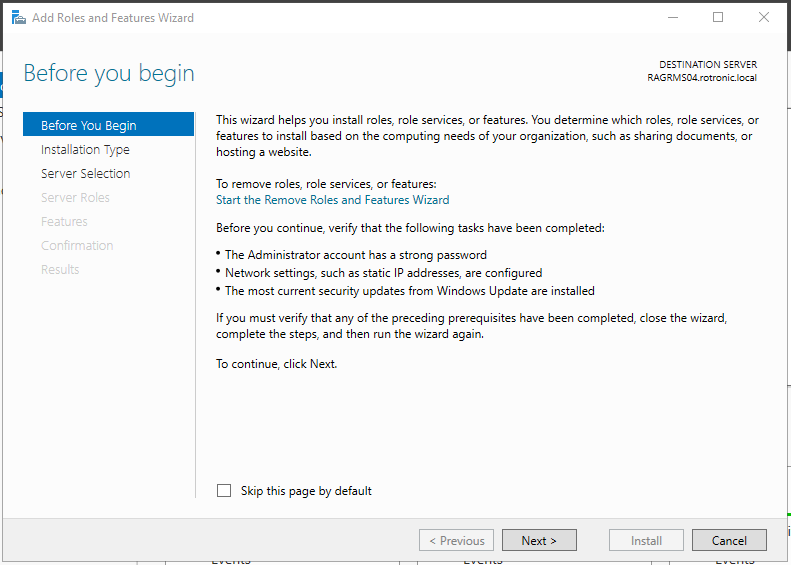
Before you begin: Read the text and click on "Next".
|
Step 3 |
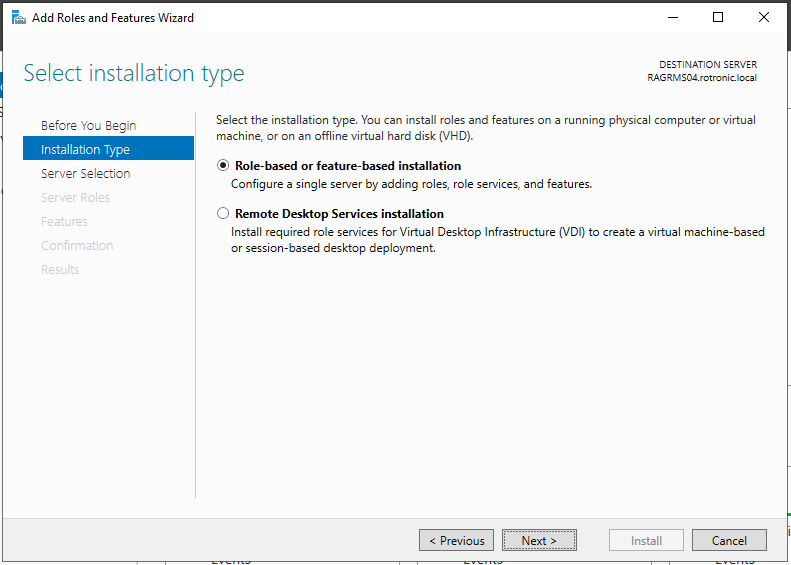
Installation Type: Select "Role-based or feature-based installation". Then click on "Next".
|
Step 4 |
Server Selection: Select "Select a server from the server pool". Then click on "Next". 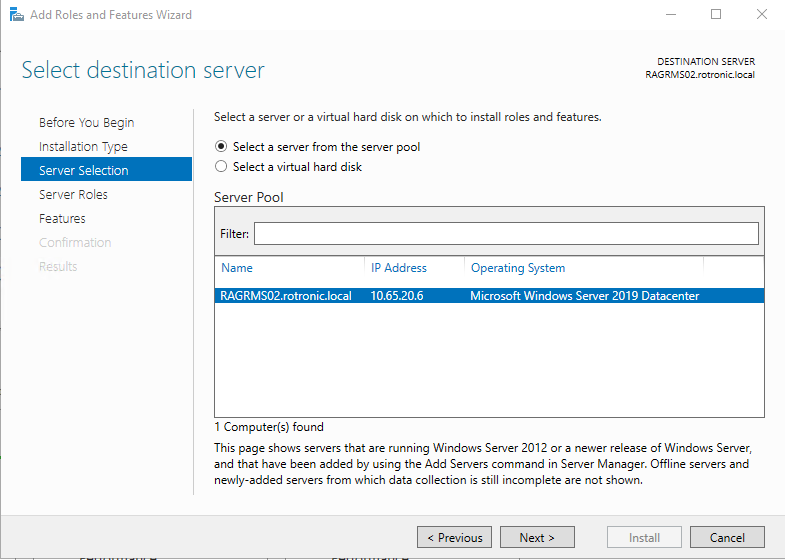 |
Step 5 |
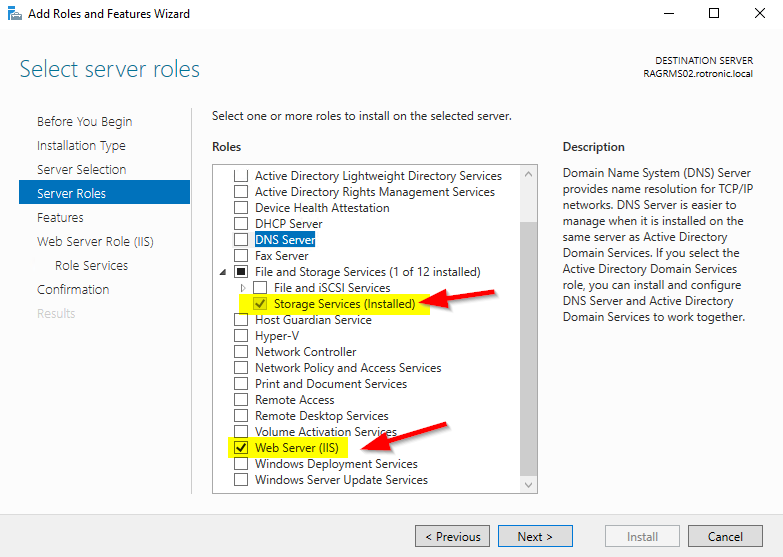
Server Roles: Select the follow settings. Then click on "Next".
|
Step 6 |
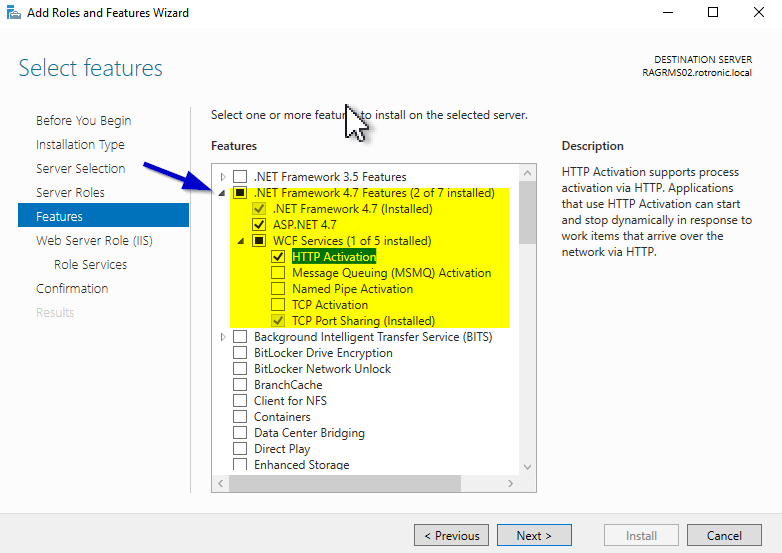
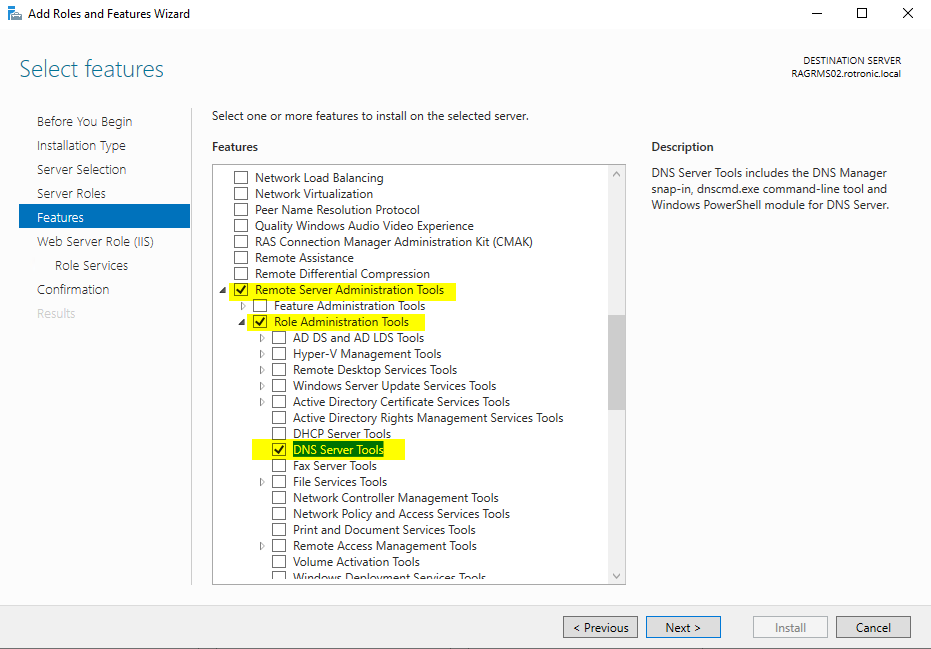
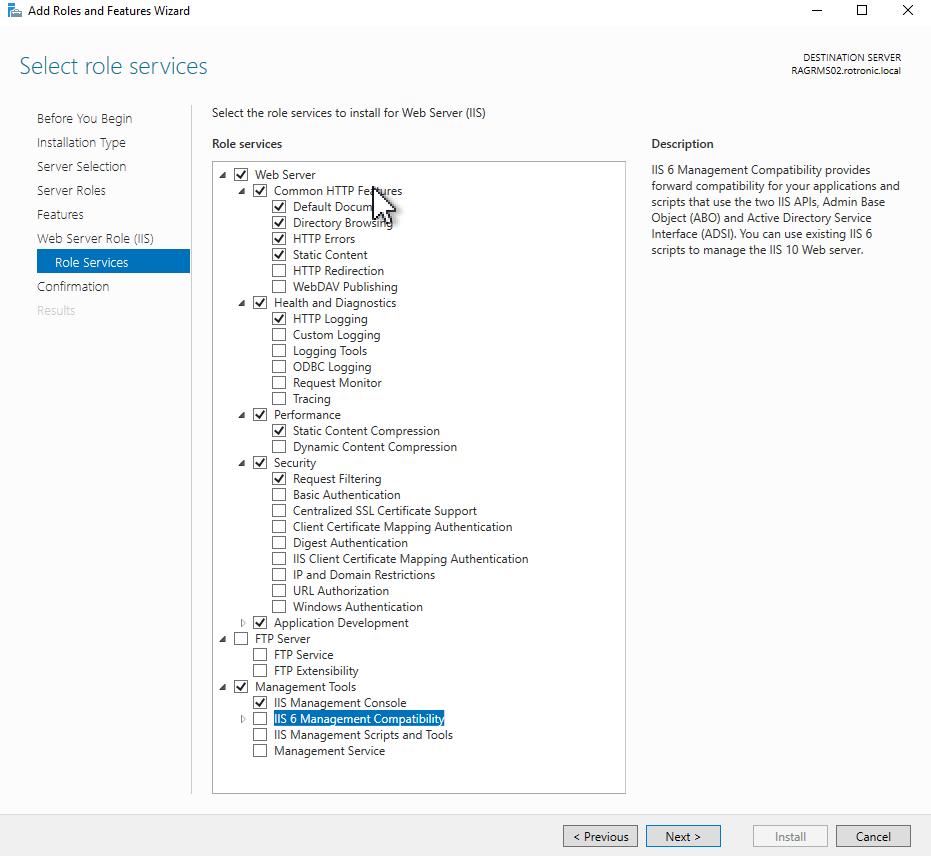
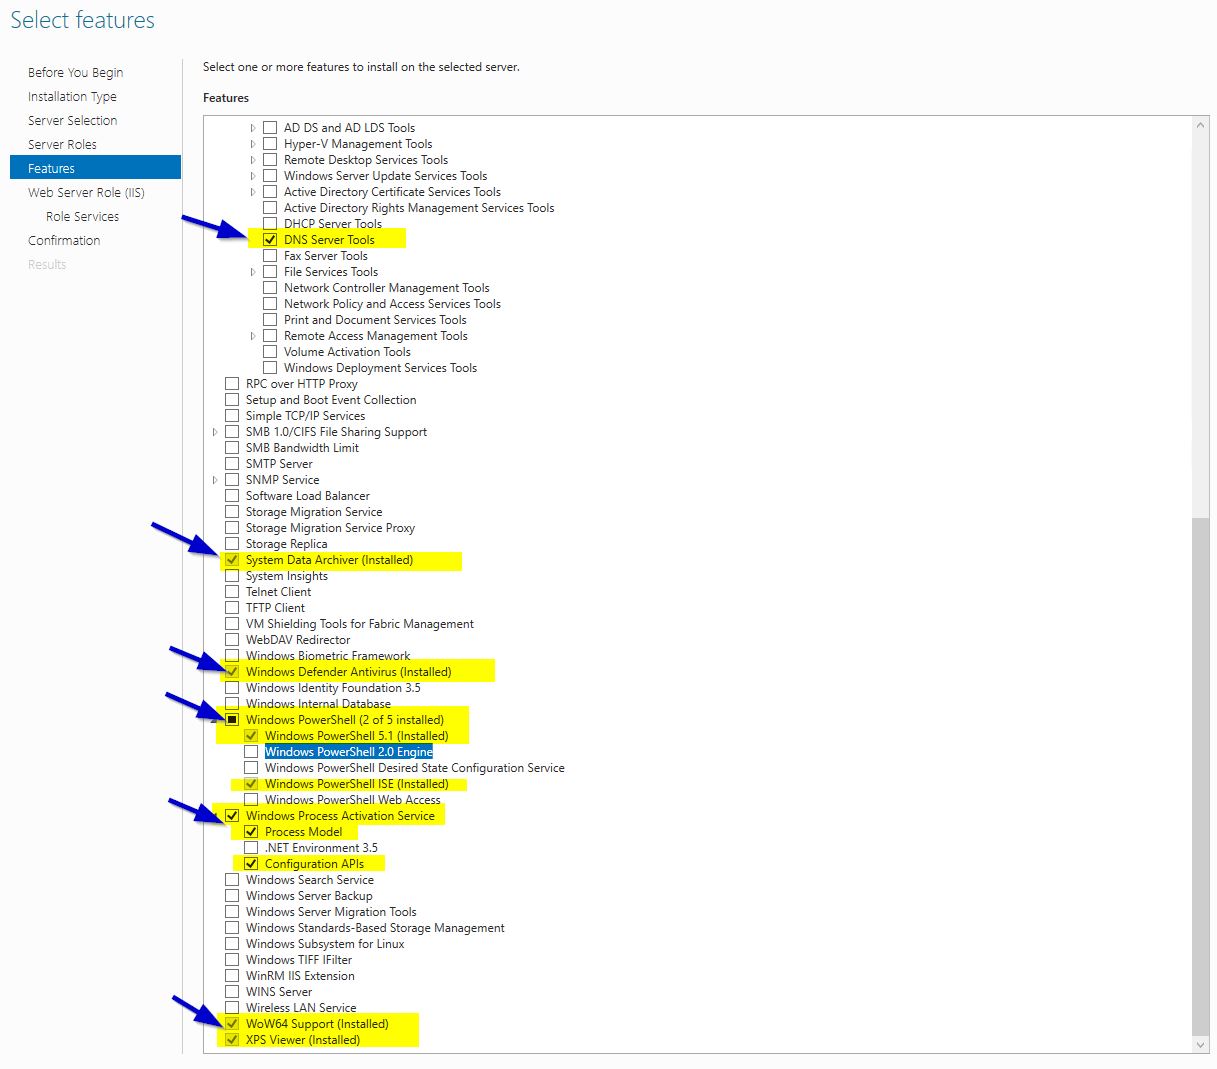
Features: Select the follow Features.
|
Step 7 |
Features: Select the follow Features. Then click on "Next".
|
Step 8 |
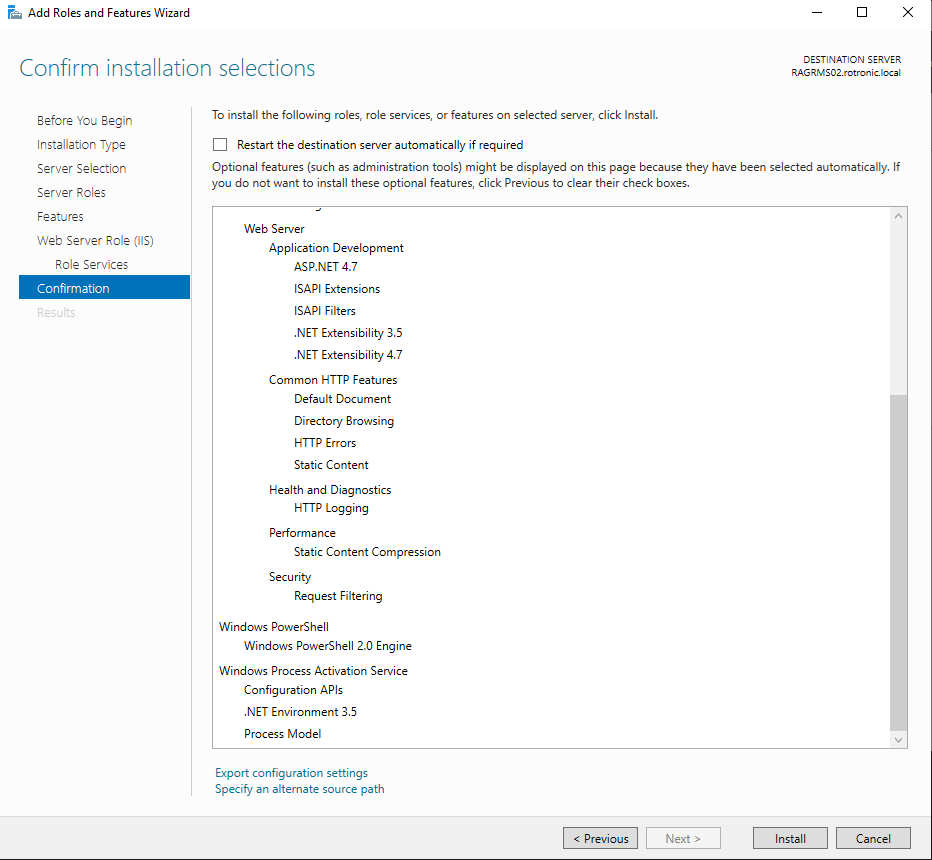
Then click on "Install". The installation progress is shown.
|
Step 9 |
Continue with the installation step 6: Installation and Configuration of the SQL Server Express. |
