Chamber Connection
To install a probe into the HygroCal100 chamber, firstly ensure that you have the correct port adapter size for the diameter of the probe.
1.Remove the blanking plug from the port adapter and keep it safe.
2.Install the probe into the port adapter - ensure that the probe is inserted as far as possible into the chamber as is possible while maintaining a good seal to the sensor body tube.
Electrical Connection
Seven push fi t connector blocks are provided on the rear panel to allow power to and communications with the probes under test.
Each connector has 6 active pins, which can be used with 2, 3 or 4-wire probes which have either a voltage or current output, depending on how it is wired.
Pin |
Function |
Description |
|---|---|---|
1 |
+24 V DC supply |
Excitation voltage for probe |
2 |
Ground |
Ground |
3 |
RH voltage input |
RH input connection for probes with a voltage scale output |
4 |
Temperature voltage input |
Temperature input connection for probes with a voltage scale output |
5 |
RH current input |
RH input connection for probes with a current scale output |
6 |
Temperature current input |
Temperature input connection for probes with a current scale output |
7 |
N/C |
Not connected |
8 |
N/C |
Not connected |
NOTE: The system requires an RH input to be connected in order for the temperature channel to work. A temperature input connected alone will not be processed.
NOTE: This table also appears on the rear panel of the instrument for quick reference.
For each connection:
1.Remove the terminal block.
2.Strip back the wires on the probe lead to ensure at least 6mm is exposed (if necessary).
3.Insert the wire for the ground connection into the Ground terminal way, and screw into the block. NOTE: Do not overtighten the screw.
4.Insert the wire for the supply connection into the +24 V DC terminal way, and screw into the block. NOTE: Do not overtighten the screw.
5.Insert the wire for the RH signal connection into either the RH voltage input or RH current input terminal way - depending on the probe - and screw into the block. NOTE: Do not overtighten the screw.
6.Insert the wire for the temperature signal connection (if present) into either the Temperature Voltage Input or Temperature Current Input terminal way - depending on the probe - and screw into the block. NOTE: Do not overtighten the screw.
7.Locate the terminal block over the connector and push it firmly into place.
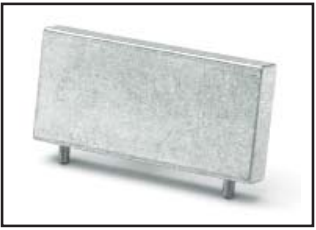
Battery Operation (Optional)
The HygroCal100 Advanced can optionally be fitted with a battery pack, allowing it to be used without the DC power supply connected.
The HygroCal100 Advanced can run from a fully charged battery for approximately 8 hours (depending on set point).
The battery pack will power the instrument automatically when the DC supply is disconnected.
Power Status Indicator
The power status indicator on the monitor shows one of two icons:
Symbol |
Function |
Description |
|---|---|---|
|
Main power connected |
Indicates that the power adapter is plugged in. If the HC100 is fitted with a battery, this also indicates that the battery is charging. |
|
Operating on battery |
Indicates that the power adapter is not plugged in, and shows the current battery charge level. There are 4 indicated levels, from full (pictured) to very low (empty icon). |


Port Adapters
The HygroCal100 Advanced is fitted with 8 M30 probe test ports. Each of these is fitted with an adapter to convert it to one of a variety of probe tube diameter sizes.
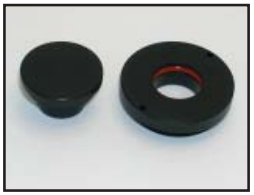
The HygroCal100 Advanced is supplied with your choice of port adapter size - additional adapters can be ordered.
Port adapters suitable for the following probe sizes are available:
Probe Diameter |
Order Code |
|---|---|
12mm (0.47") |
A000291 |
13.5mm (0.53") |
A000292 |
14mm (0.55") |
A000293 |
15mm (0.59") |
A000294 |
18.5mm (0.73") |
A000295 |
19mm (0.75") |
A000296 |
24mm (0.94") |
A000297 |
25mm (0.98") |
A000298 |
Adapters can be installed or removed using the Port Adapter Tool (A000265). Take care to ensure that the port adaptor is properly aligned with the thread before tightening.