Detecting the HP32
Use a USB cable (micro-USB connector on the HP32) to connect the HP32 to the HW5 PC. Unless already installed, you should install the ROTRONIC USB driver on the PC before running HW5.
After detection by HW5, the HP32 appears as an icon in the left pane of the HW5 main screen.
Click on the + sign to the left of the HP32 icon to display the HP32 Device Manager module, the Record Data module as well as the probe icon.
Click on the + sign to the left of a probe icon to display a list of the available functional modules for the probe.
Device Manager
The HW5 functions available for the HygroFlex are illustrated below:

To open the Device manager form, click with the mouse on Device Manager. The Device Manager form is used to configure the HygroFlex and to read device specific information.
When Device Manager is started, it automatically interrogates the device and downloads its current configuration.
Device Information
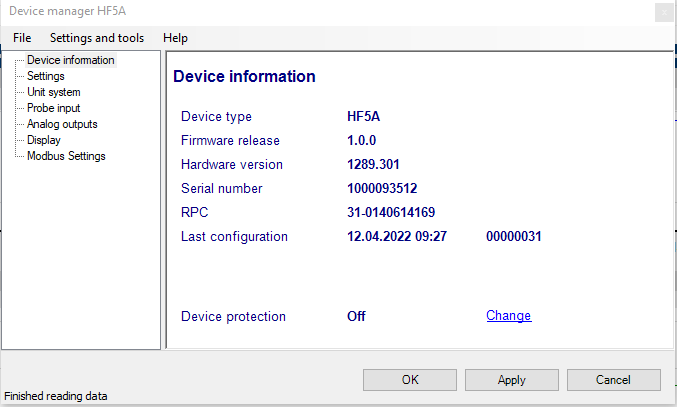
RS485 address: click on the underlined link to change the instrument address to be used in conjunction with an RS-485 network (multi-drop). Each network address should be unique and within the values of 0 to 63.
Note: the default factory RS-485 address is 0. Unless necessary, do not manually modify this address. HW4 will automatically change the RS-485 address of the device, if so required.
Device Protection: for a description of this function, see document General HW5 feature
The Device Manager menu bar is located at the top of the form.
Tools
Firmware Update: This tool is used to update the firmware of the HP32 after downloading a new firmware file from the ROTRONIC website to your PC. Firmware files are given a name that shows both to which device the file applies and the version number of the firmware. All firmware files have the extension HEX or ROF. The ROTRONIC website will publish firmware updates as required. The tool opens a form that allows you to specify the folder where the firmware update file is located and to select the file. Click on OPEN to start the update process.
Choose the (Hex File), which you already stored localy on your computer. The upgrade takes around 2 minutes and during the update the following screen is shown:
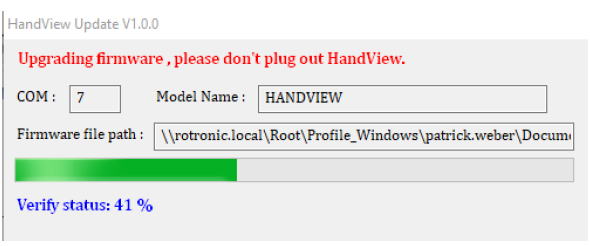
IMPORTANT: the HP32 must be powered during the entire process. Loss of power when the handheld is being updated may have unexpected results and prevent future operation of the HP32.
Settings
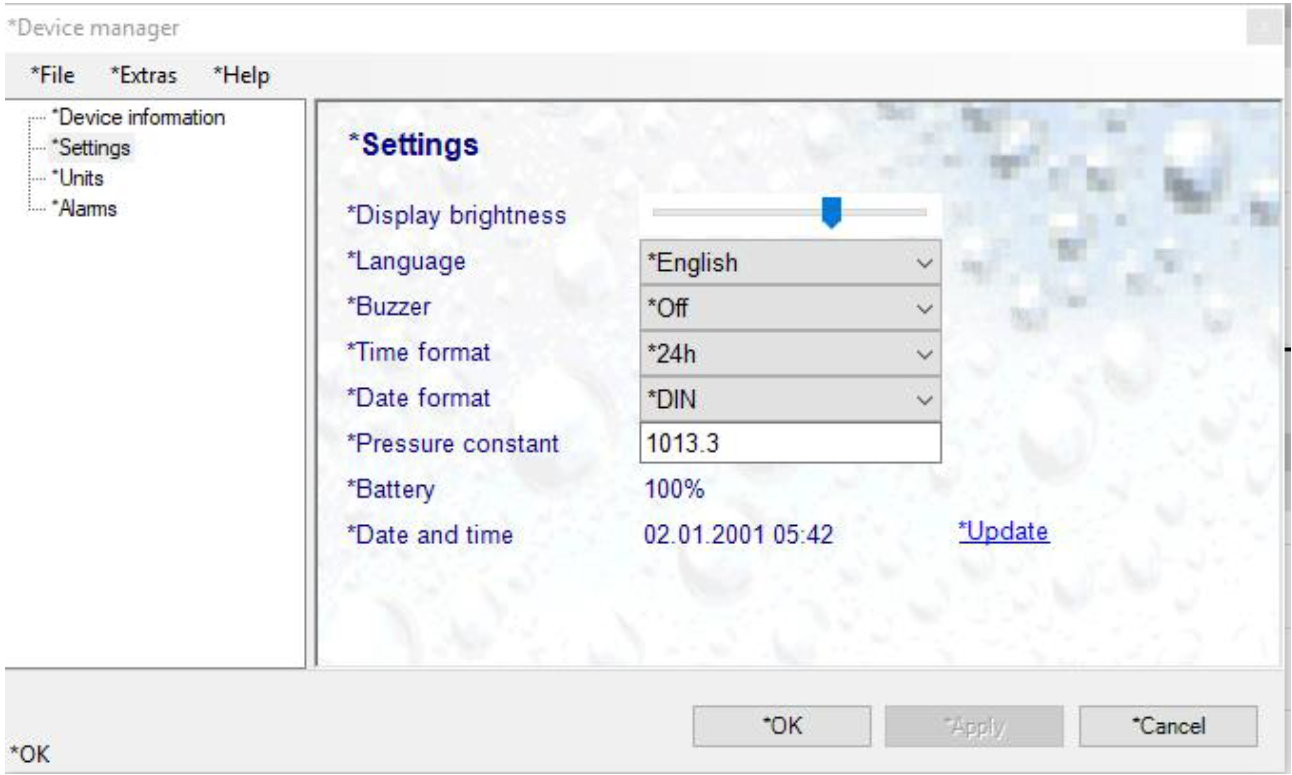
Important Note: After changes has being made or selected, the device must be updated by using the Apply button.
Display brightness: Set the brightness of the display by using the slider.
Language: Select the language for the HP32 menu.
Buzzer: Turn the (alarm and indication) buzzer on or off.
Time format: Select either the 24 or the 12 hour format.
Date format: Choose between DIN, ISO or US
Pressure constant.: enter here the fixed numerical value to be used for barometric pressure when calculating the following parameters: Wet bulb temperature, Enthalpy, Specific humidity and Mixing ratio by weight. This numerical value should correspond to the typical barometric pressure at your elevation (or in your process) and should be consistent with the unit system that is being used. Note: when one of the probe inputs is set for an analog pressure probe, the probe measurements are used instead of the fixed pressure value.
Battery: Battery charging status in percent.
Date and Time: Click on the update link to immediately set the clock of the HP32 to the date and time of the PC. Do not use this link when the HP32 is recording data.
Unit System
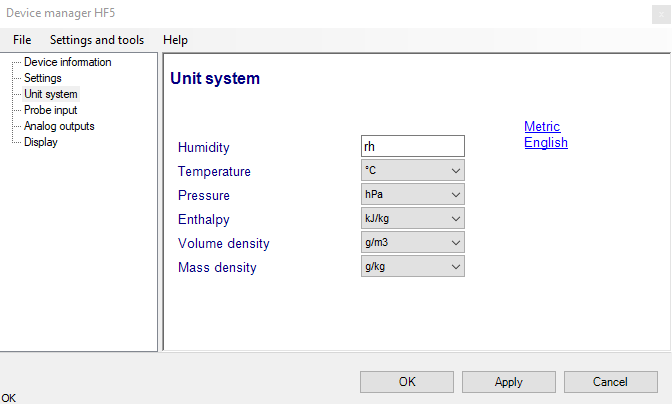
Humidity: enter here the letters to be used after the “%” symbol used for relative humidity
Temperature and other parameters: Left click on the arrow to the right of the text box and select the engineering unit.
Click with the mouse on the blue links labeled Metric or English to globally set the unit system for all parameters.
Note: regarding both HW5 and the transmitter outputs and display, the unit system selected for the transmitter overrides the unit system selected for the probe.
Data Recording
Data Recording is used to configure the data recording functions of the HP32, to start and stop data logging by the HP32 and to download the recorded data to the HW5 PC.
To select Data Recording, click on it with the left mouse button. HW5 opens the Data Recording form.
There are two different modes to capture data. One is the Interval Logging, which is used to continuously log data at the same spot or area. The Batch Logging function is used to capture single values in different locations such as rooms in school building.
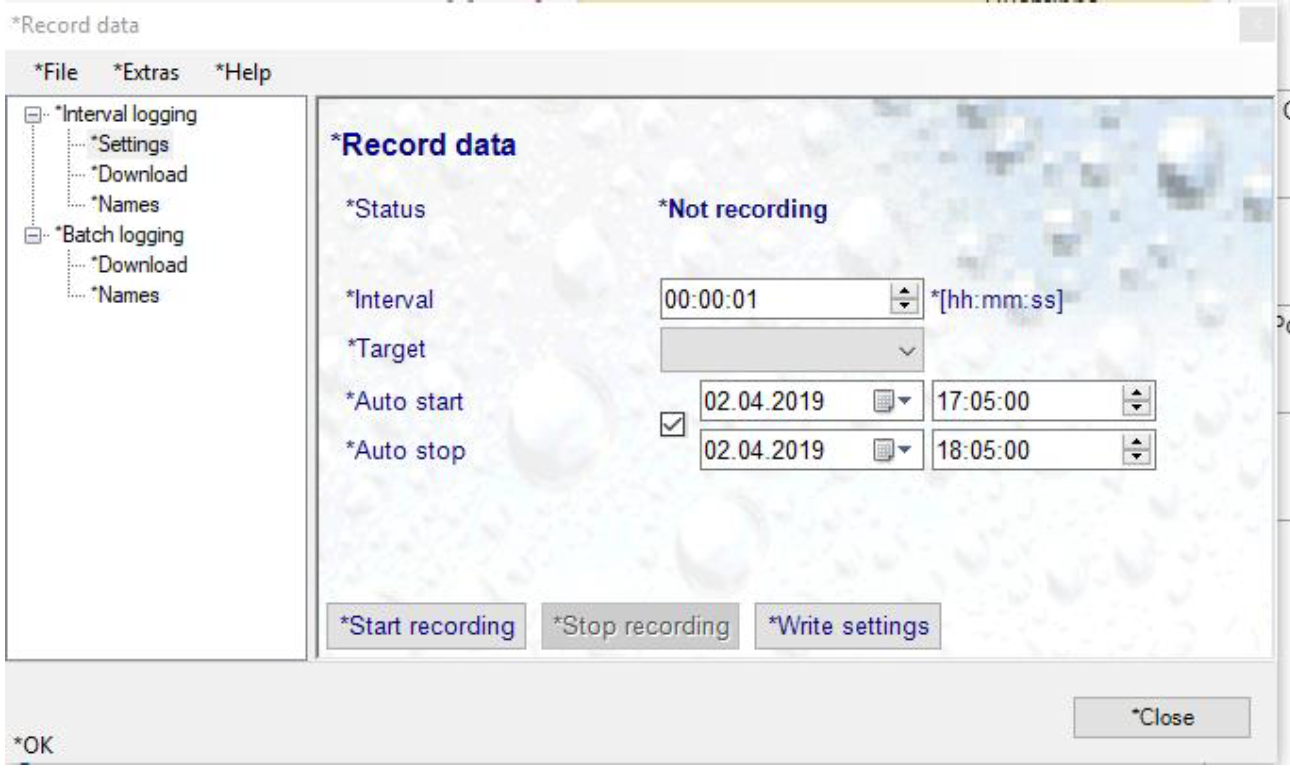
This form is used to select the following. To save the changed values "Write settings" must be pressed
Log Interval: 1 sec up to 23 hours 59 min and 59 sec.
Target: Data can be saved under up to 8 locations names on the HP32. These must be defined previously under "Name" see chapter Interval Logging – Name
Auto start / Auto stop: To start and stop the measurement at a certain date and time, the check box must be enabled to show the box to enter the values.
Start recording / Stop recording: The logging function of the HP32 can be started and stopped via HW4.
Interval logging
Download: Logged data, can be downloaded after stopping the logging function. After pressing the Download button, the file name and location of the file can be selected. After the file is saved that will also be shown on the screen.
Delete: Will delete the recorded data.
Name: Up to 8 file names (location) can be defined. New name or changes on existing one need to be confirmed by using the "saved" botton.
Note: Please do not use umlauts when you fill in a name.
Batch logging
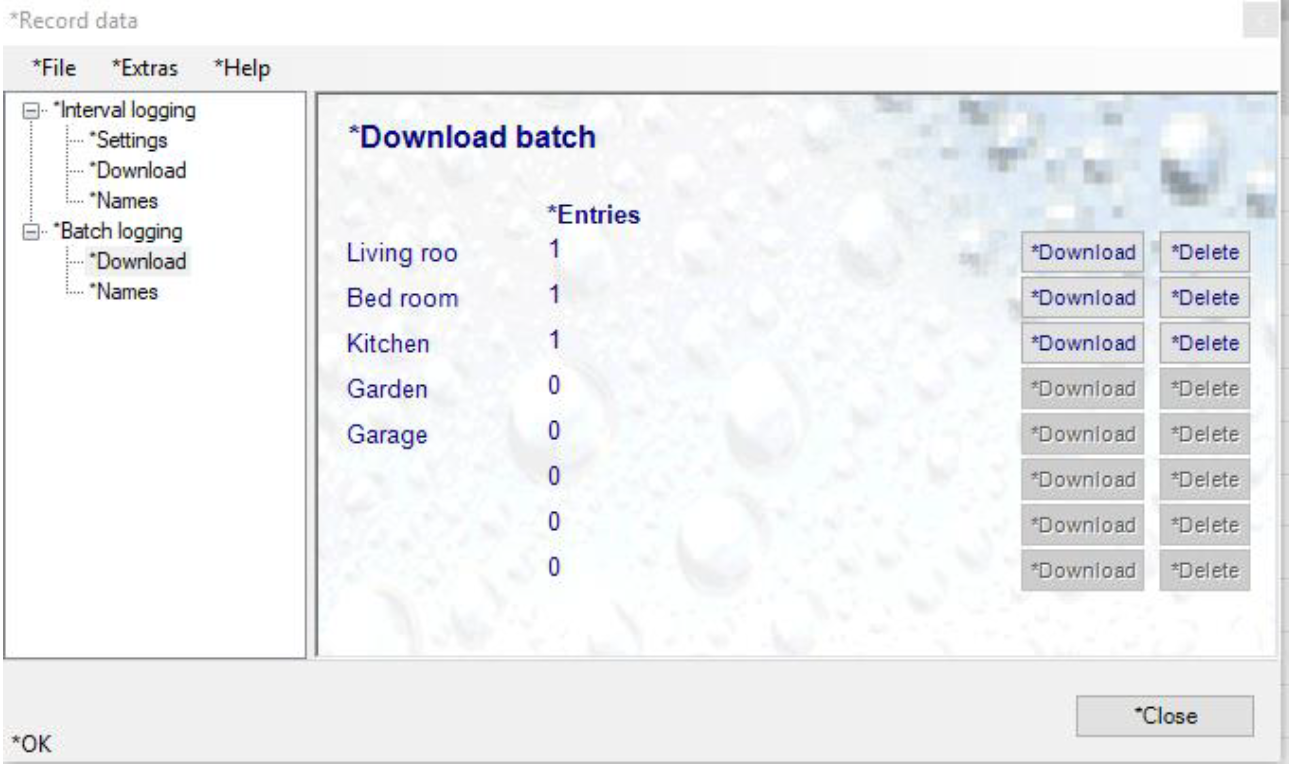
Download: Logged batch data, can be downloaded for each batch separately. After pressing the Download button, the data will be displayed on the screen. Note: The data will not be saved locally, therefore the safe function of HW5 must be used.