Both the Rotronic Temperatur and Humidity sensor used in the probe and associated electronics are very stable and should not require any calibration after the initial factory adjustment. Long term stability of the ROTRONIC Hygromer humidity sensor is typically better than 1 %RH per year. For maximum accuracy, calibration of the probe should be verified every 6 to 12 months. Applications where the probe is exposed to significant pollution may require more frequent verifications. Finde also more infromation here: 4. How to perform an adjustment
Step 1 |
Calibration standards for the AwEasyDepending on which sensor needs to be calibrated the AwEasy offers calibration / adjustment functionality for Temperature and Humidity. Humidity can be easy calibrated with the Rotronic humidity standards, in addition to the Measurement guidelines which need to be followed for a correct measurement.
Temperature is a bit more complex to calibrate because a stable reference temperature is needed, such as that of a Rotronic HG2 humidity and temperature generator. For this, there are options to contact Rotronic and their local partners, who can offer calibration services for the AwEasy with even ISO 17025 accreditation.
|
||||||
Step 2 |
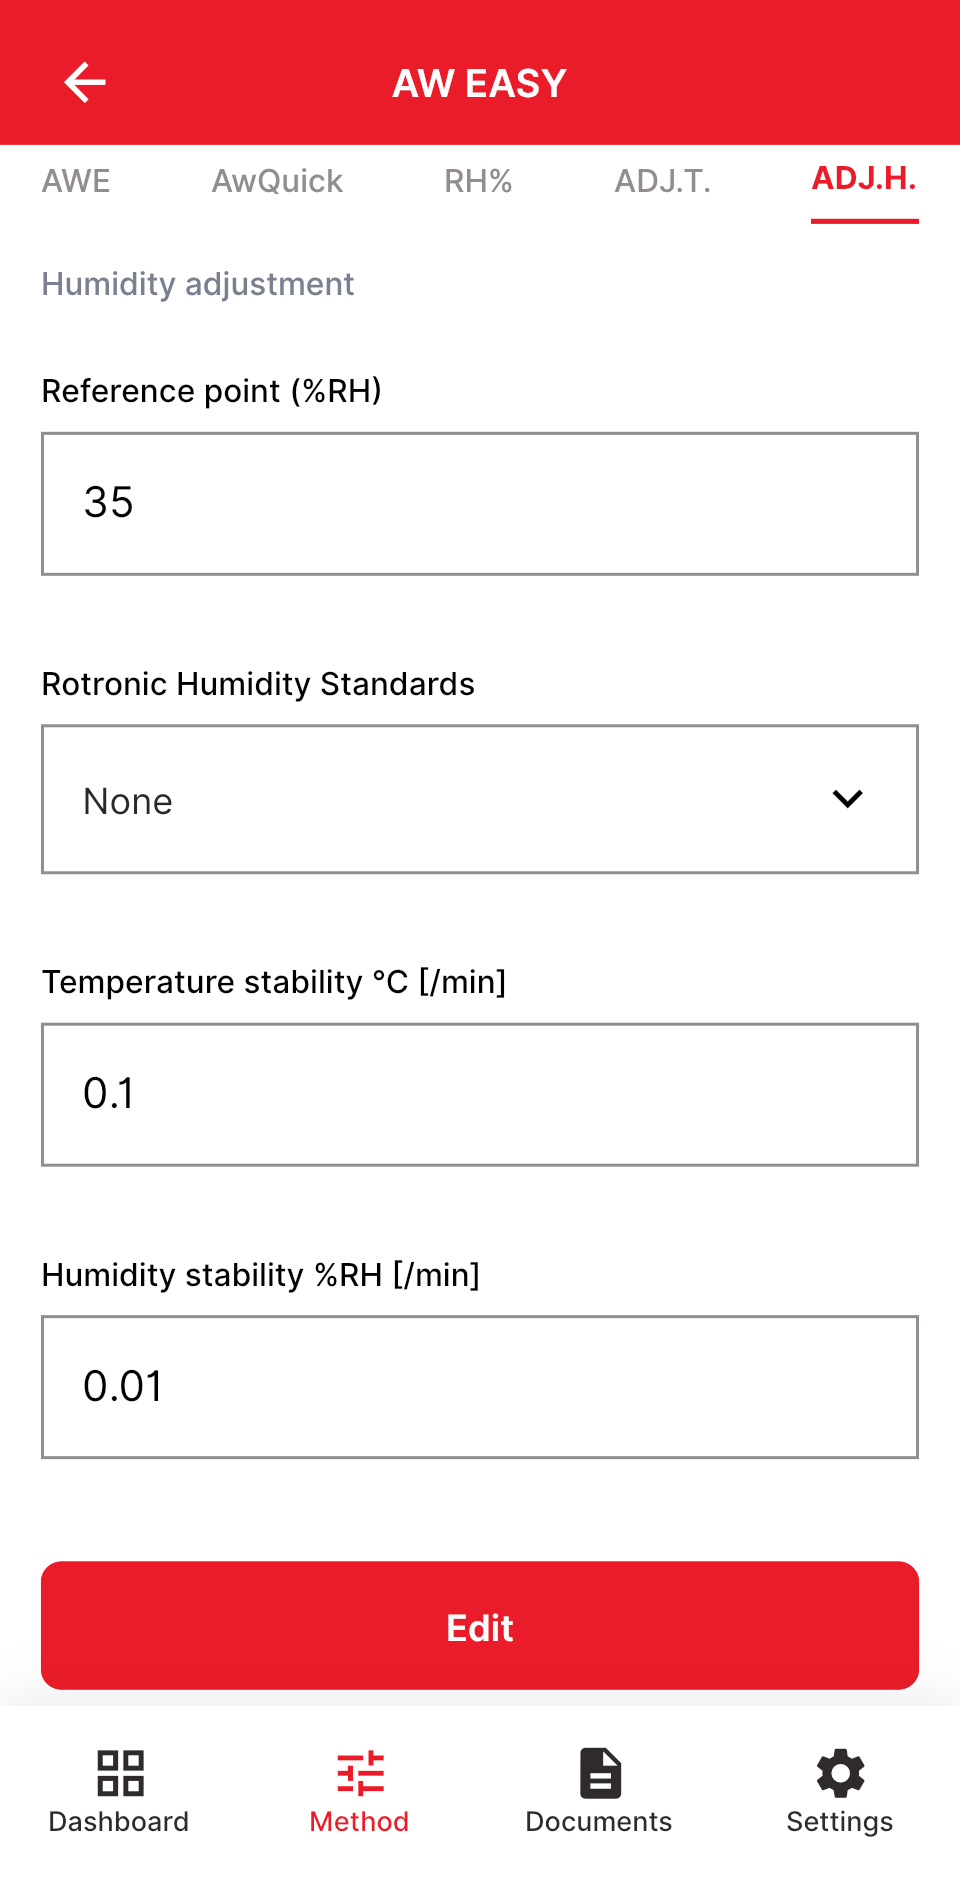
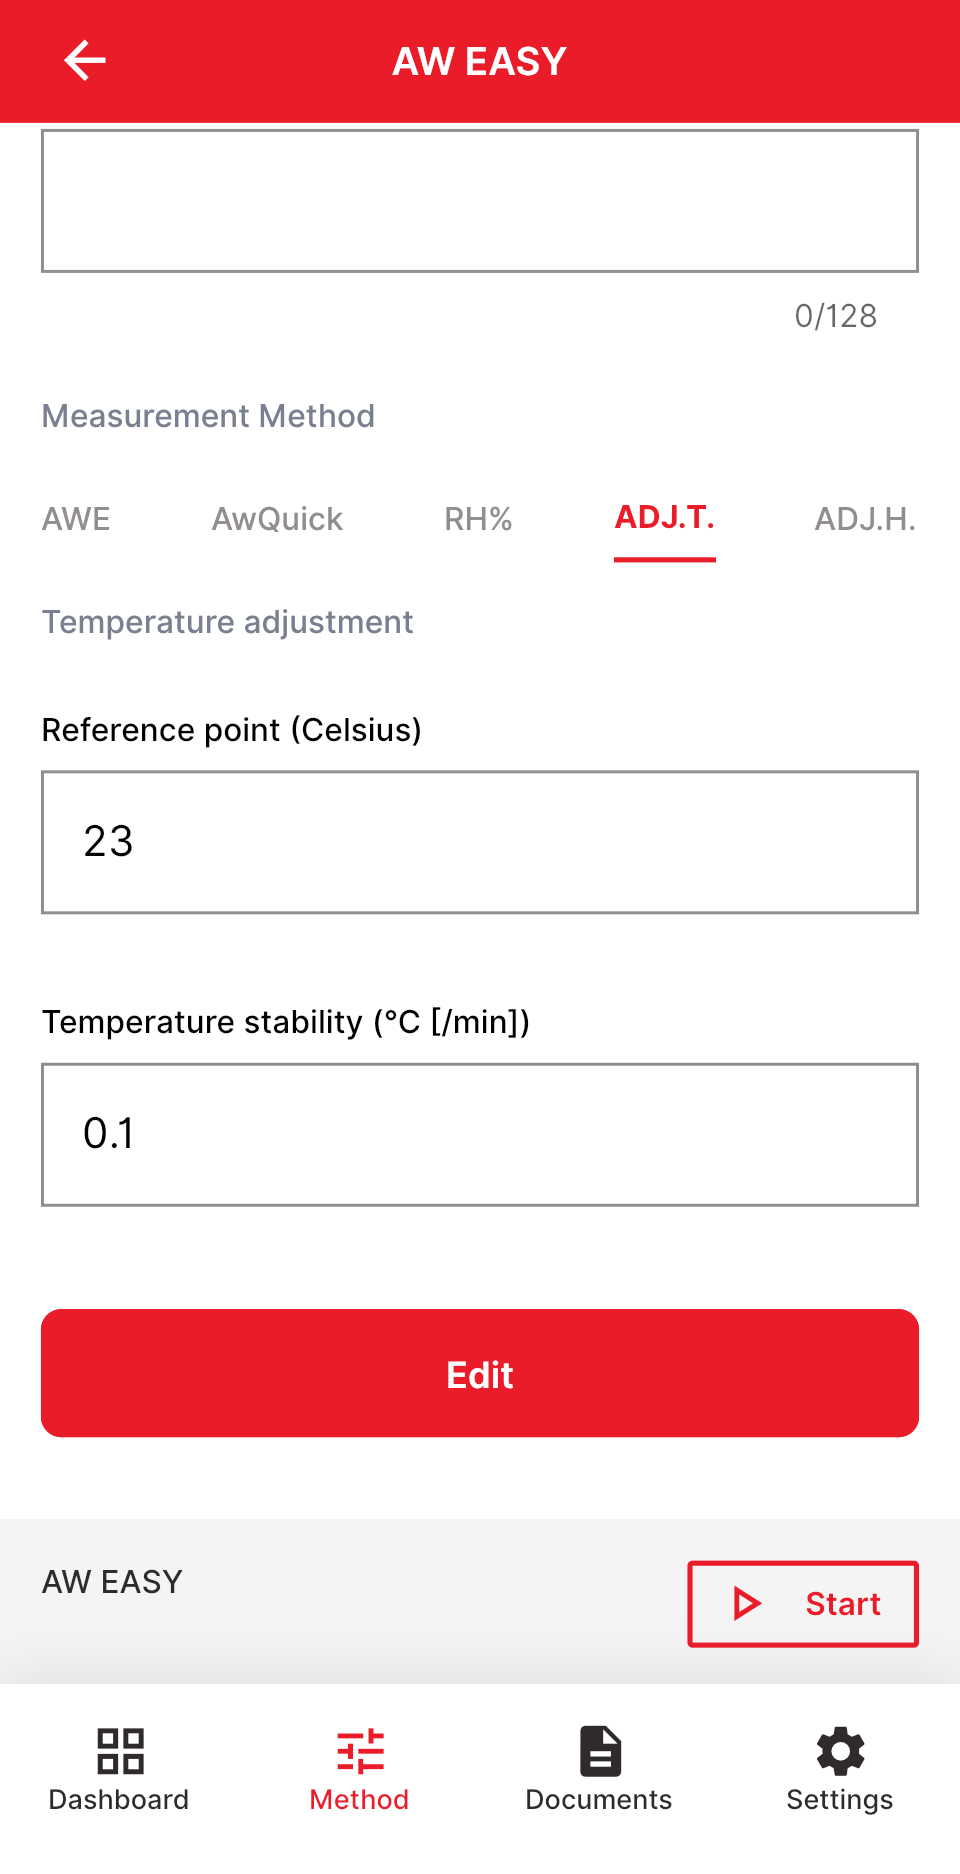
Setting up the calibration / adjustment settingsTo setup the calibration / adjustment functions go from the main menu into "measurements" click on the specific AwEasy device which should be calibrated / adjusted. Go down to the button "New measurement" and select in the Measurement method "ADJ.H." for Humidity Adjustment and "ADJ.T." for Temperature Adjustment. NOTE: This guide focuses on adjusting the humidity. You can follow the same procedure to adjust the temperature.
By selecting the "ADJ.H" there are to options to select your reference: 1)Type in manually in your reference, in case when using the Rotronic humidity standards please check the calibration certificate and the temperature dependency. 2)When using the Rotronic humidity standards select in the "Rotronic Humidity Standard" your specific used Humidity Standard for example the EA50 for 50% RH. This function automatically considerate the temperature dependency of the Rotronic humidity standards (which is normally written on the Box of the Rotronic humidity standards). 3)Define the right Stability value for the humidity and/or temperature per minute. Rotronic recommends the following settings for the Humidity and Temperature stability:
Click on "Edit" / "Save" to save the settings of the calibration / adjustment settings.
|
||||||
Step 3 |
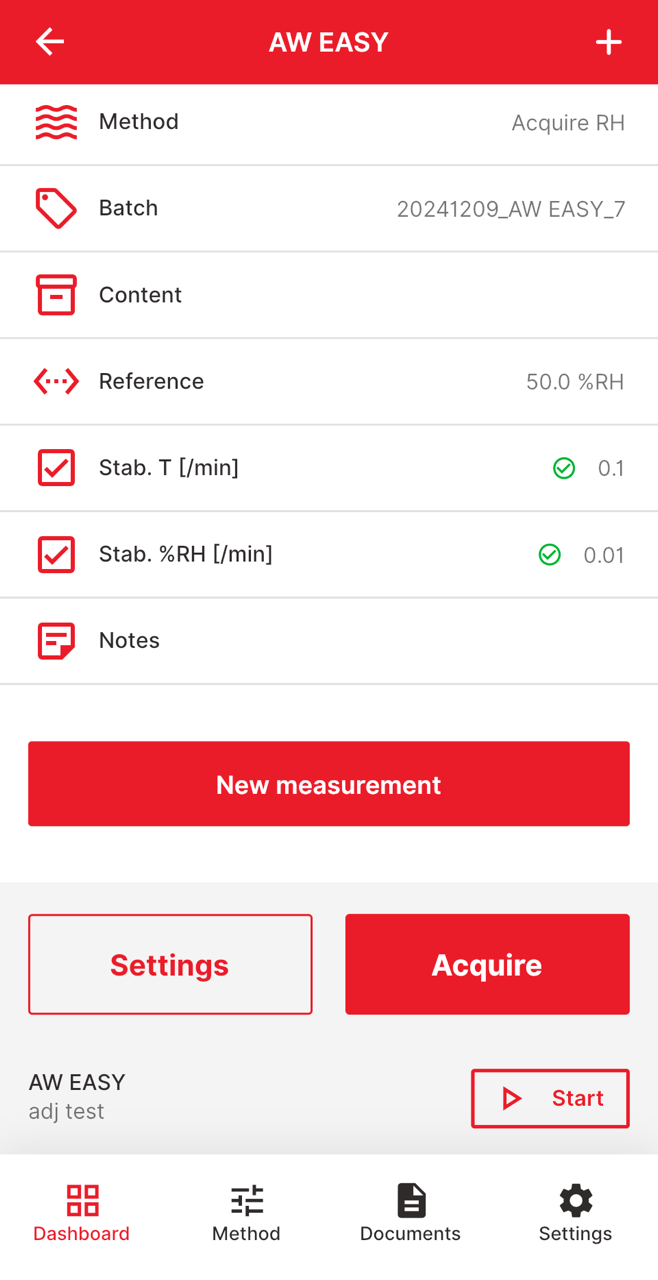
Aquire the caliration / adjustment pointOnce the calibration / adjustment settings have been made and the salt solutions have been placed in the sample chamber, the measurement can be started. Please note that the Rotronic humidity standards needs time to adapt before the measurement is started (see instructions on the calibration certificate). After the measurement has been started, AwEasy waits until the stability conditions in the settings are met.
After the measurement is completed click on "Acquire" to save the calibration / adjustment point. By clicking on "Settings" it's possible to readjust the settings and repeat the measurement.
 |
||||||
Step 4 |
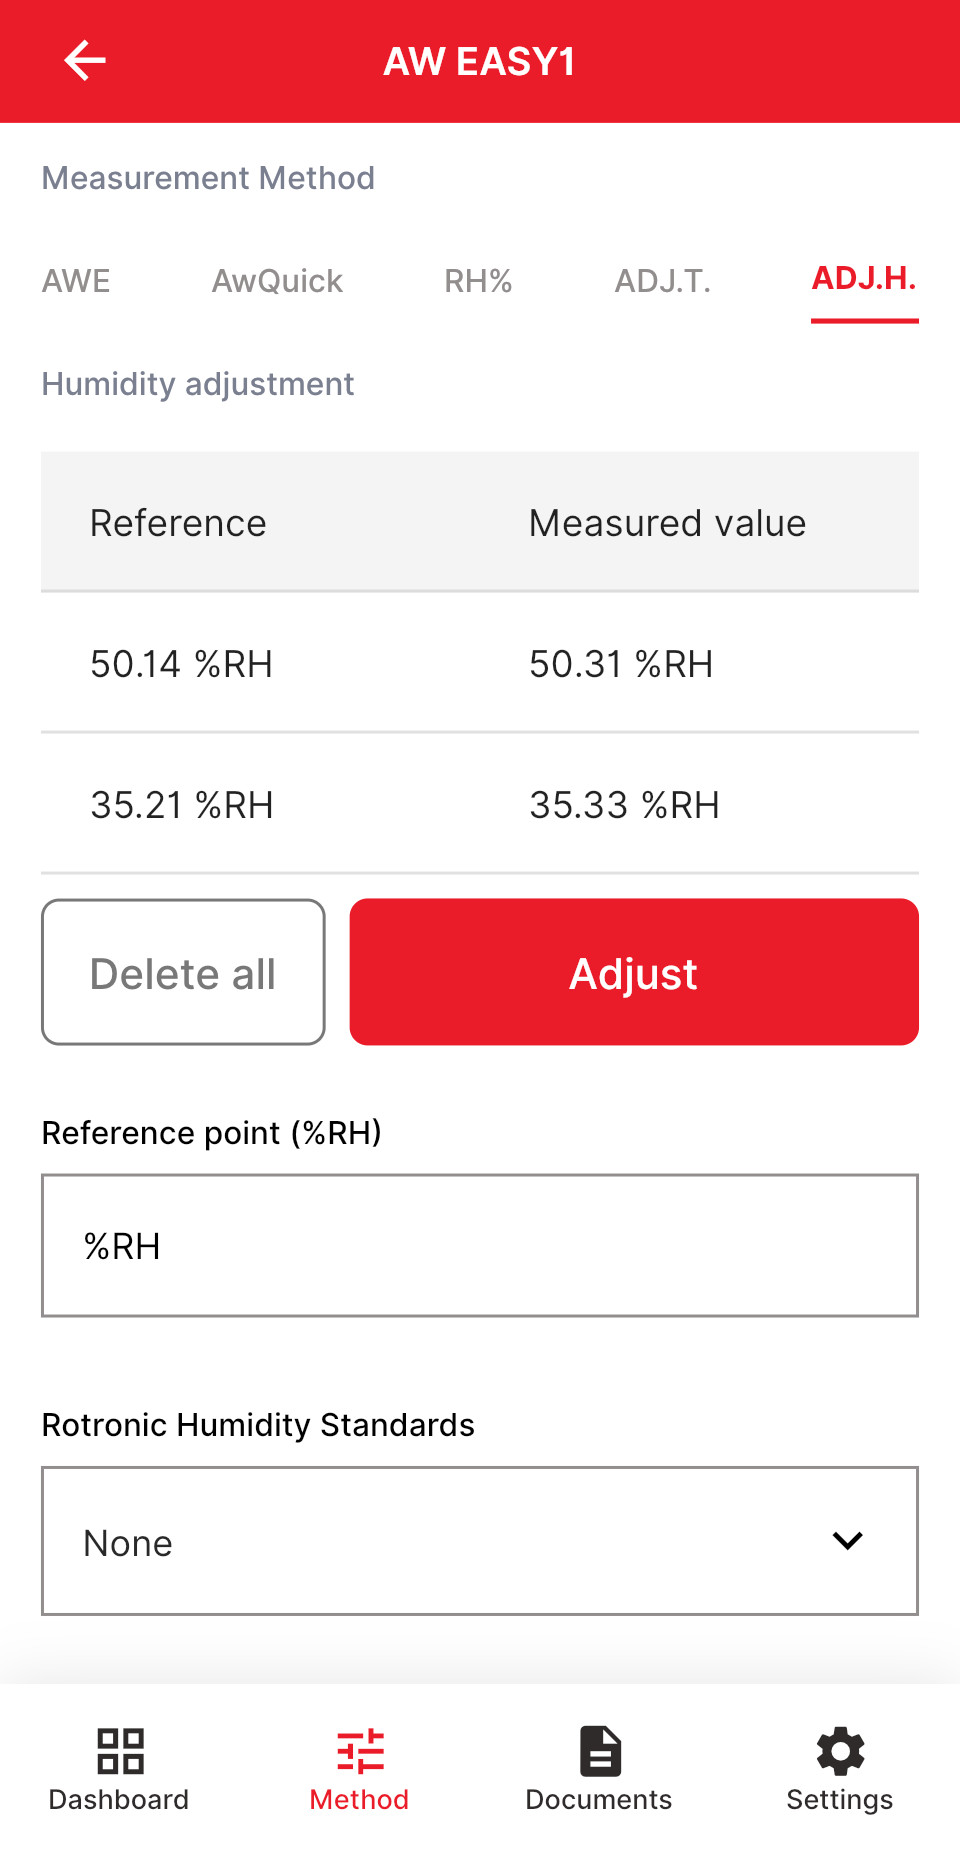
Adjust the AwEasy measurement headAfter the first calibration / adjustment point has been accepted, the next calibration / adjustment point can be selected immediately afterwards. Rotronic recommends using at least two calibration points, ideally three adjustment points. One adjustment point would only cause an offset in the calibration curve, which is not ideal in most cases.
By making multiple calibrations / adjustments a table will appear with the user selected "Reference" and the "Measured value", which then will be corrected after the adjustment of the AwEasy. Click on "Adjust" to start the adjustment of the probe (this will then take about few seconds, please don't close the App or cancel the measurement in the meantime). When selecting "Delete all" all the acquired points will then be deleted.
 |
||||||
Step 5 |
Check the new adjustment pointsAfter the adjustment has been completed, you can find the selected reference or adjustment point under the settings and see the date and time when this adjustment was carried out. When clicking on the "Humidity adjustment report" the user has the possibility to generate and export an PDF report with the information from the user adjustments, like the adjustment points. By clicking on the "Delete user adjustment" the user can delete the user adjustment back to the standard factory adjustment. NOTE: It is recommended to delete the user adjustment before a new user adjustment is made.
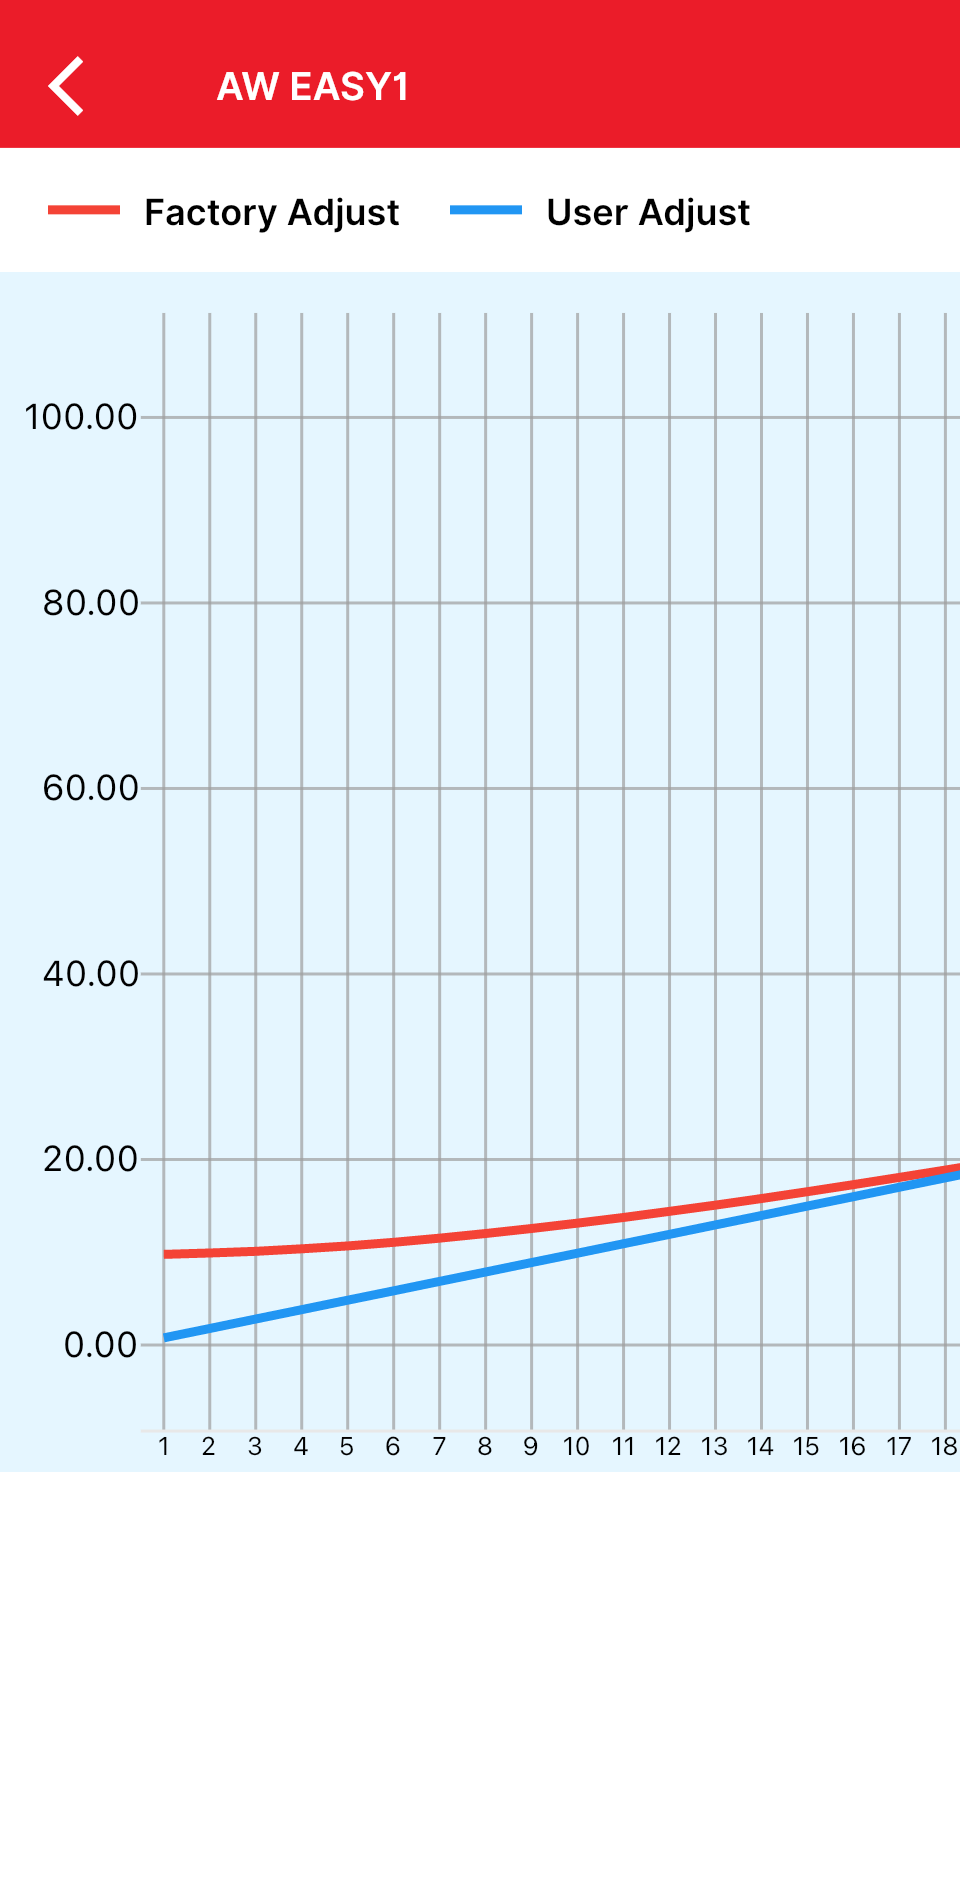
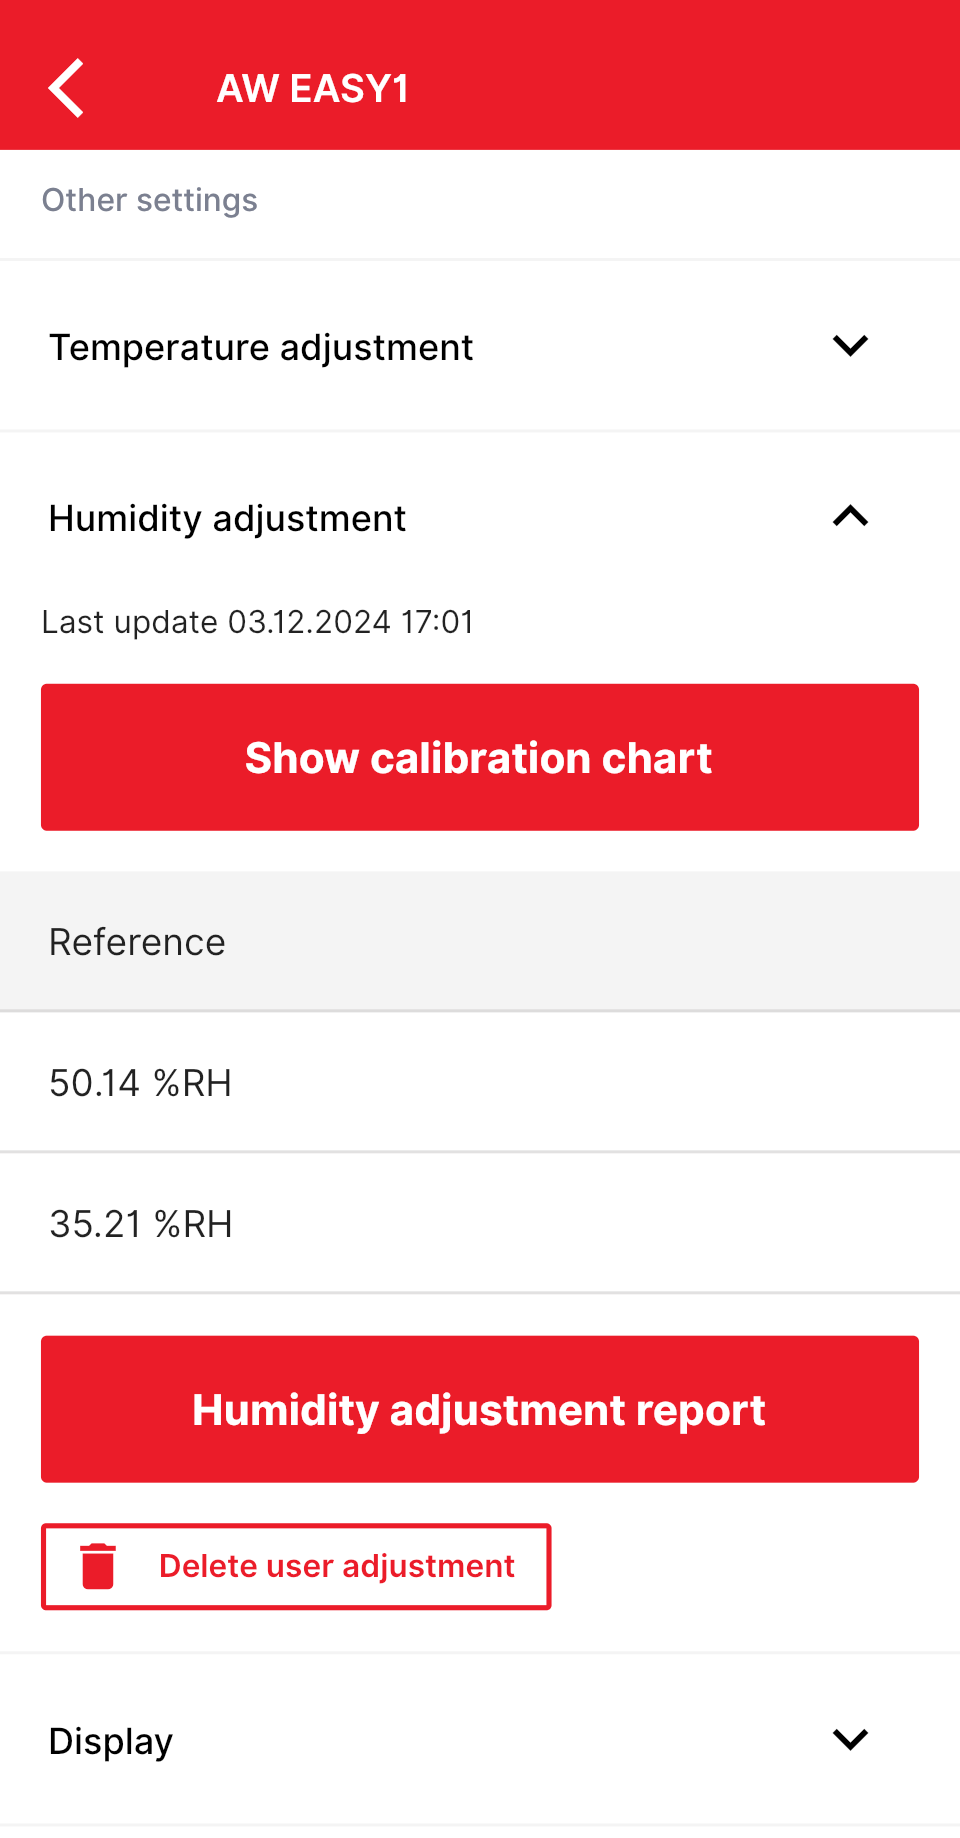 By selecting show calibration chart the user has the possibility to check the calibration curve of the new adjustment. When the probe is not adjusted form the user there is only the one line which is then the Factory Adjustment in red. As soon as the user performs an adjustment there is a second blue line which is the indicator of the User Adjustment. When performing for example a 1-point adjustment the user can see a parallel blue "User Adjust" line which will then visualize the offset of the factory adjustment. When performing a multiple point adjustment the user will then see another line in the chart with a probably different slope and possibly with overlaps to the factory adjustment.
 |