NOTE: This feature is only available with the Software Version 2.0.0.0 or higher.
Step 1 |
Starting the calibration / adjustment processTo start the calibration / adjustment process it has to be added a new measurement (like a standard AWE measurement).
 |
Step 2 |
Setting the calibration / adjustment measurementAfter adding a new measurement it the correct measurement method needs to be selected. For calibrating / adjusting the relative humidity of the probe select "Cal. RH" or for calibrating / adjusting the temperature select "Cal. T". Then set the right calibration settings like the reference humidity or to compensate the temperature of the Rotronic humidity standard (RHS). Rotronic humidity standards (RHS) salt solutions are named EA35 for example, which have a standard humidity value of 35% RH. Find also more information here: 4. How to perform an adjustment
The HygroLab also helps to find the best calibration / adjustment point by waiting the equilibrium of the reference sample. This means it needs to be set a temperature stability with "Stab. T" and a humidity stability "Stab. RH" by calibrating the humidity. For the Temperature calibration there needs to be only set the temperature stability with "Stab. T".
After set the calibration settings to the right values click below "Save" to save all settings before measuring.
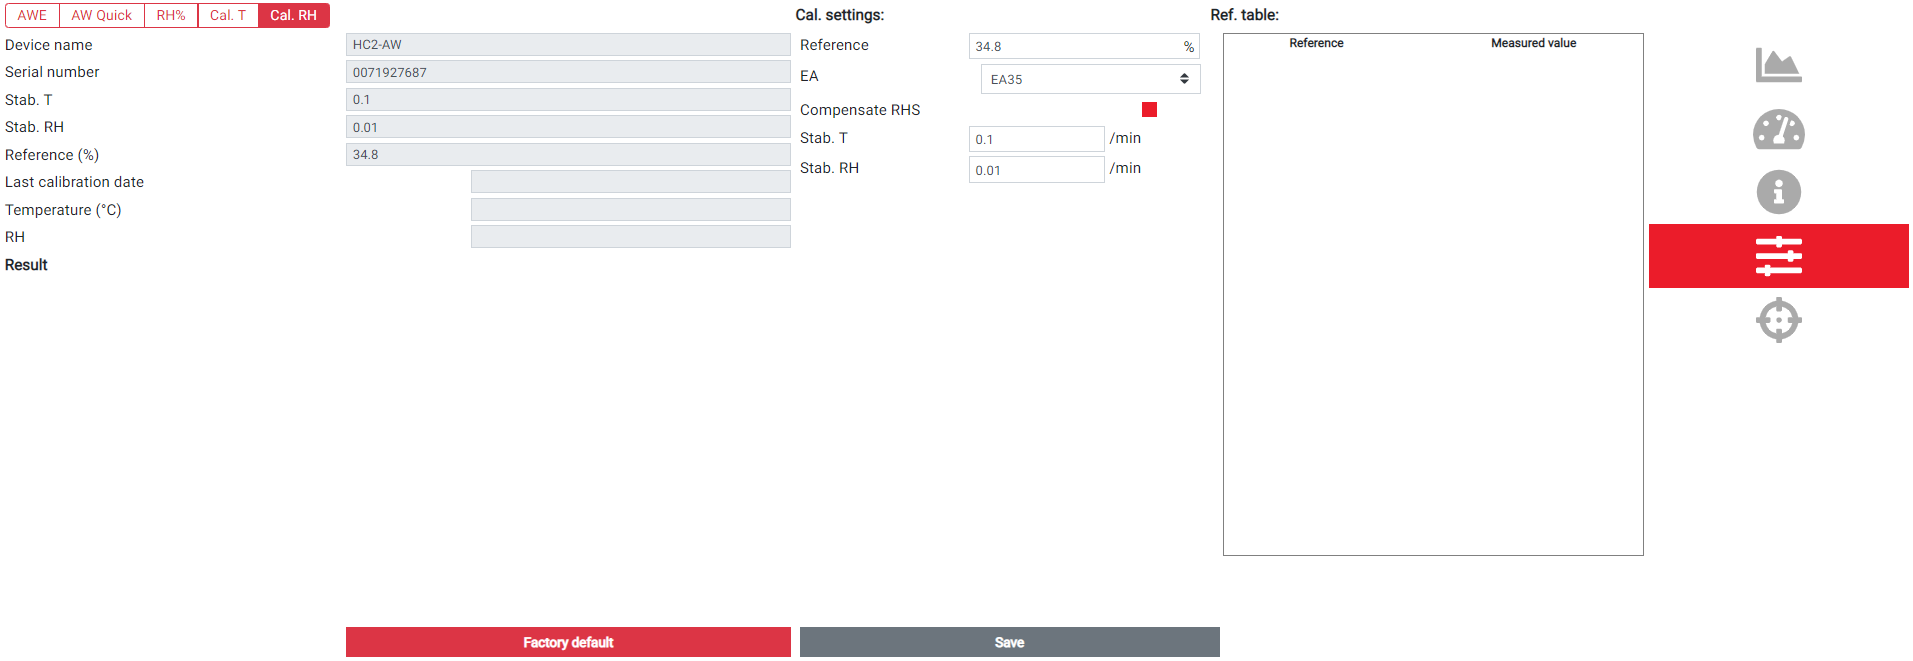
Rotronic recommends to set the stability for the temperature (Stab. T) to 0.1°C / min and the humidity stability (Stab. RH)to 0.01% RH / min.
|
Step 3 |
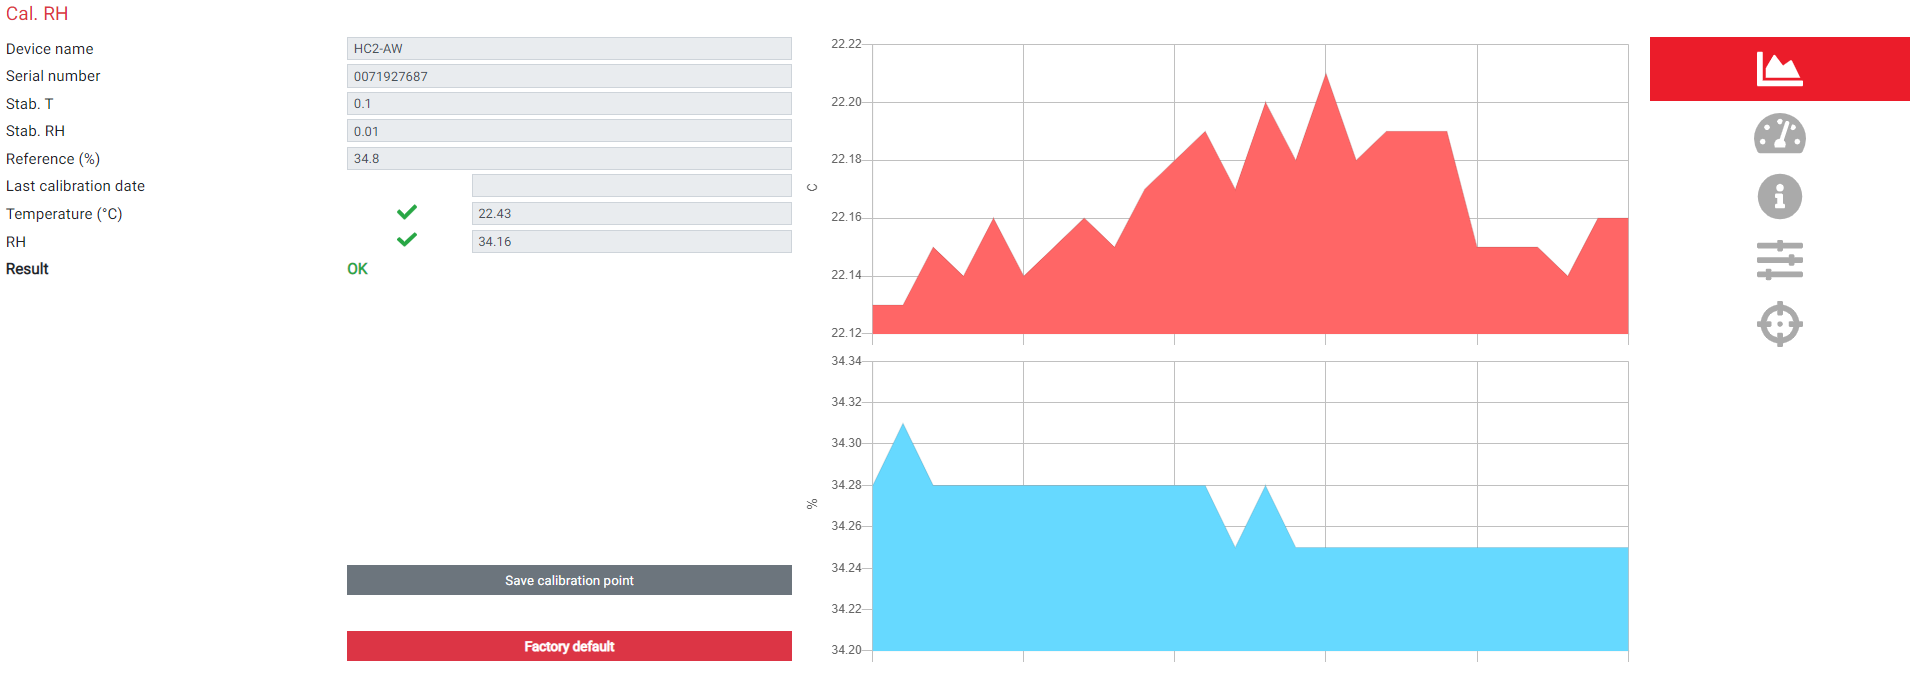
Calibration / adjustment measurementAfter setting the measurement, the calibration / adjustment can be started by clicking the play / start button in the lower measurement menu. Then the HygroLab starts to measuring until it gets to an equilibrium. When everything is done it shows green check mark at the RH and temperature value and in the result a green "OK". After this it's ready to save the calibration point and a "Save calibration point" button will appear.
|
Step 4 |
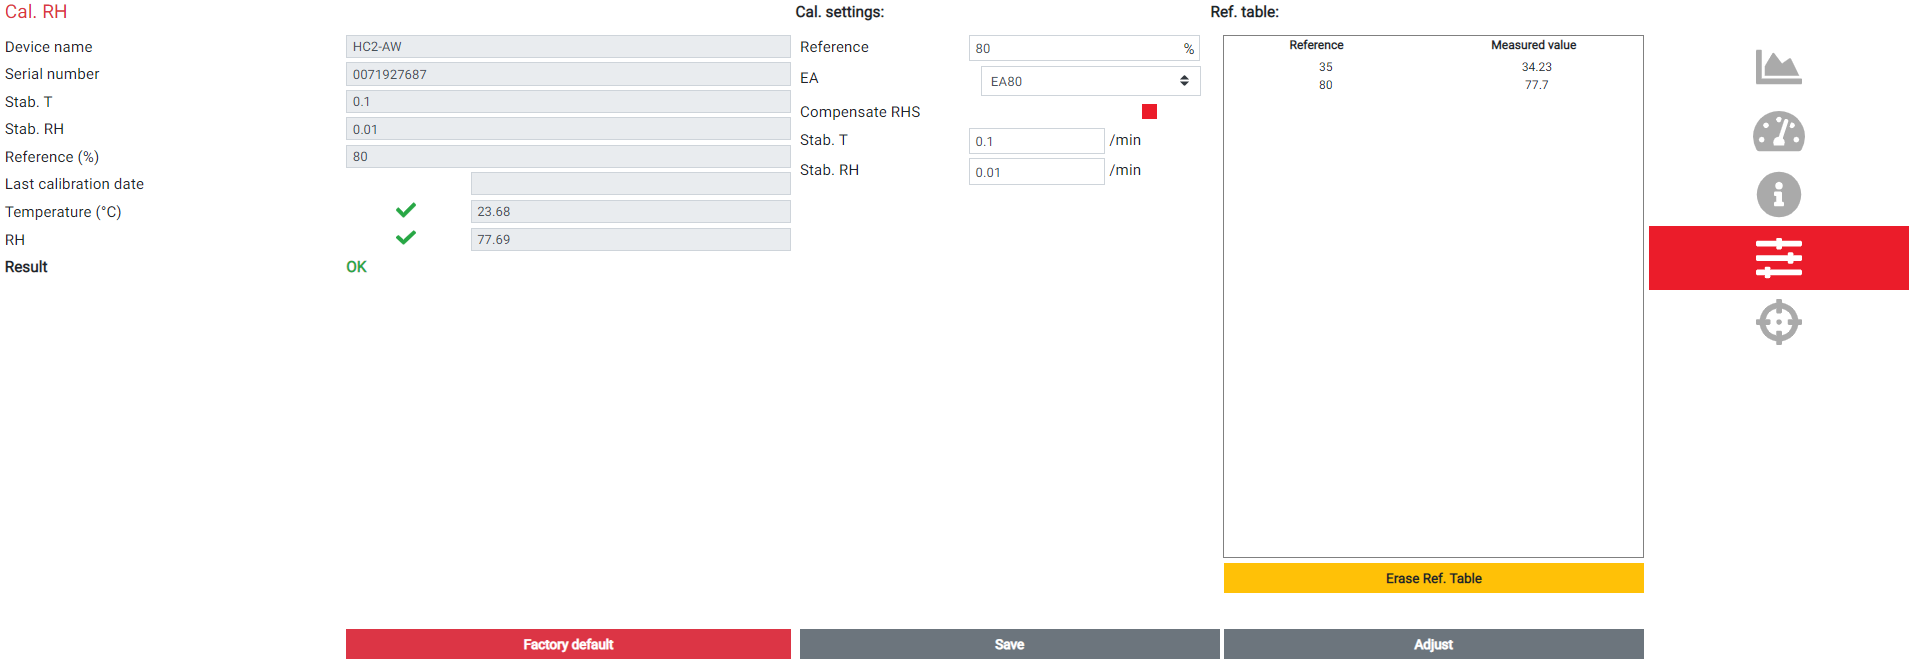
Saving multiple calibration pointsAfter saving the calibration point this process can be repeated multiple times for a 2-point, 3-point or even for a multiple point adjustment. All saved calibration points will appear in the reference table.
NOTE: By saving the calibration point into the reference table it can happen that the value is slightly different form the RH value, because of the live value which has normally a light instability.
|
Step 5 |
Adjusting the probeWhen all calibration values are saved into the reference table, the probe is ready to adjust. By clicking the "Adjust" button the probe will get adjusted. To check if the adjustment is done properly, check the calibration curve. The calibration curve will have 2 different lines (a red line for the factory calibration and a green line for the user calibration).
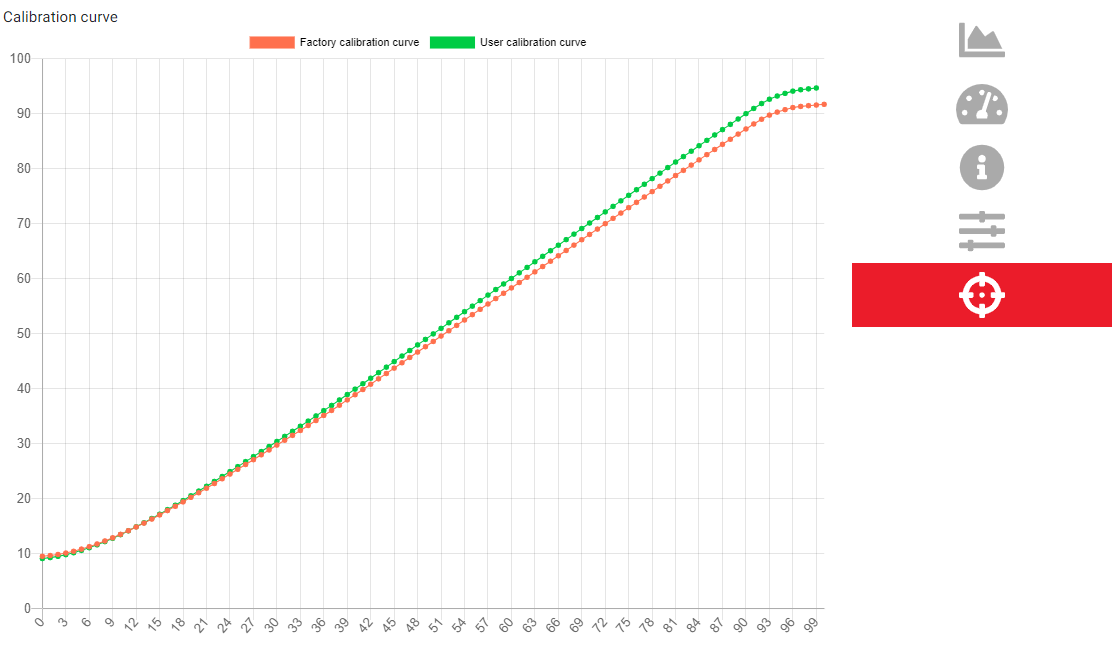
NOTE: In case of any problems and insecurity of the user calibration the probe can be always rested to the original factory calibration. |