Step 1 |
In the Microsoft Entra admin center, which can be found at https://entra.microsoft.com, go the Applications Section and click on Enterprise Applications. There click the New application button: 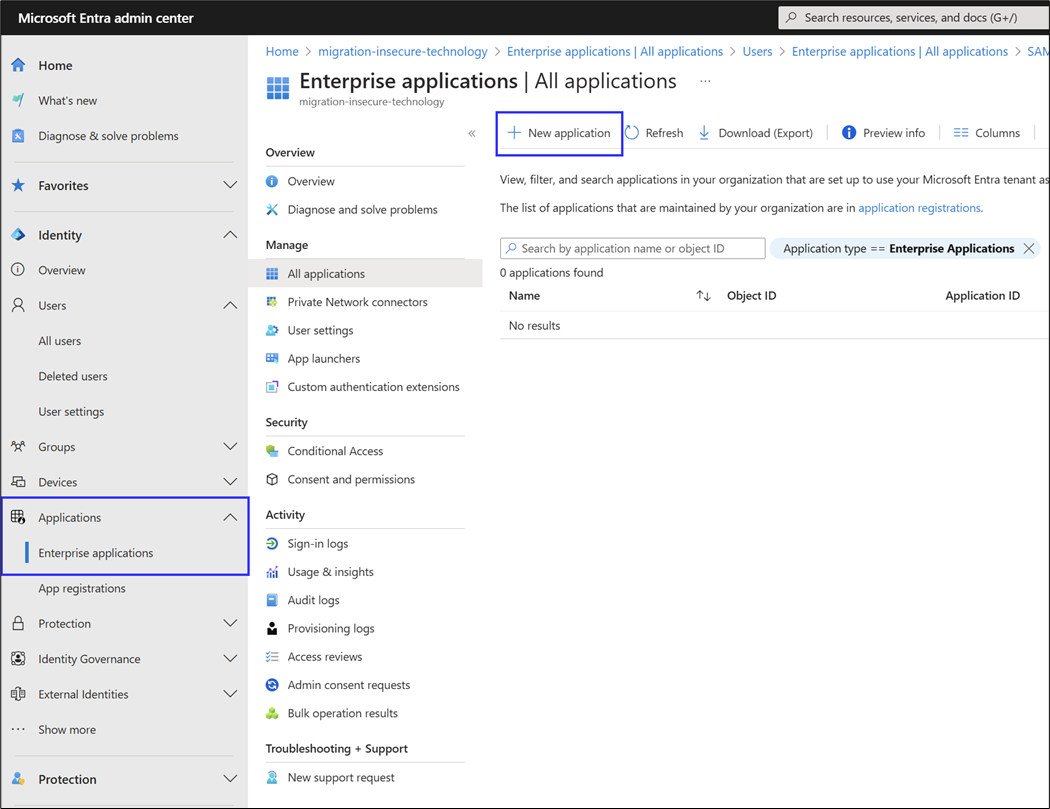 |
Step 2 |
The Microsoft Entra Gallery pops up with an application selection. There, search for the Microsoft Entra SAML Toolkit application from Microsoft Corporation and select it: 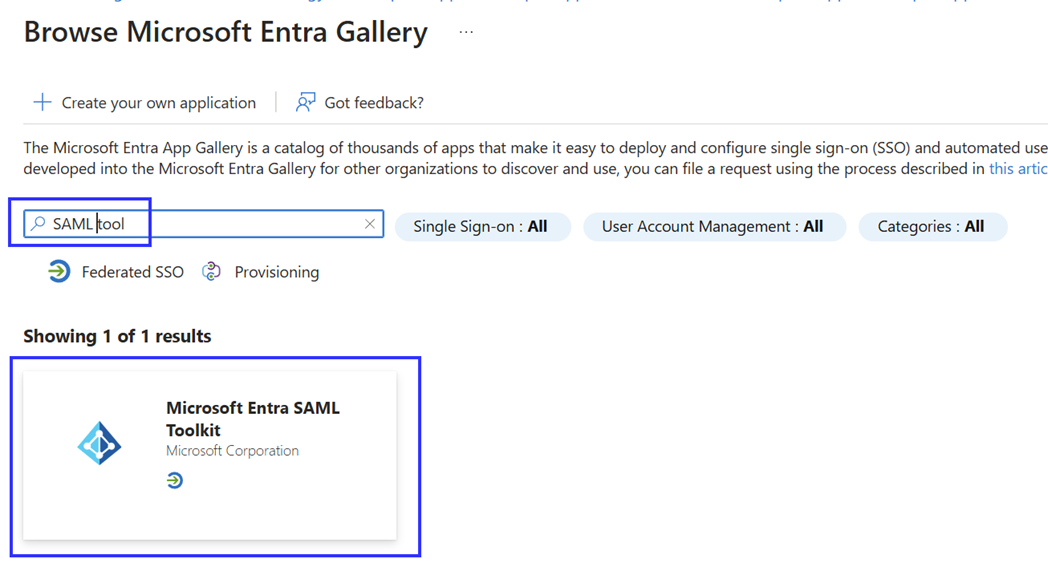 |
Step 3 |
In the form that pops up, give the application a descriptive name and click Create: 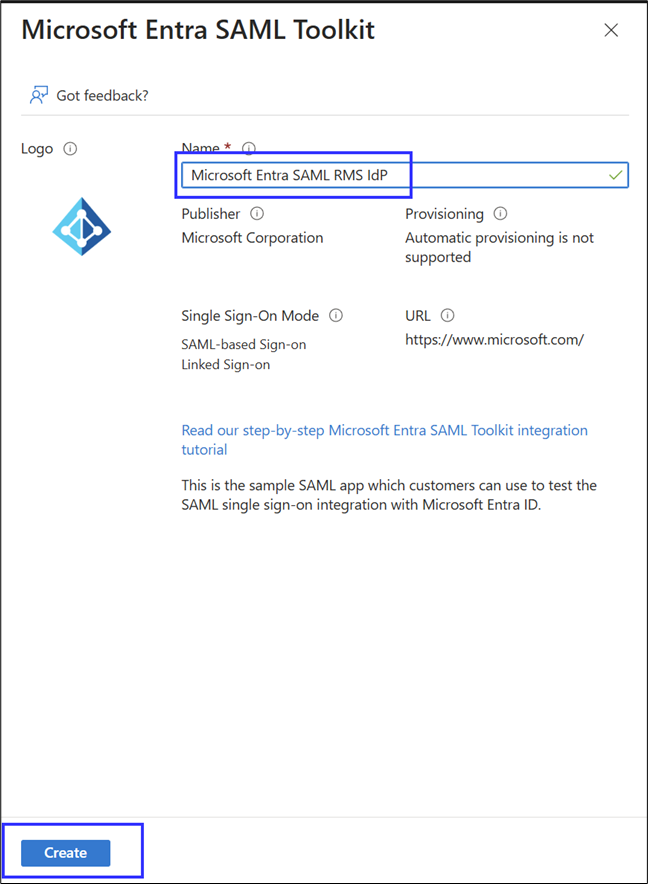 |
Step 4 |
After the application has been created, you should be redirected to the application page. If not, you can find your created application under the same Enterprise applications tab selected in the beginning. On the application page, go to the Single sign-on tab: 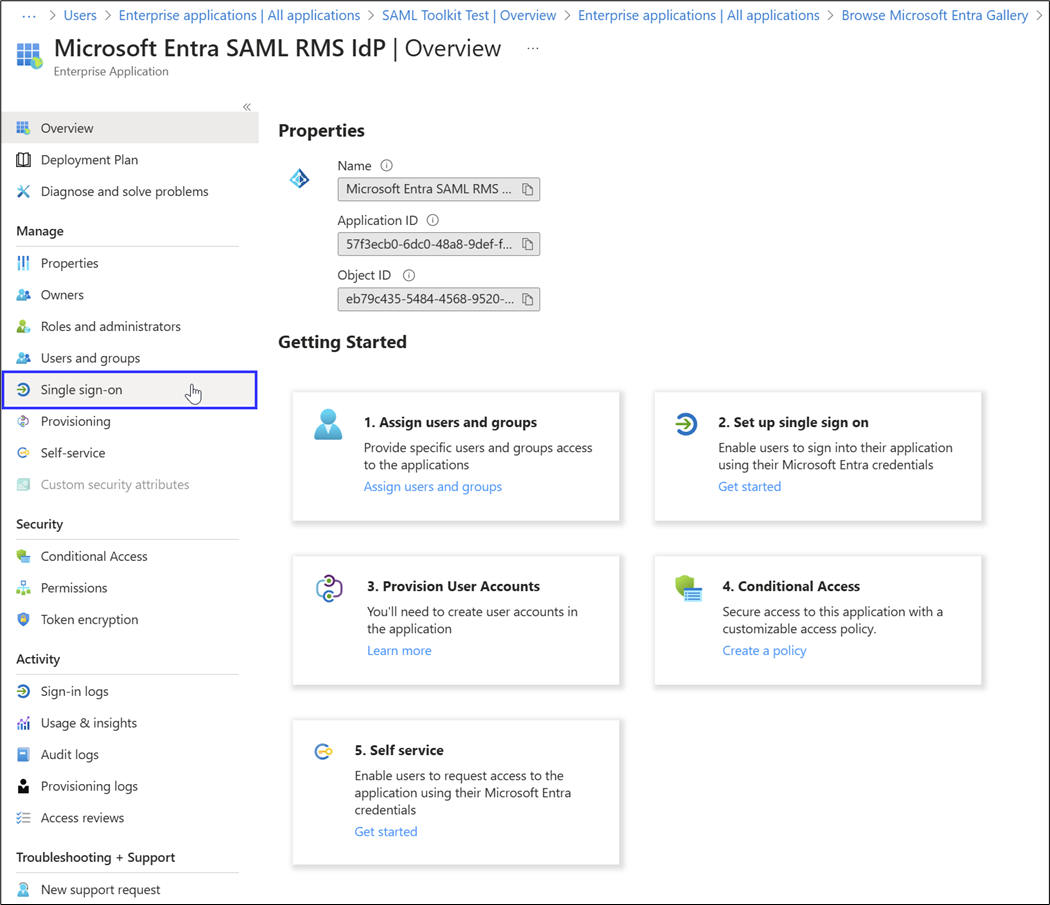 |
Step 5 |
On the first visit you will be asked what sign-on method you want to use, select SAML: 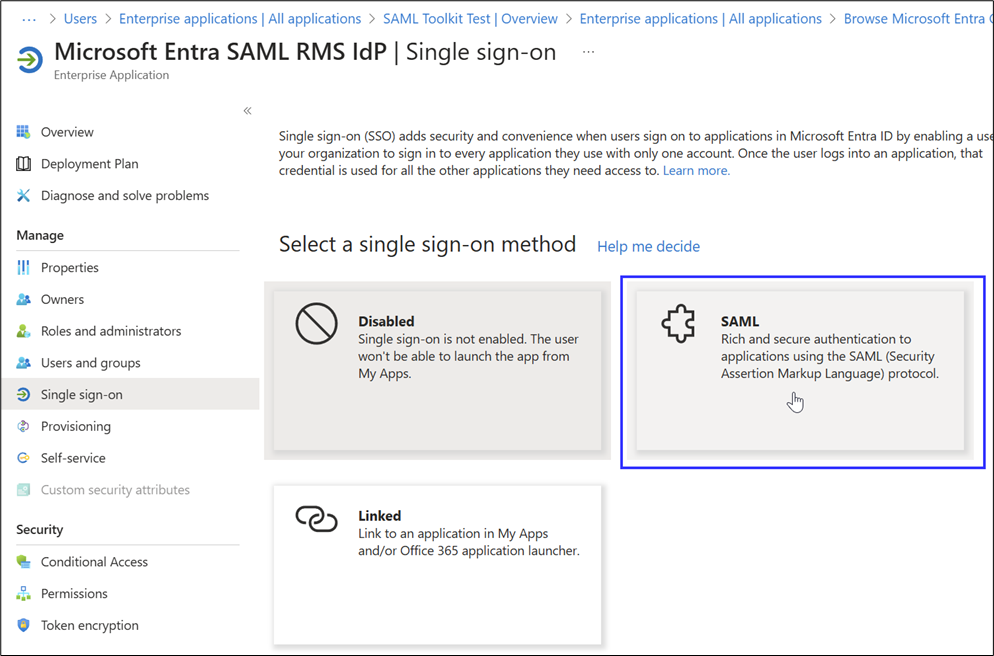 |
Step 6 |
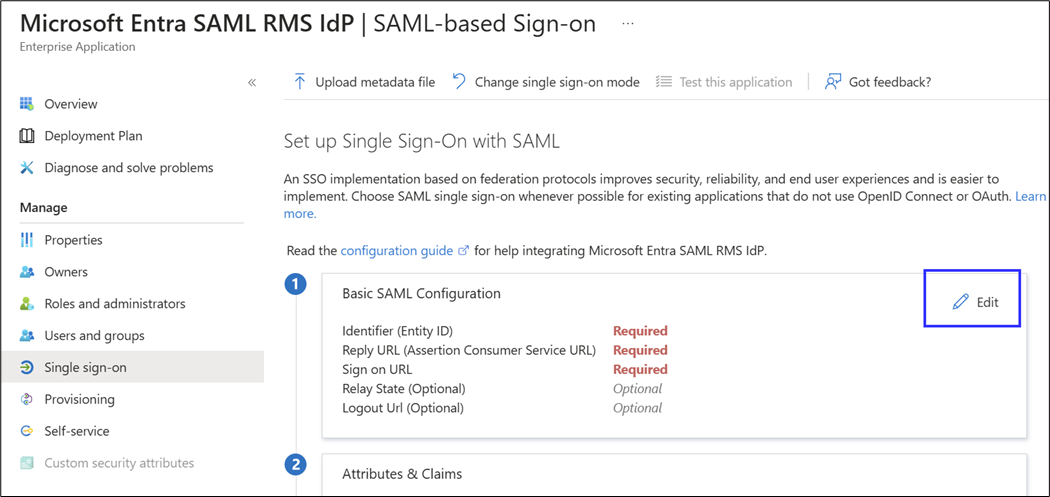
On this page click the Edit button for the Basic SAML Configuration: |
Step 7 |
There 3 values must be configured: •For the Identifier (Entity ID) the Issuer configured in your RMS application should be used, for example https://rms.rotronic.com/. •For the Reply URL click the Add reply URL button. After that the SP Assertion Consumer Service URL found on the Setup Page of your RMS instance can be copied here: 
•The Sign on URL the URL present in the address bar when you sign in to your RMS application can be copied. In the end the Configuration should look like the following. When done press the Save button at the top: 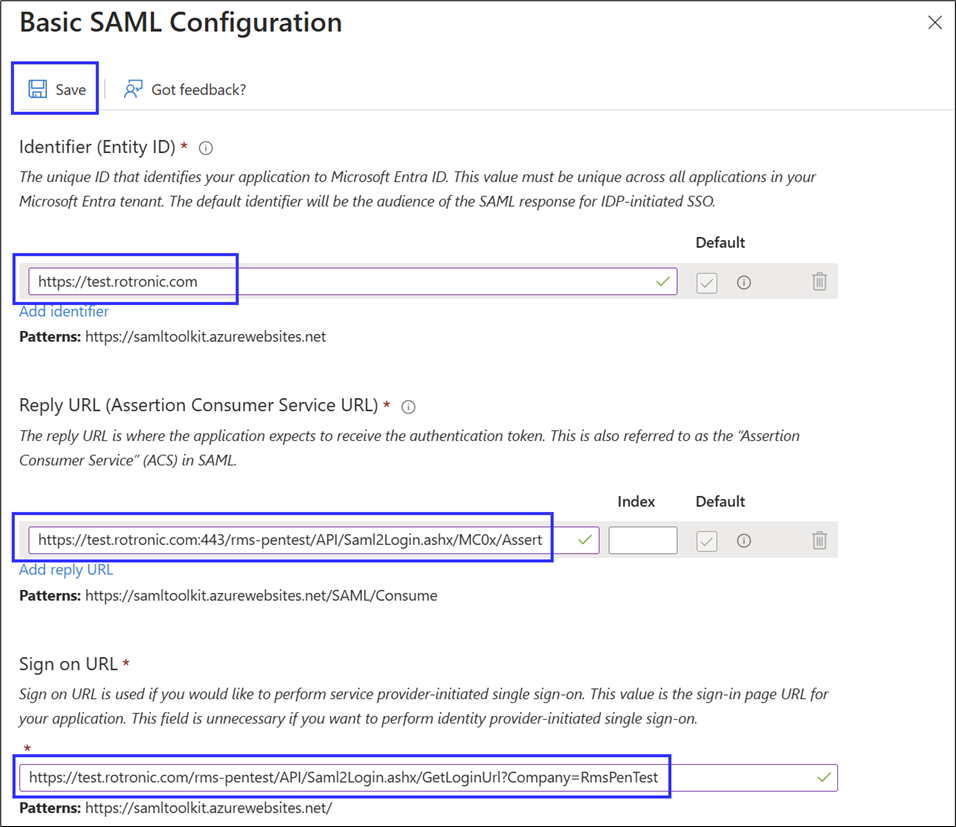 |
Step 8 |
If you want attributes from the SAML response linked to your RMS users you have to create custom attributes under Attributes & Claims. There click the Edit button:  |
Step 9 |
Now new Attributes can be created with the Add new claim button at the top: 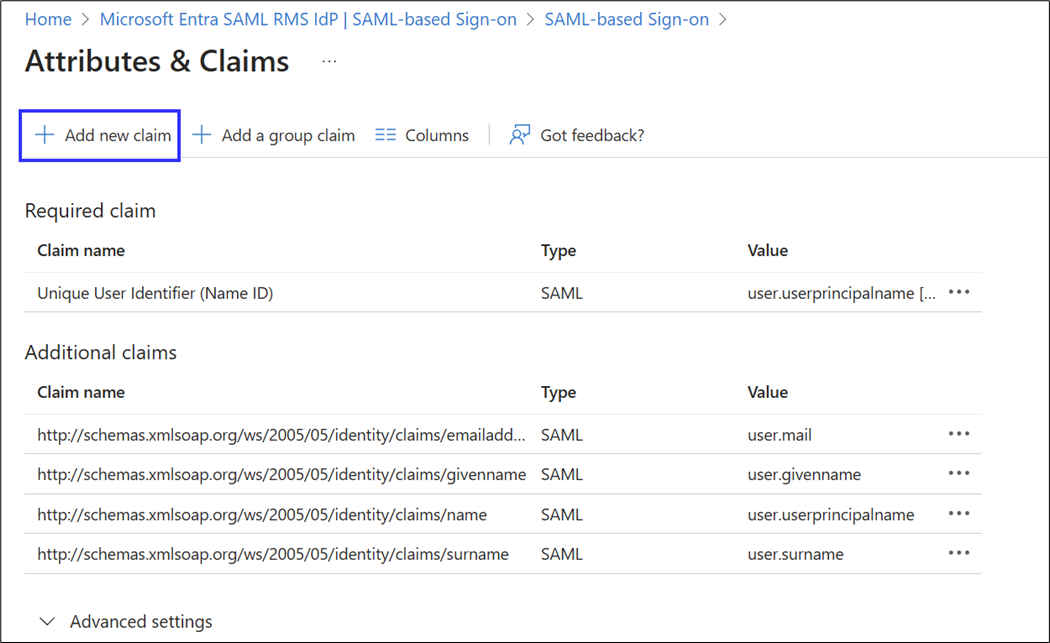 |
Step 10 |
There the attribute name and the Source attribute have to be configured, for example the display name of the Entra User can be mapped to the rms_user value in the SAML response: 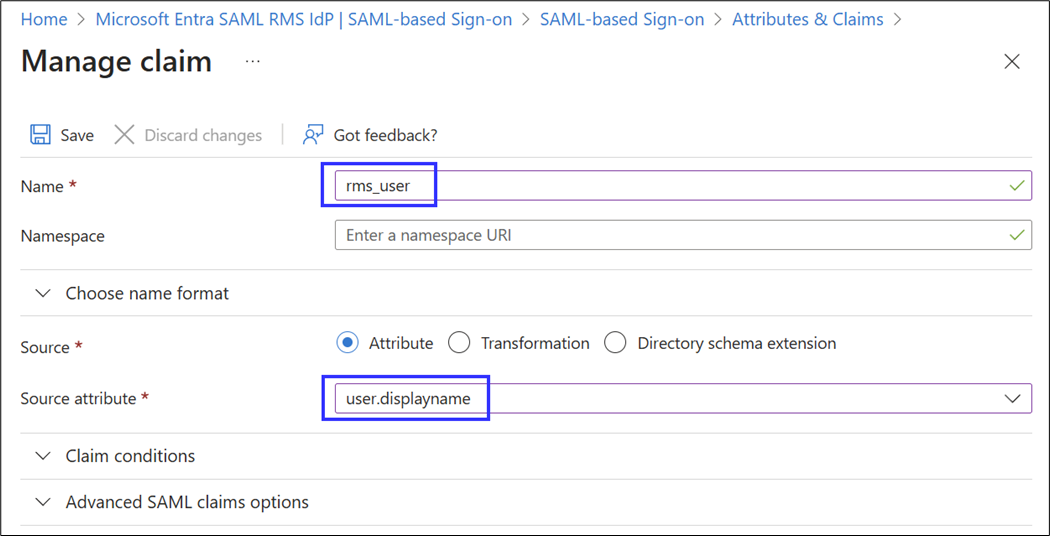 |
Step 11 |
In RMS the attributes can be configured on the Setup page with the Edit button on the Attribute mapping setting. There the given attribute name can be mapped to RMS user properties: 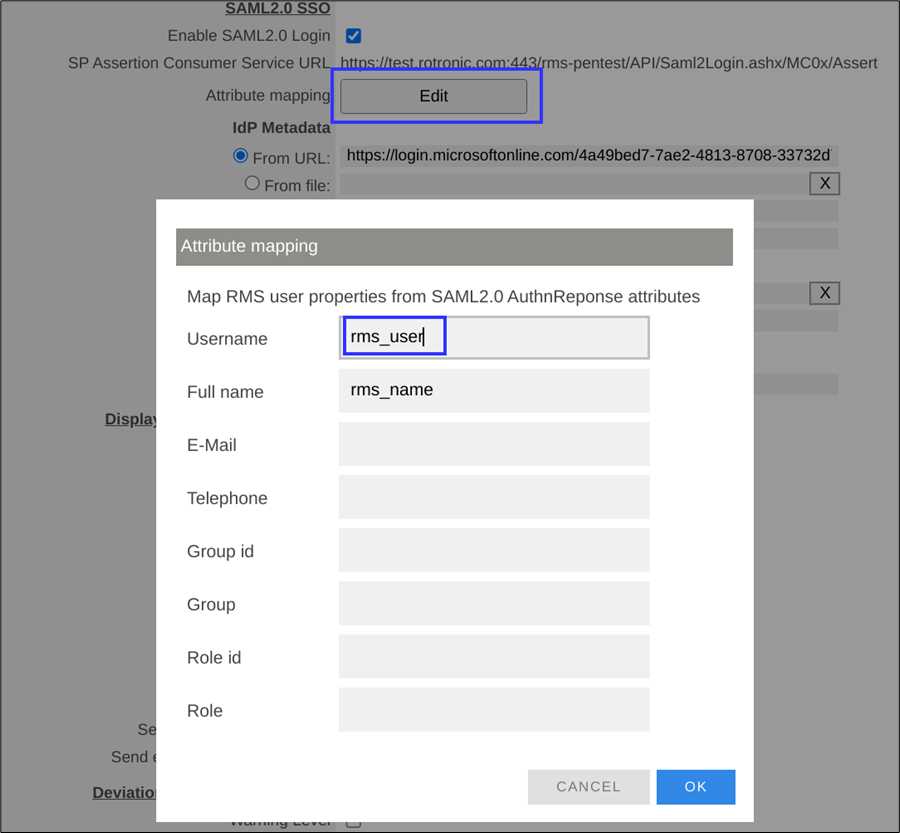 |
Step 12 |
The last step to is to add the App Federation Metadata URL found on the Single sign-on page of your Entra application to your RMS configuration: 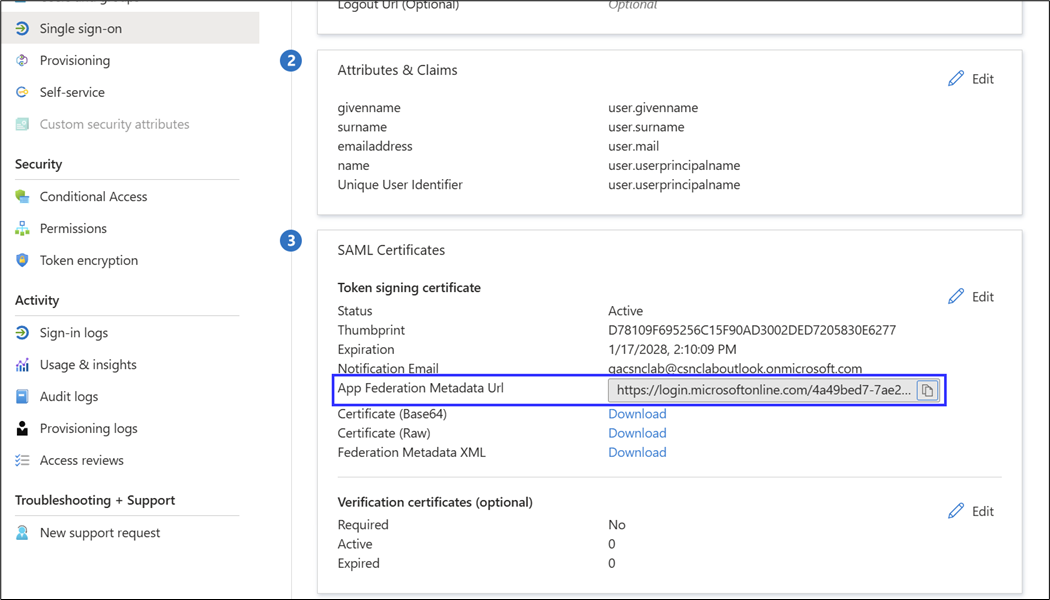 |
Step 13 |
The copies Metadata URL can then be inserted on the Setup page in RMS in the IdP Metadata From URL field. When configured press the Save button at the top of the setup page: 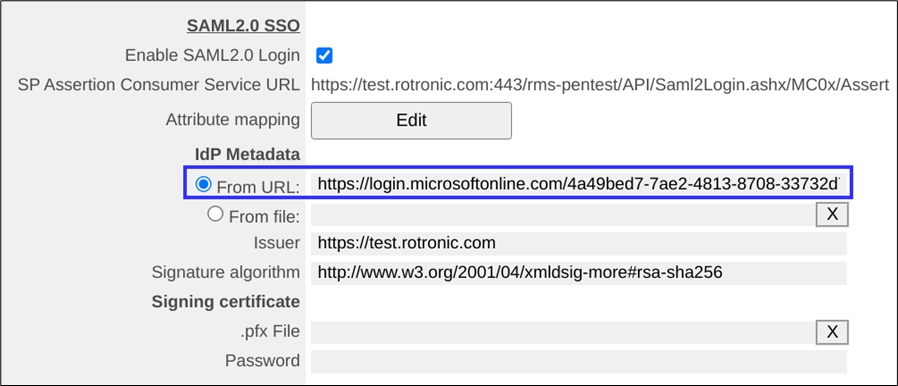 |
Step 14 |
With this configured the Sign using SAML2.0 SSO button should be present on your RMS login page when your application name is entered: 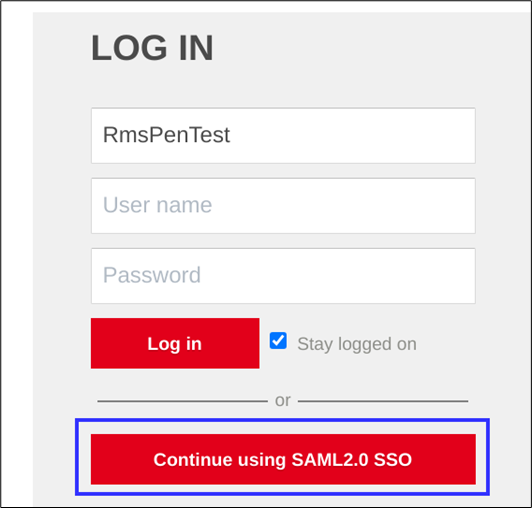 |
