Step 1 |
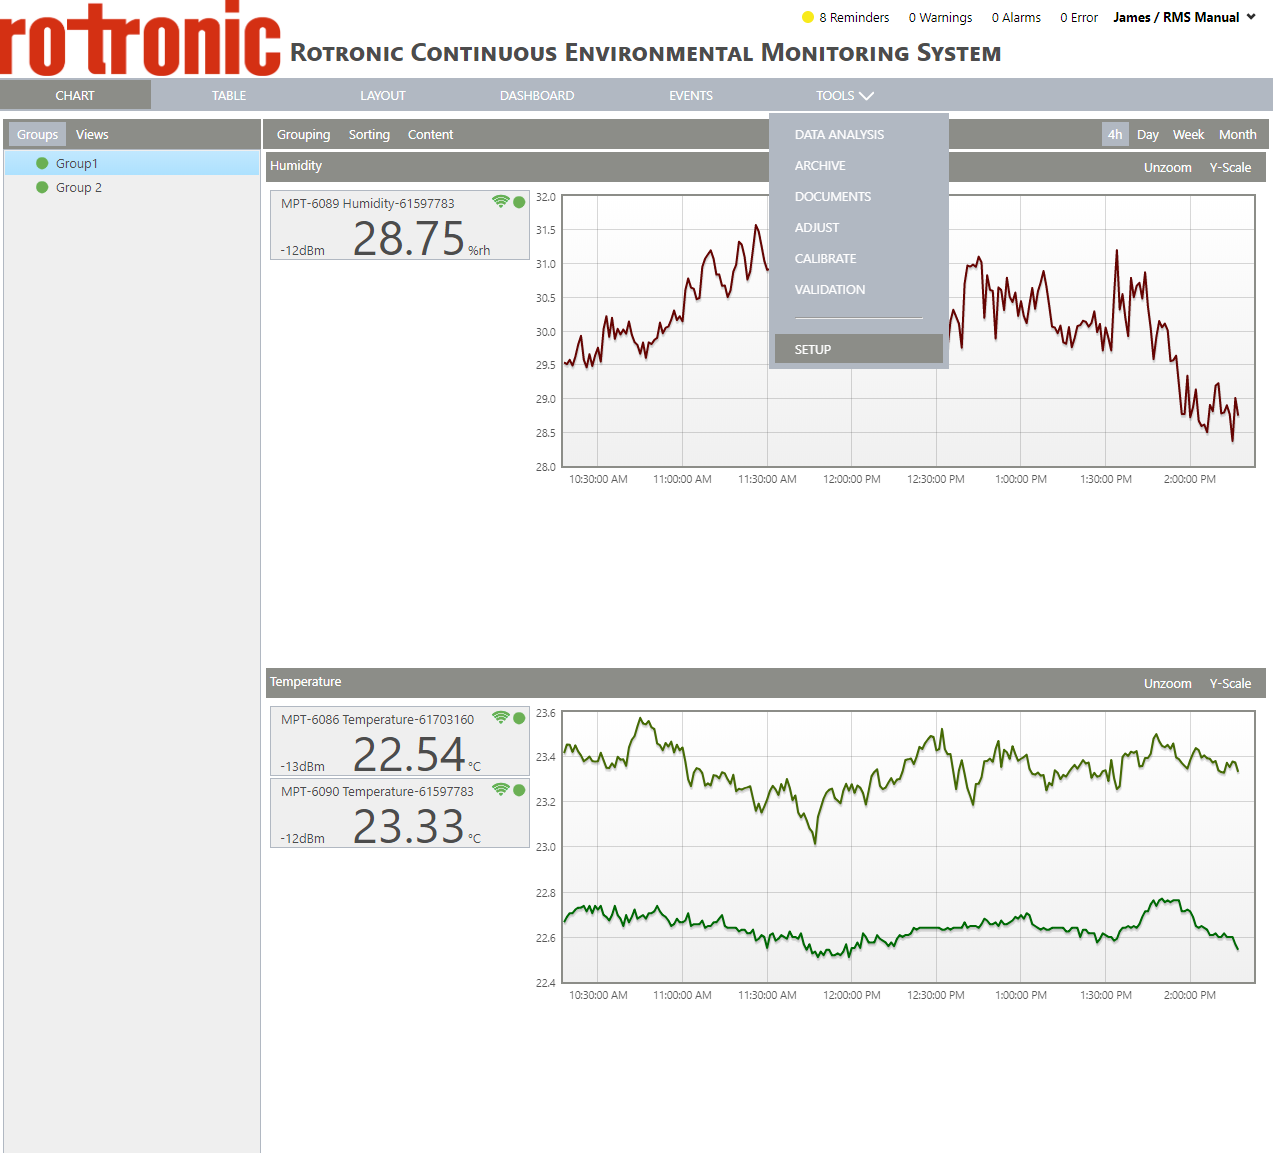
From the start page, click on "Tools" > "Setup":
|
Step 2 |
On the left side, select "System": 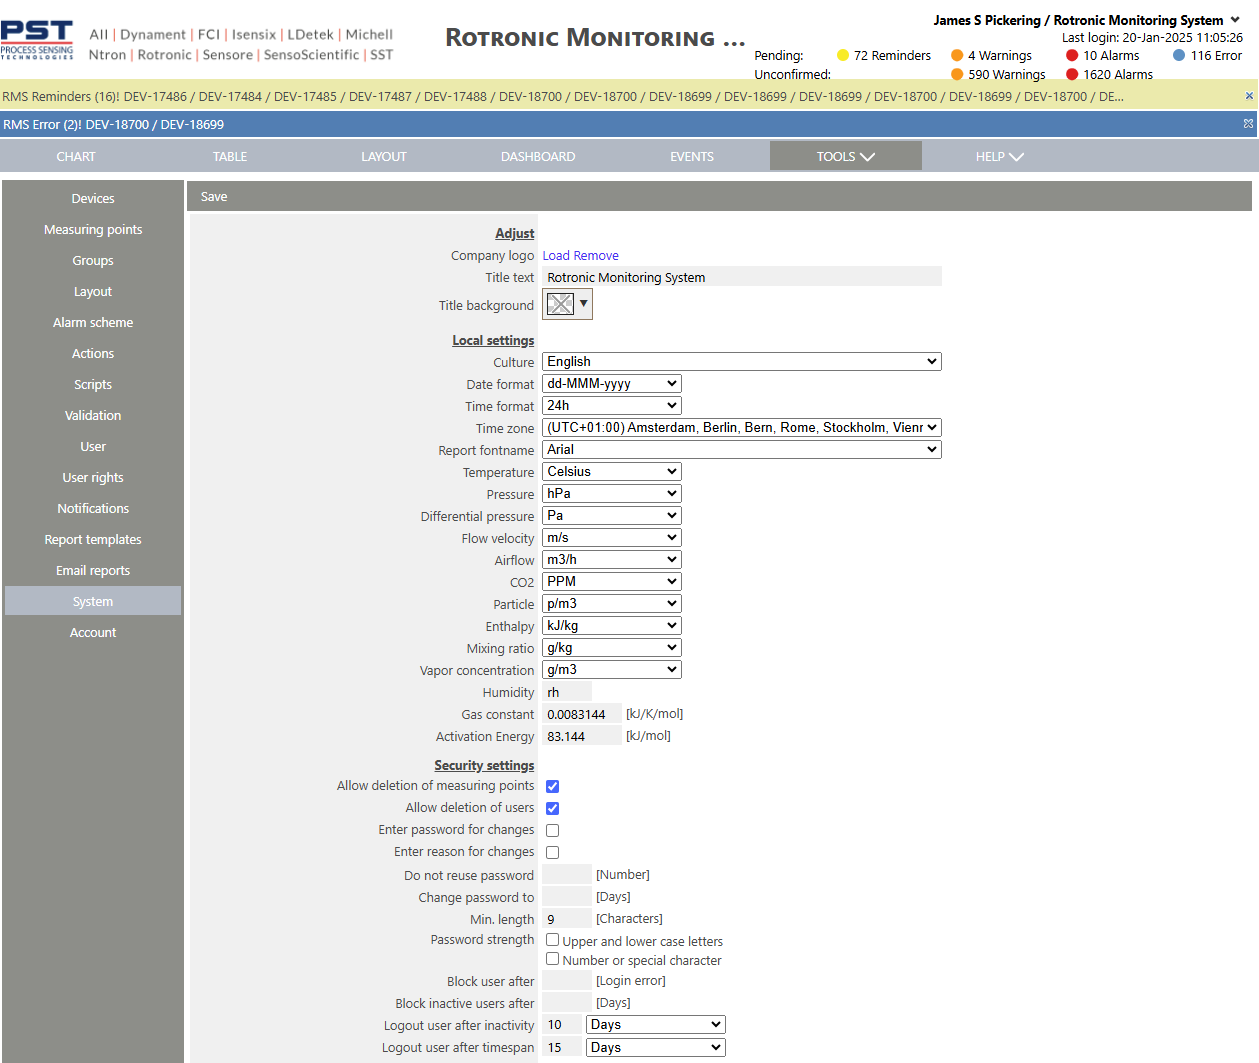
Scroll down to the SSO menu:  |
Step 3 |
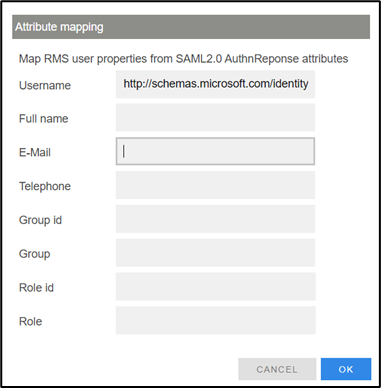
Setup Example: 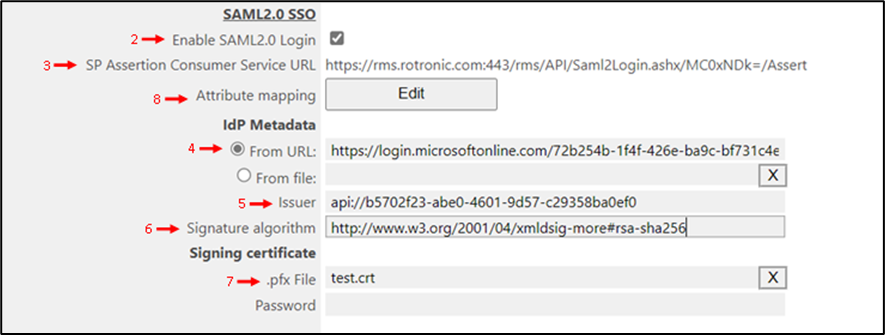 Configure the following: 1.Ensure that the user making the changes has the correct user rights. 2.Click on enable SAML2.0 Login. 3.Add the SP for the RMS cloud server to the IdP, which is found under “SP Assertion Consumer Service URL” 4.Select “From URL”. This is found in the IdP. This is the URL where the SSO login will come from. 5.Get the “Issuer” within the IdP. This may be called “Tenant ID” or “Entity ID” depending on the IdP. 6.Get the “Signature Algorithm” from the IdP. 7.Attach the signing certificate from the IdP. If there are multiple, please create a .pfx that contains all. 8.Add at least 1 attribute for the user. Click the “Edit” button next to “Attribute Mapping” and enter the URL found in their IdP for at least the username (Note: Username is mandatory, and all other fields are optional).
 |
Step 4 |
Click on "Save" to save the settings. |
Step 5 |
Click on the User menu, select all users that will login via SSO and click on enable SAML2.0 login and click on save: 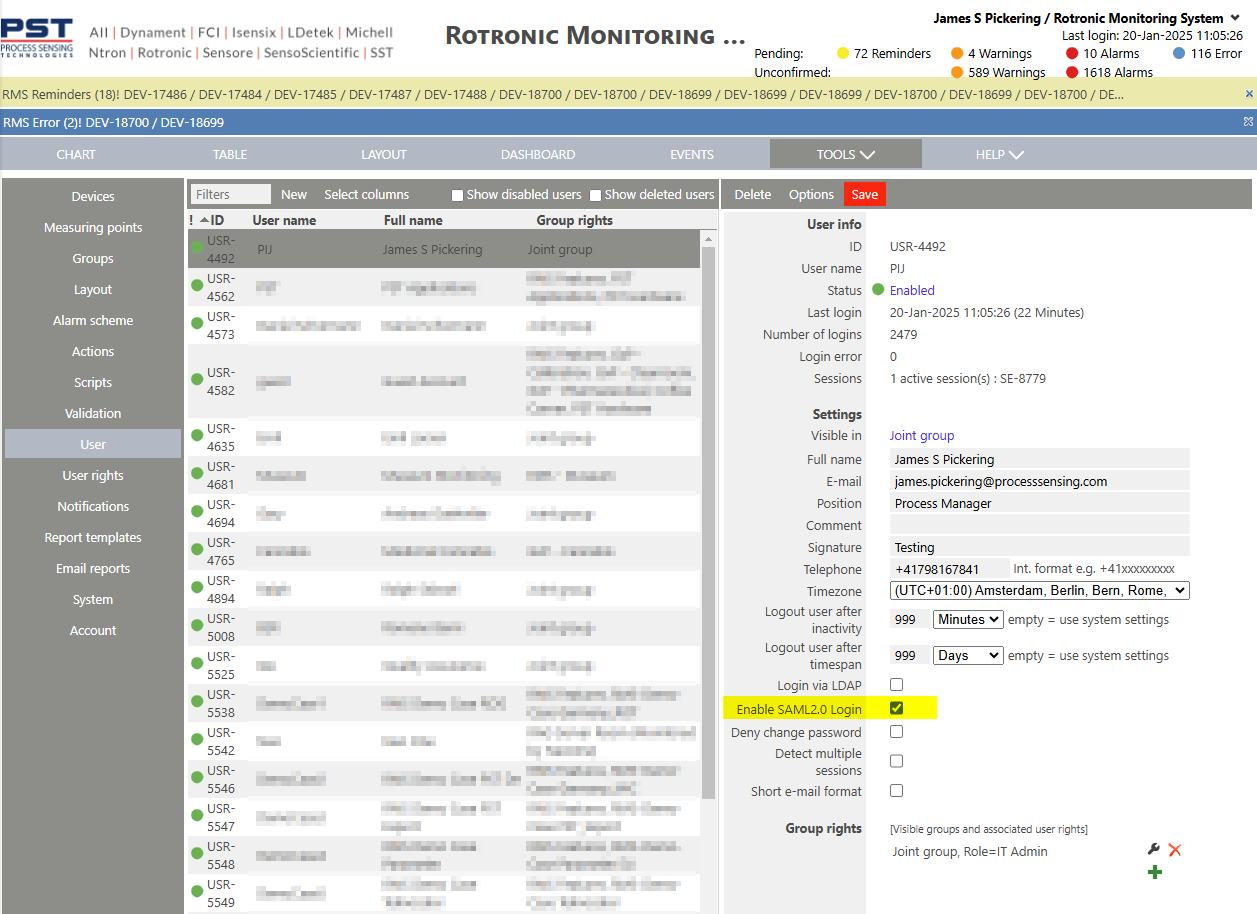 |
Step 6 |
When logging into the system, the user will have the possibility to login via SAML2.0 SSO: 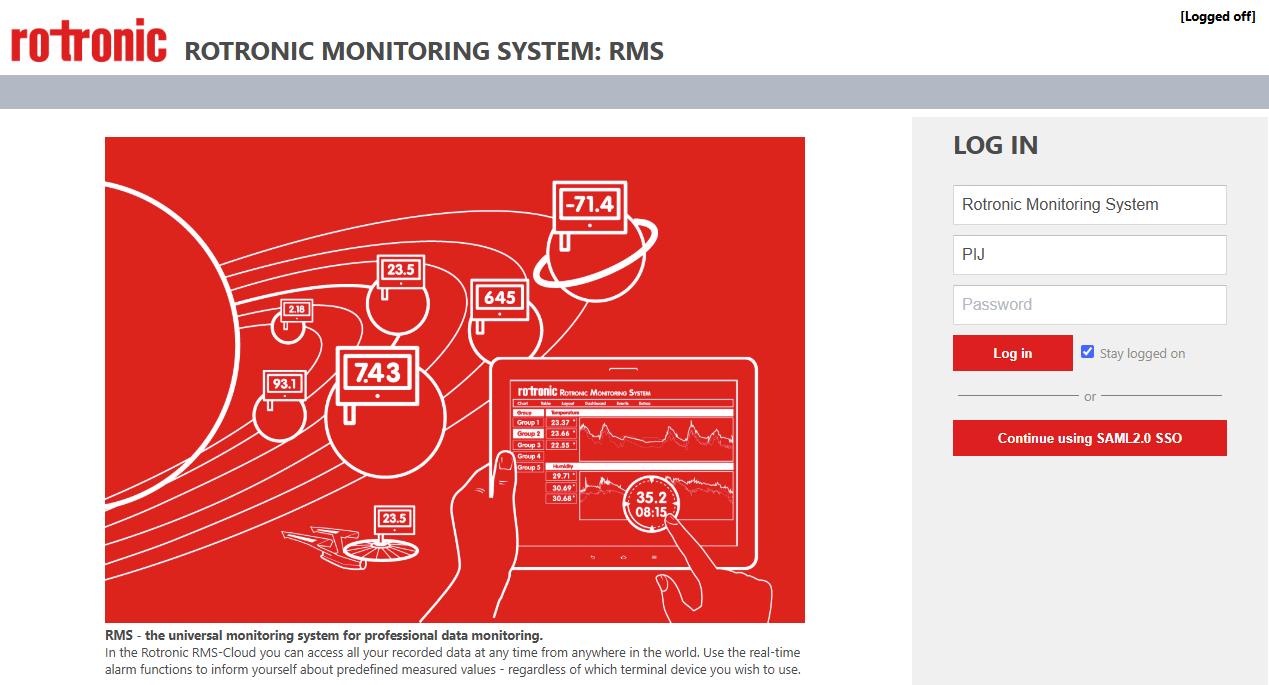 |
Step 7 |
See here for the Microsoft Entra SSO Setup. |