Step 1 |
Double click on the "SQLEXPRWT_x64_ENU.exe" that is saved on the desktop.
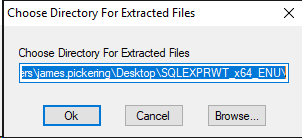
Choose the directory for the extracted files. Click on "OK". The "SQL Server Installation Center" will open.
|
|---|---|
Step 2 |
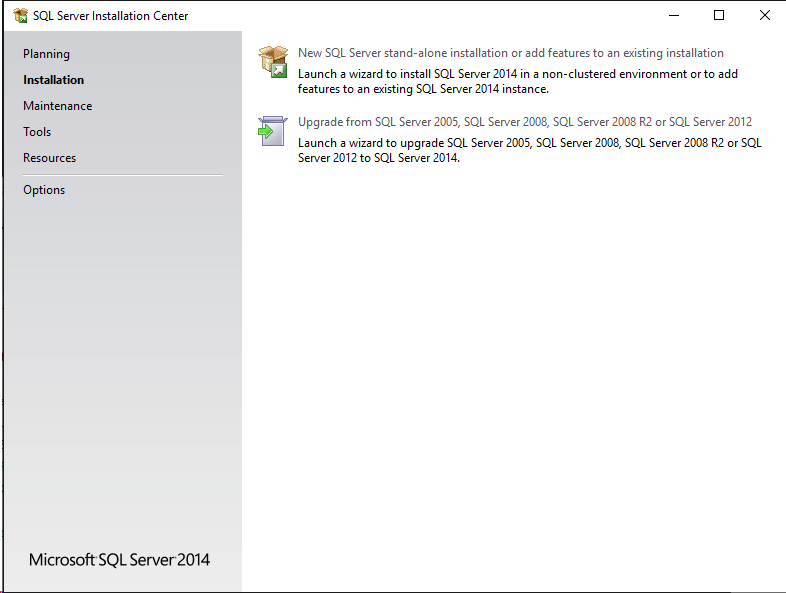
Select "New SQL Server stand-alone installation or add features to an existing installation".
|
Step 3 |
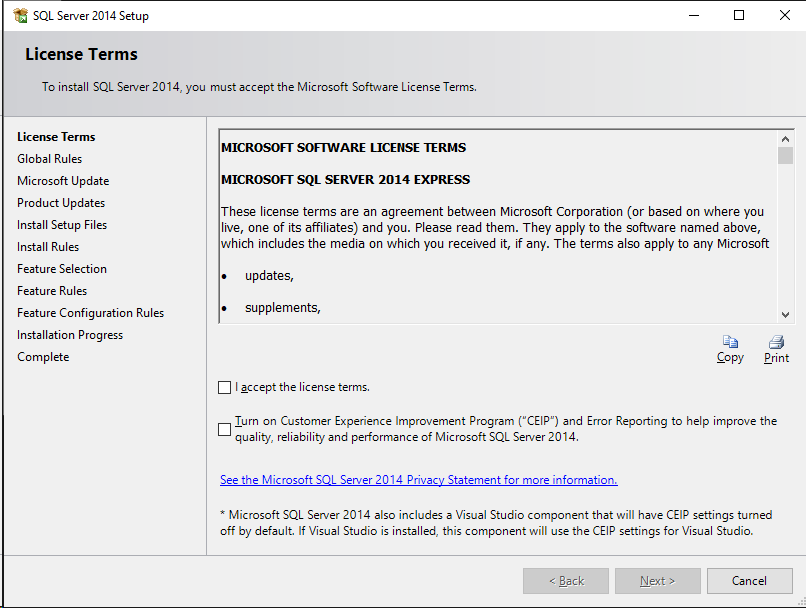
Read the License Terms and tick "I accept the license terms". Then click on "Next".
|
Step 4 |
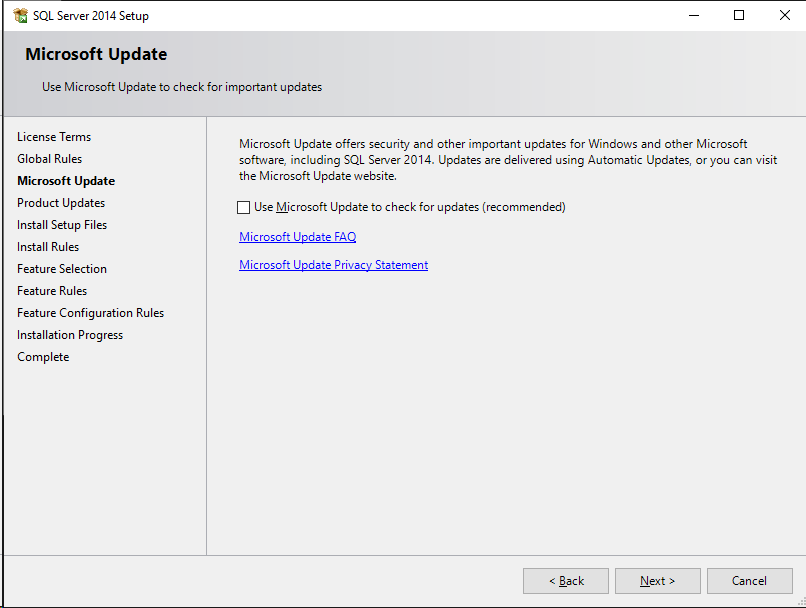
Select if Microsoft Update should check for updates or not. Then click on "Next".
|
Step 5 |
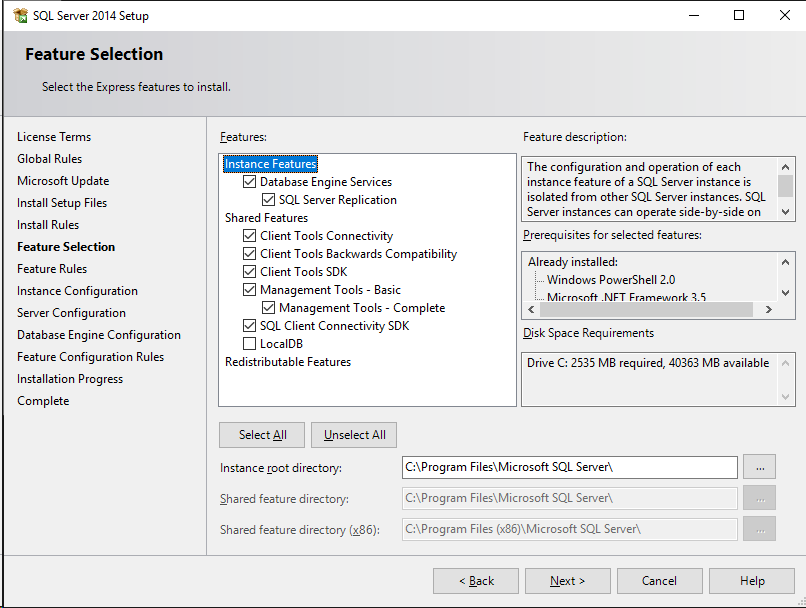
Feature Selection: Select the features seen in the print screen (these are the standard features already offered by SQL when carrying out the setup). Then click on "Next".
|
Step 6 |
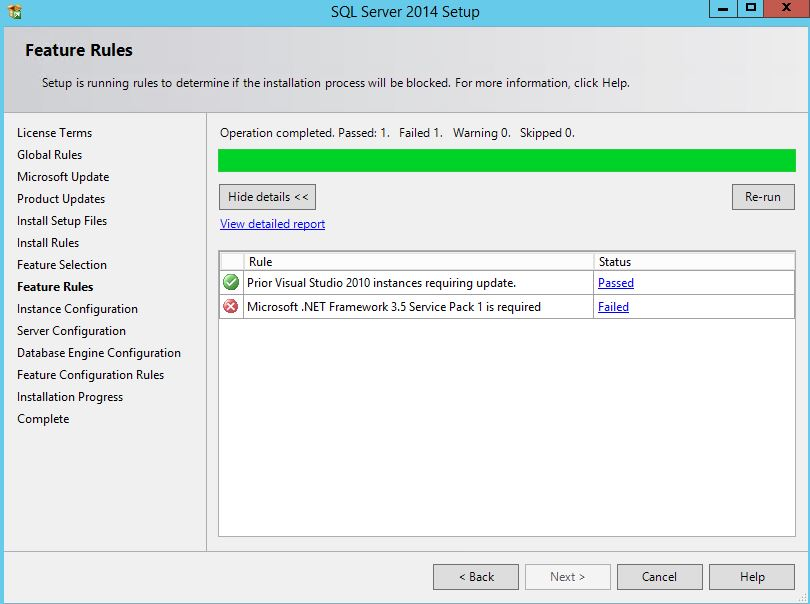
If the .NET Framework V3.5 is not yet installed, an error is reported.
Installation of .NET-FW V3.5 in Server Manager
Once the .NET-FW V3.5 is installed continue the installation process.
|
Step 7 |
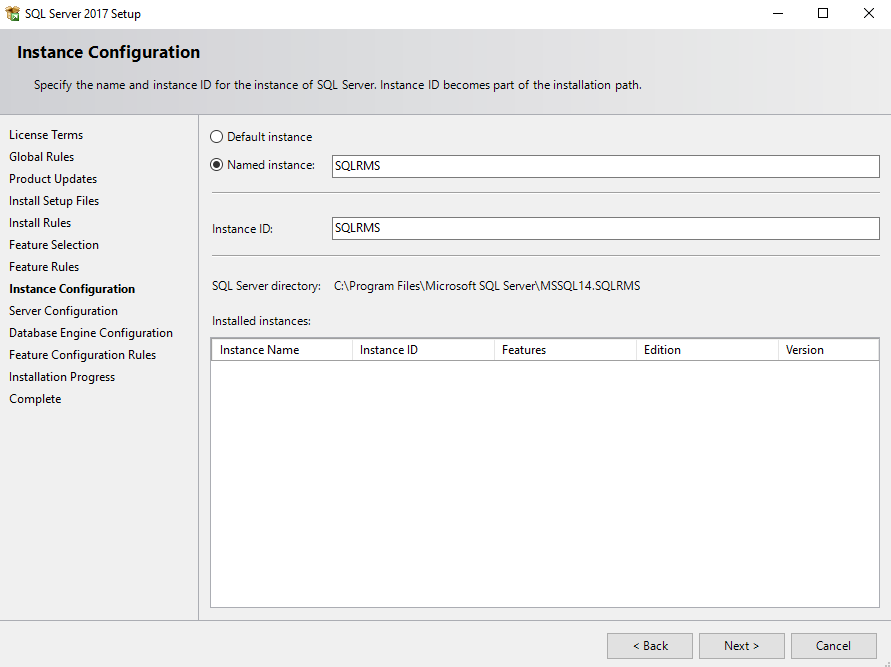
Instance Configuration: Change the named instance to SQLRMS and go to "Instance ID" with the tab key. SQL Server Setup will fill in the ID automatically with the named instance name. Then click on "Next".
|
Step 8 |
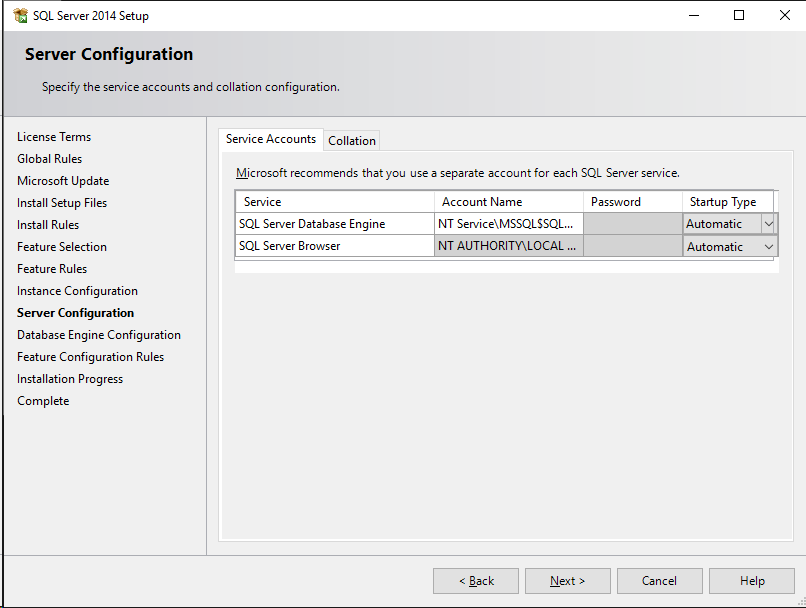
Server Configuration: Make sure that the SQL Server Browser is set to Automatic. Then click on "Next".
|
Step 9 |
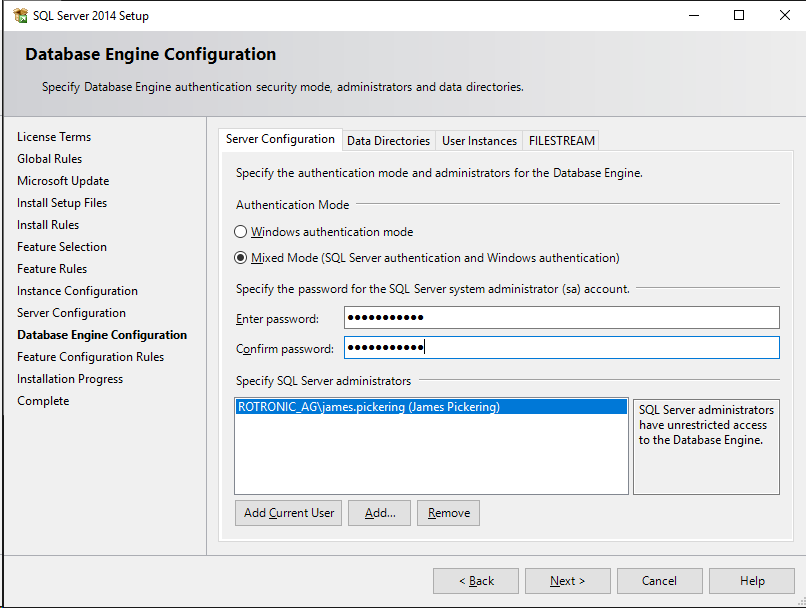
Database Engine Configuration: Select the Mixed Authentication mode, then specify the password for the SQL Server system administrator (sa) account.
Recommendation Rotronic: Rotronic123.
Then click on "Next".
|
Step 10 |
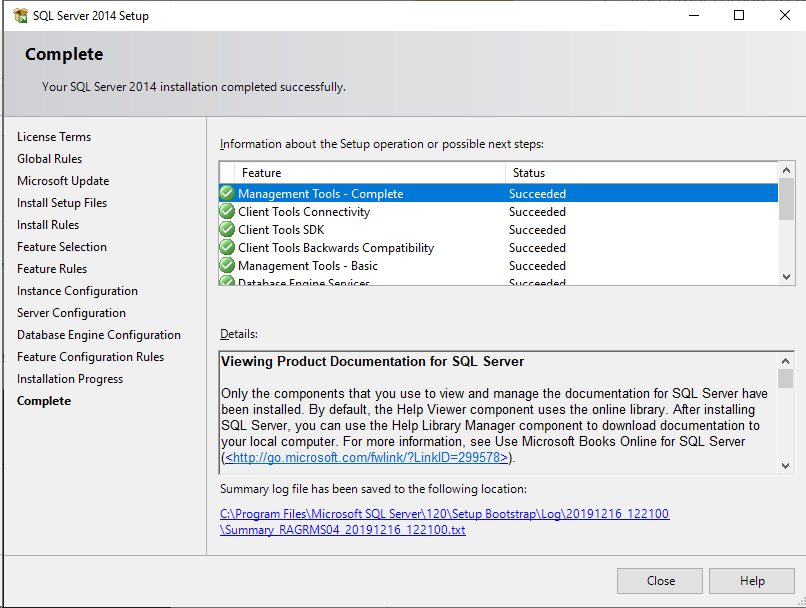
The SQL Server 2014 Setup is now complete. Click on "Close".
|