Step 1 |
Add a text label by selecting "Add label" > "Text label":
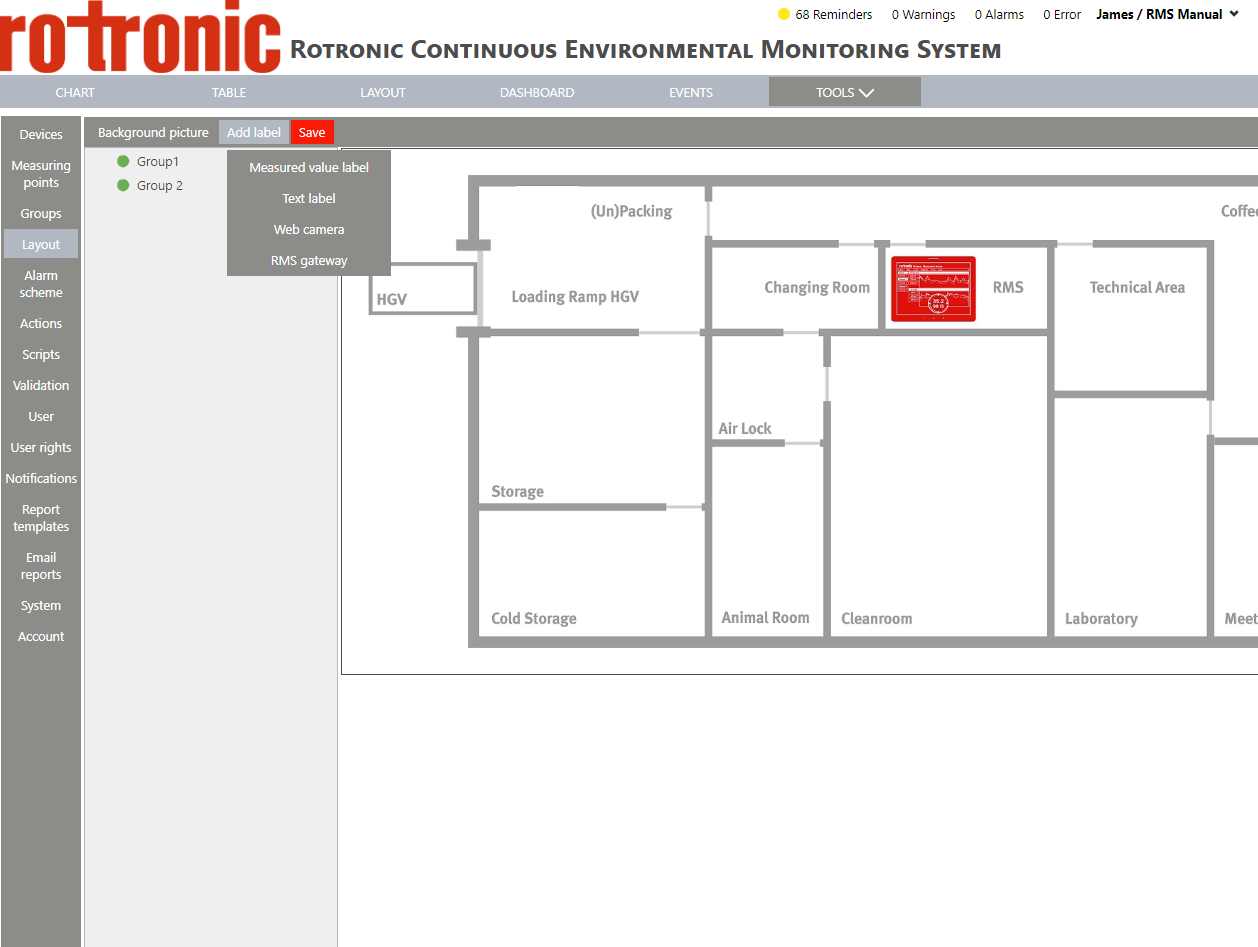
|
Step 2 |
The label appears on the background:
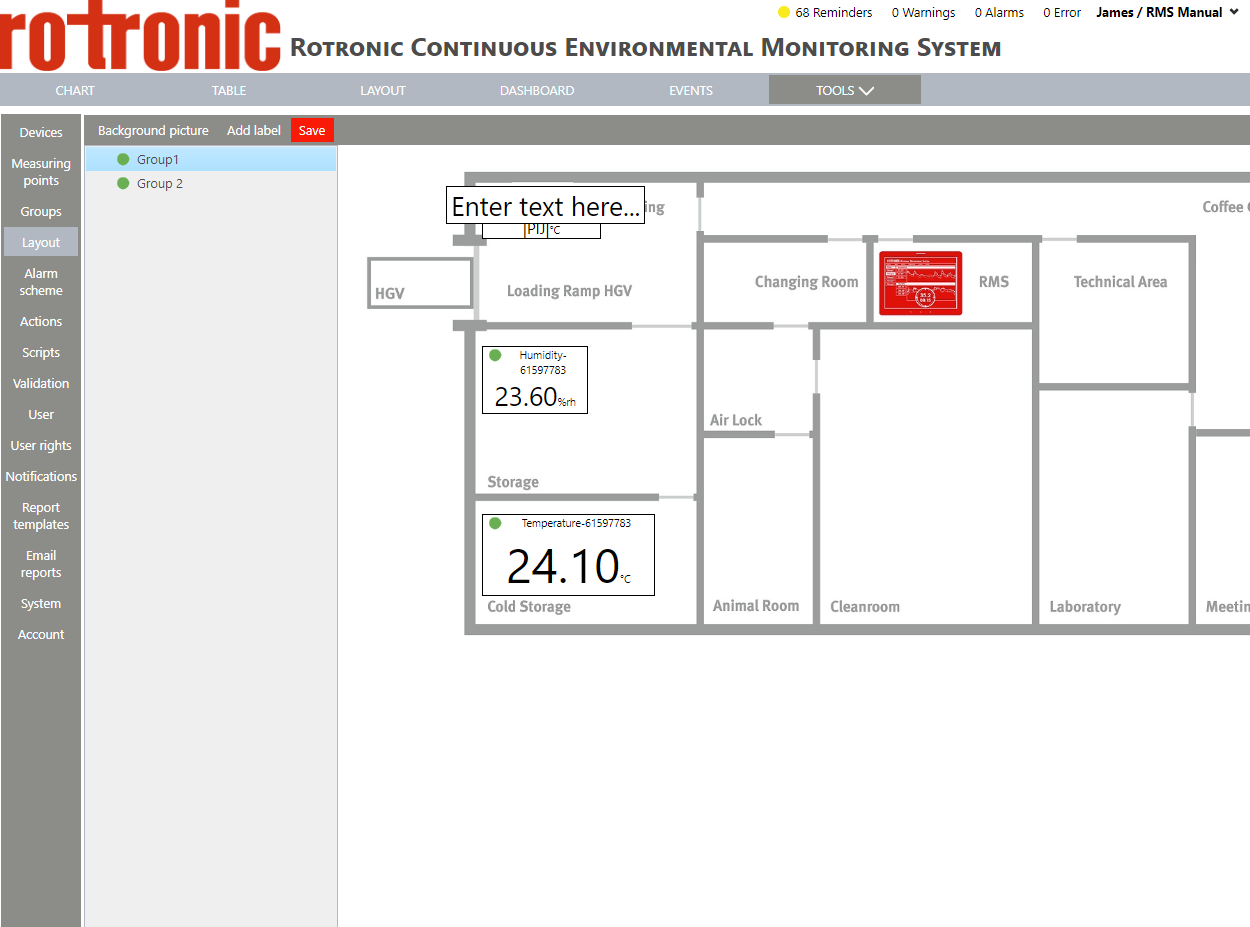
|
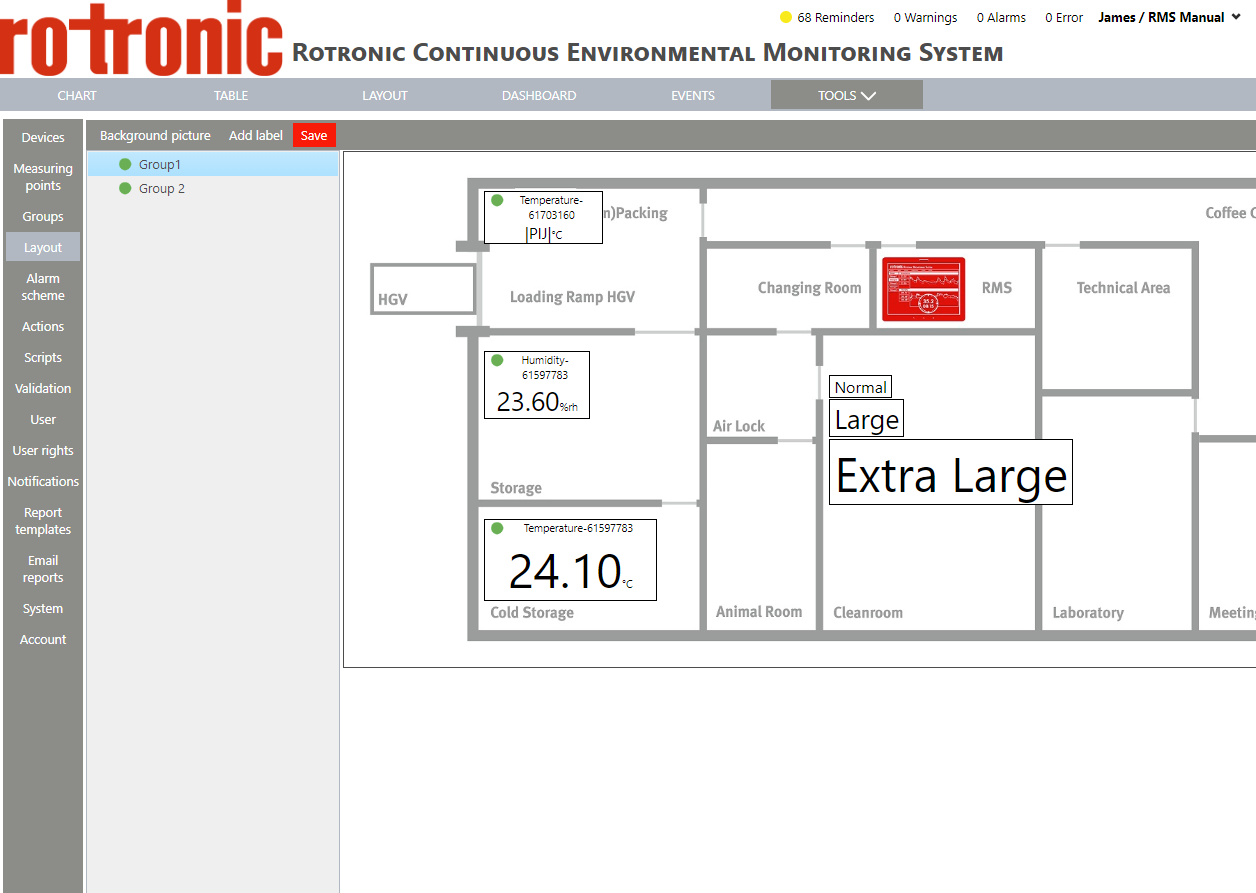
Step 3 |
Using the mouse, click on the measuring point box and drag and drop the box to the desired location:
|
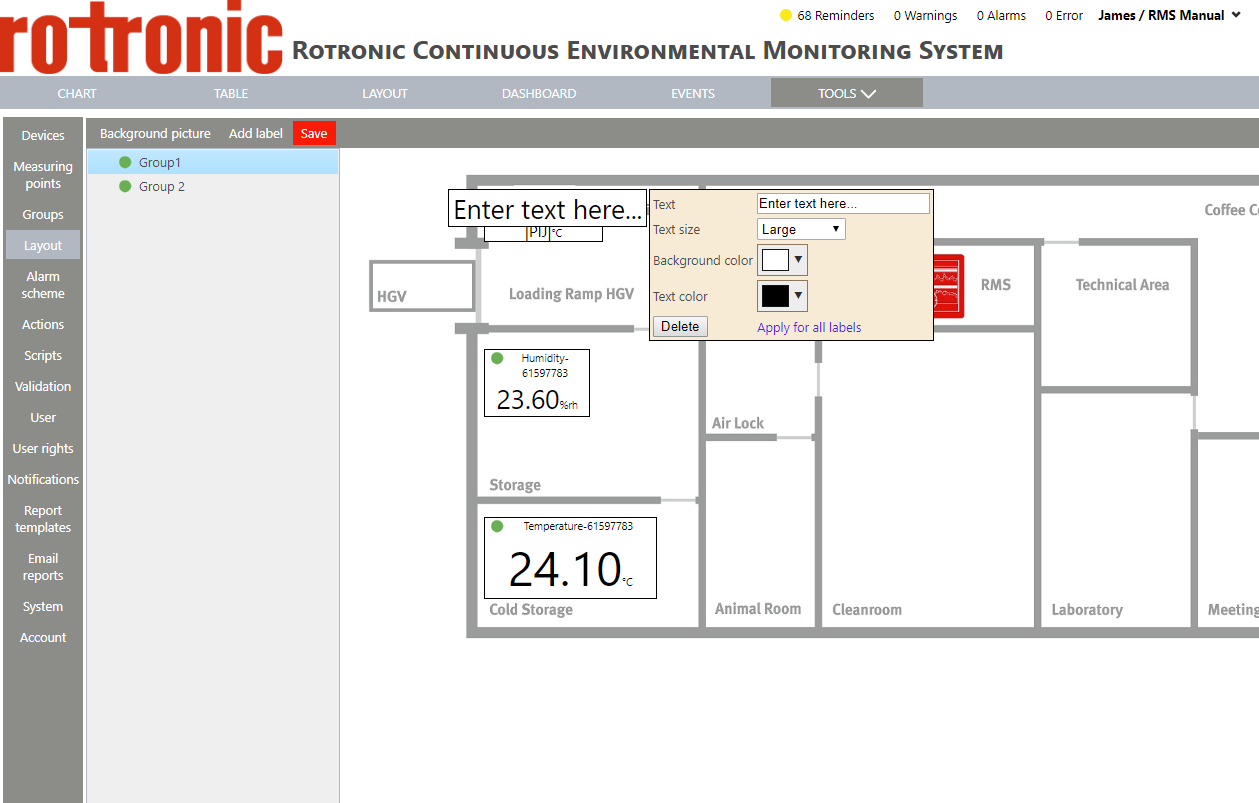
Step 4 |
Click on the text within the dialog box saying "Enter text here..." to open up the label's menu:
|
Step 5 |
Text: Click on text to enter the desired text. |
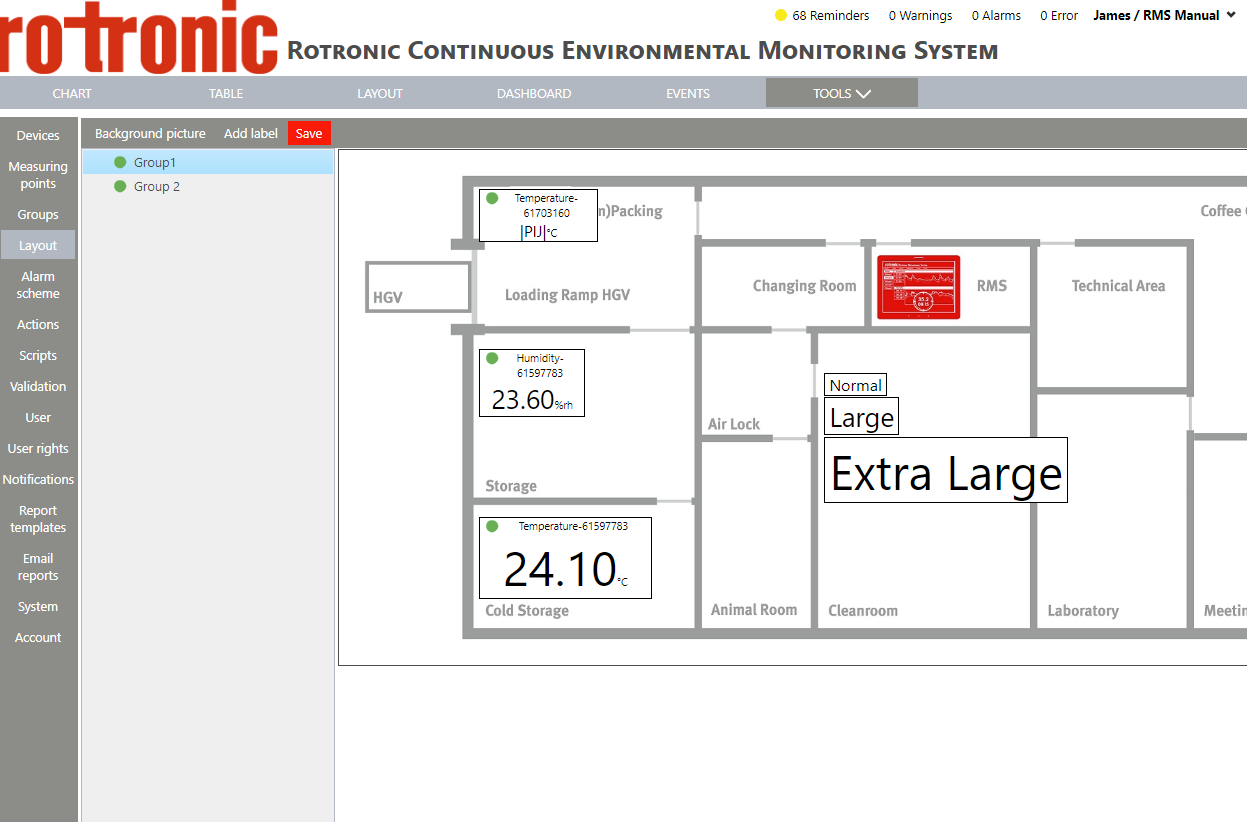
Step 6 |
Text size: select between "normal", "large" and "extra large" and click on "OK".
"Normal", "large" and "extra large" are shown in the same order below:
|
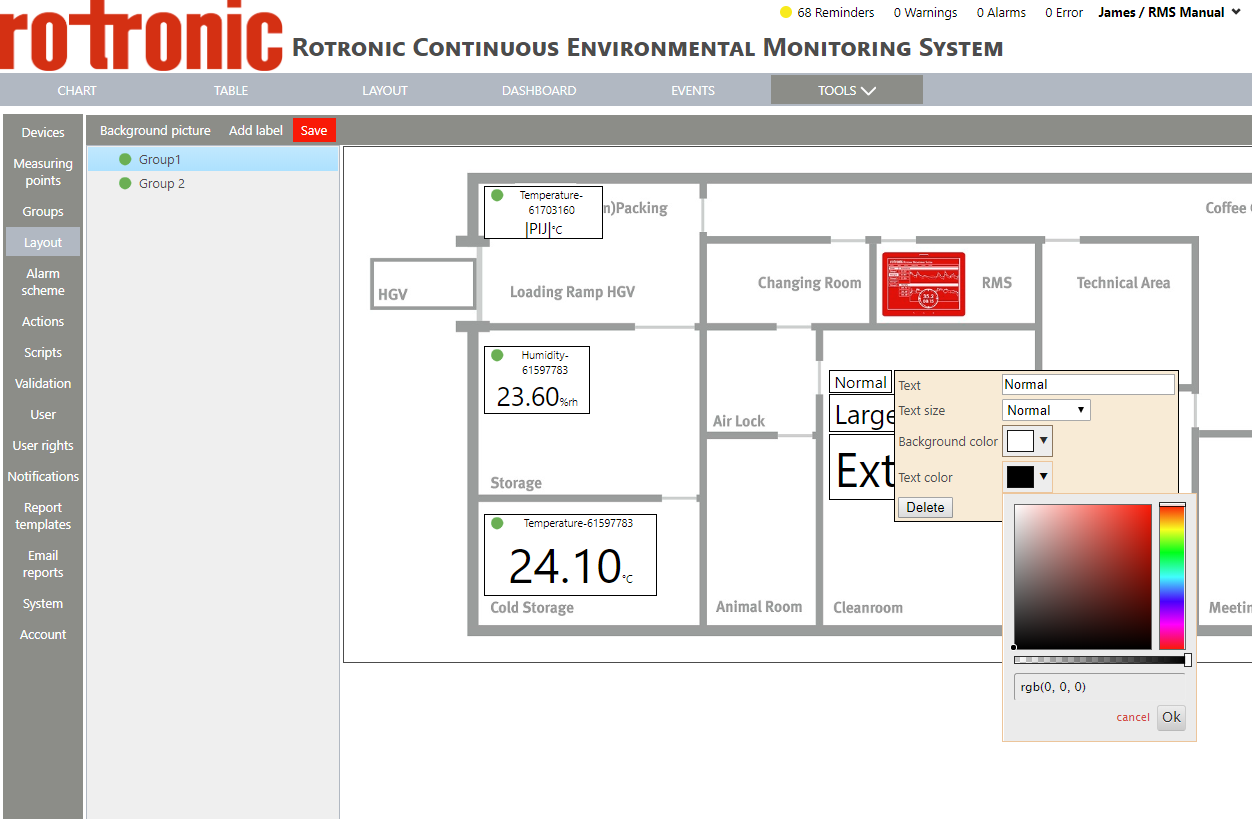
Step 7 |
Background color: select a color for the background and click on "OK"
|
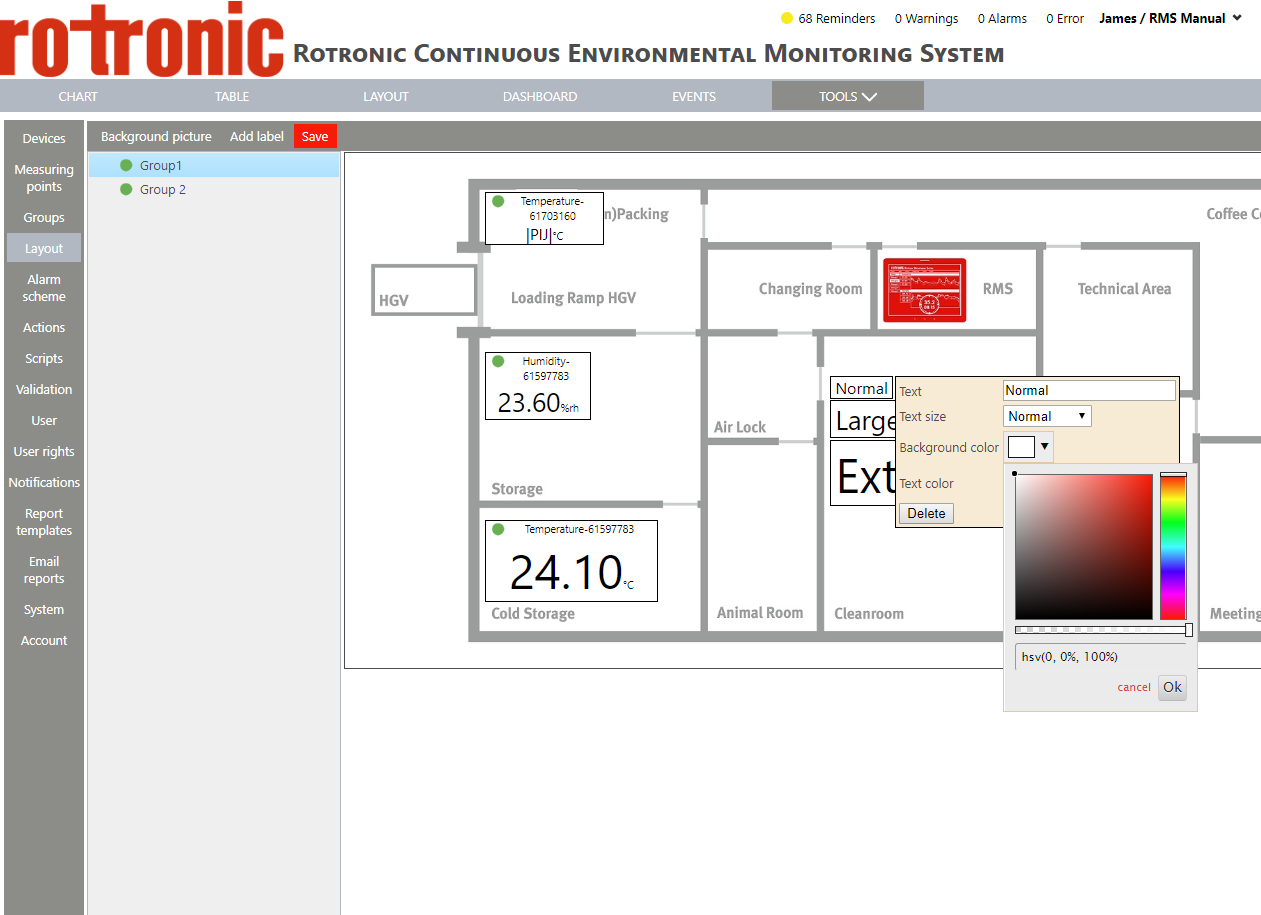
Step 8 |
Text color: select a color for the text and click on "OK"
|
Step 9 |
Delete: click on "Delete" to delete the text label. |
Step 10 |
Apply for all labels: click on "Apply for all labels" to apply the settings for all labels. |