Installation

<< Click to Display Table of Contents >>

Navigation:  Humidity & Temperature Devices > Transmitter > HF5A >

Installation

The following instructions describe installation of the transmitter step by step


Step 1

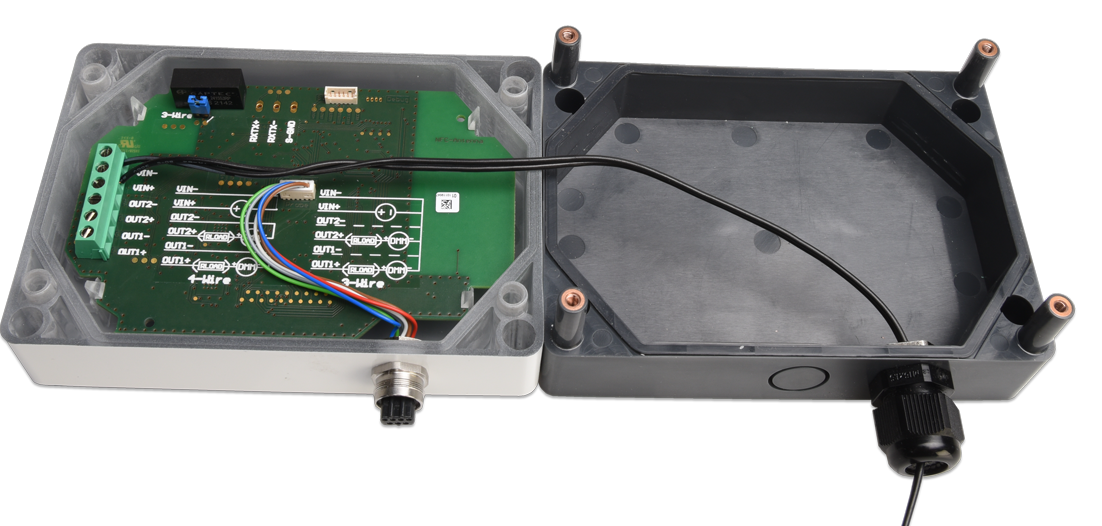
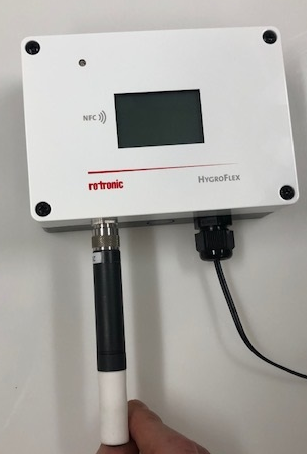
The HF5A transmitter is delivered with closed screws by default, open the device and install the respective power supply.

Prior to the power supply wiring you should install the bottom case to the wall.


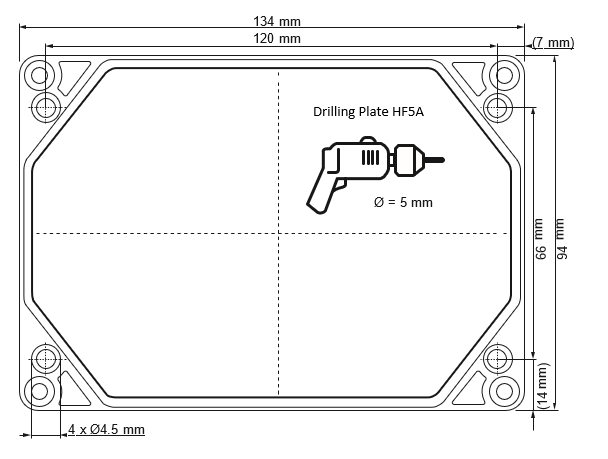
Within the delivery packaging you have integrated a drilling template, screws and wall fixings:

HF5A_Drilling_Templateclip0002

Step 2

Now you can connect the supply voltage


clip0001

To do: Open the device and apply power supply refer to the description of Electrical Connections HF5A

Note: The M16 cable strain relief only provides an effective seal if a cable with the necessary number of conductors is used

Step 3

HF5A-Mountingtheprobe0001

To do: Close the device and tighten the screws. Align the connector and manually screw in the probe (not included) ensuring the nut is tight