If calibration reveals that the selected calibration points are outside the specified tolerance, an adjustment should be performed to correct the deviation.
To ensure accurate functionality, it is recommended to acquire at least three adjustment points. A single-point adjustment only applies an offset to the current calibration curve, which may not sufficiently correct measurement deviations. By adjusting at least three points, the calibration curve is properly aligned.
As with calibration, the adjustment points should be selected based on the actual application range where the probe is used.
After completing the adjustment, it is strongly recommended to perform a final calibration to verify that the adjustment was successful and that the sensor now measures accurately within the required range.
Example adjustment
Here is an example of an adjustment procedure of an HC2A-S and an ER-15 calibration device. The reference is the Rotronic Standard Humidity with 50% RH, which is placed in the ER-15.
Please read the calibration instructions carefully, which can be found on the back of the calibration certificate for the Rotronic humidity standard.
In particular, note the required adaptation time for the humidity standard depending on its humidity.
After that please connect your HC2A-S with a AC3001 cable to your computer and open up the HygroSoft software.
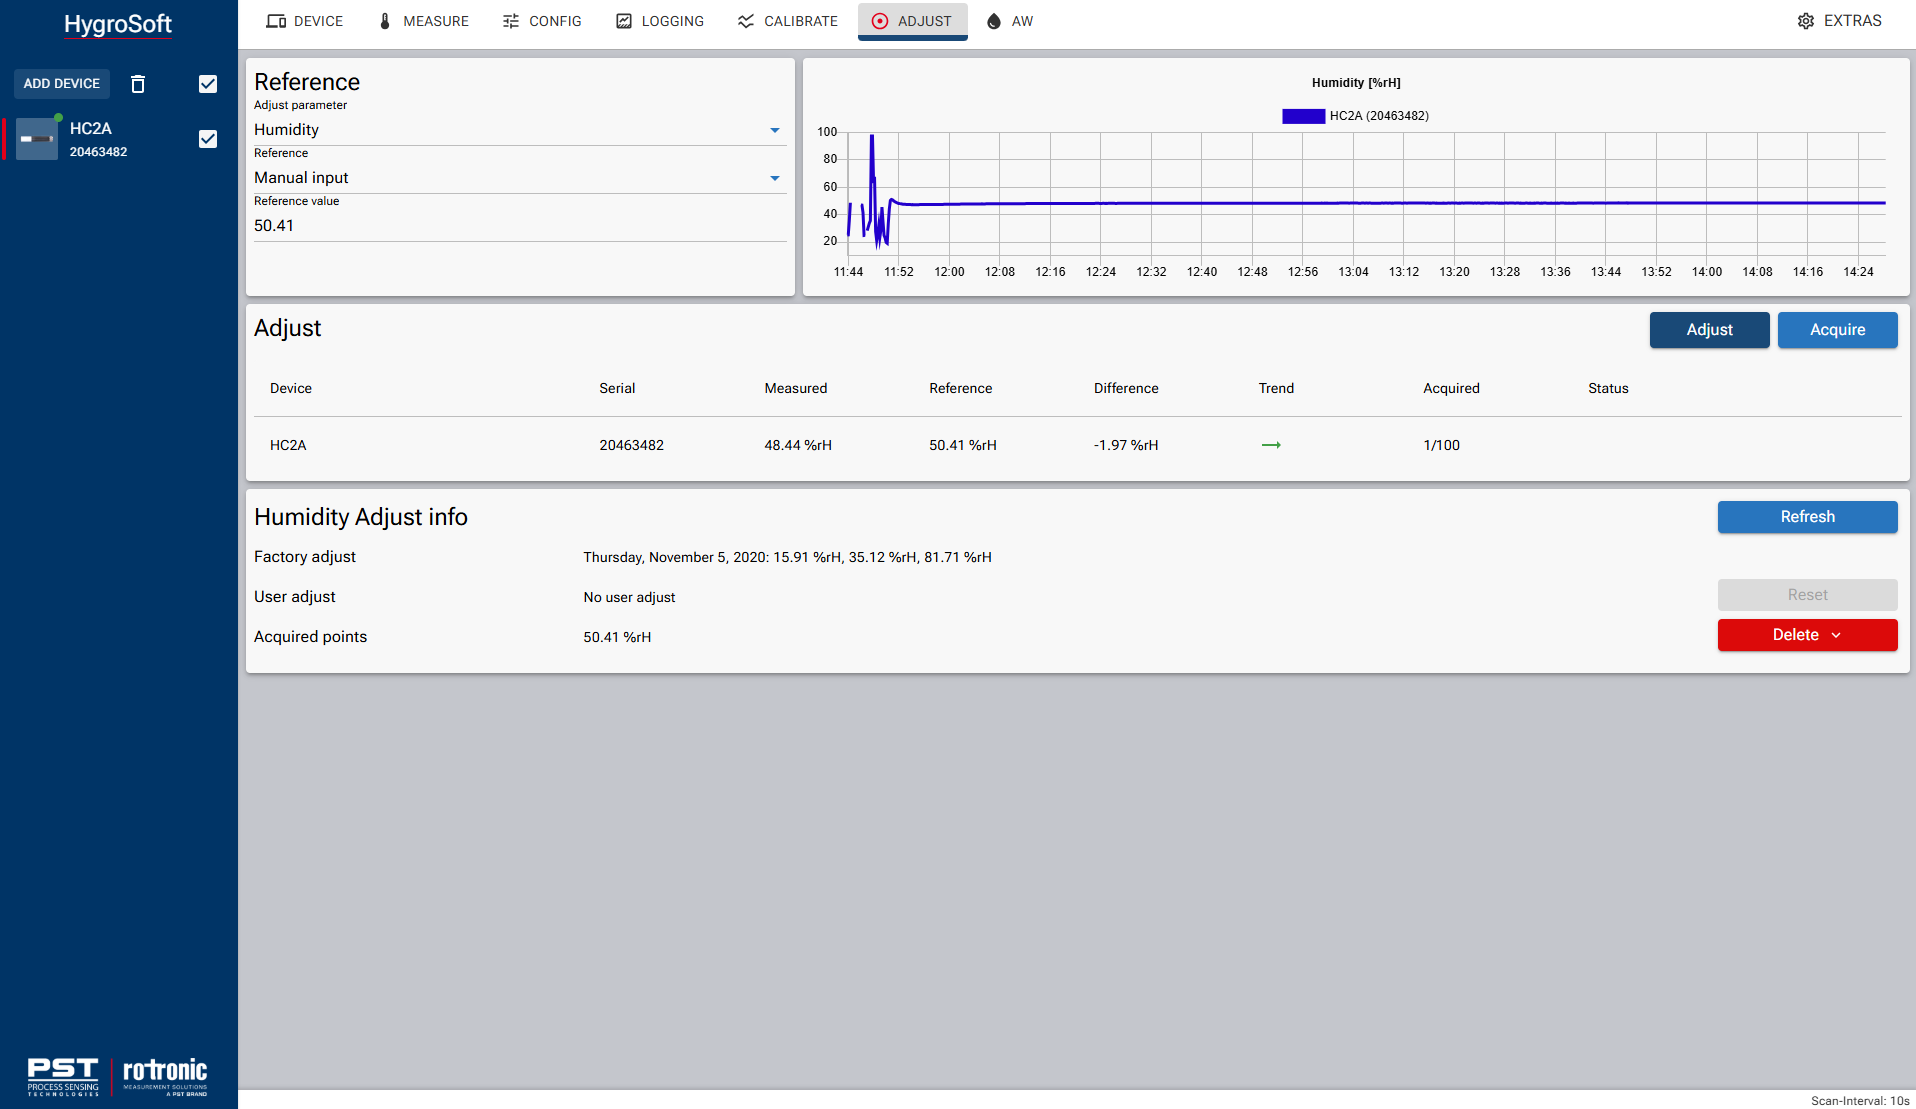
Please select "ADJUST" and follow these steps:
1.Select for the "Adjust parameter" which is in this case "Humidity".
2.Type in the given environment which is in this case "Rotronic Humidity Standard".
3.Select the Reference, which is in our case the "Manual input" where we will enter manually the value of the Reference.
4.The "Reference value" can be taken from the calibration certificate which is the "Meanvalue of sample at 23°C" which is in this case 50.21%RH. Additionally to this value it's important to consider the current room temperature (which is in this case 25°C) according to the package of the 50 % humidity standard there needs to be added 0.2%RH to the "Reference value" which makes a total "Reference value" of 50.41.
5.After all the information has been entered and the adaptation time has passed, you can see in the graphic that the humidity has stabilized. In addition, there is a green, straight arrow next to “Trend”, which also indicates that the humidity value has stabilized.
6.Click on "Accquire" to add the first adjustment point. This adjustment point will be saved in the "Humidity Adjust info" under "Acquired points". To add a second adjustment point repeat the adjustment process and take a different Humidity Standard value.
7.After acquiring multiple adjustment points to finalize the adjustment, you must then click “Adjust”. Only then has the adjustment been carried out correctly. To check, you can see the new adjustment points under “User adjust” in "Humidity Adjust info".
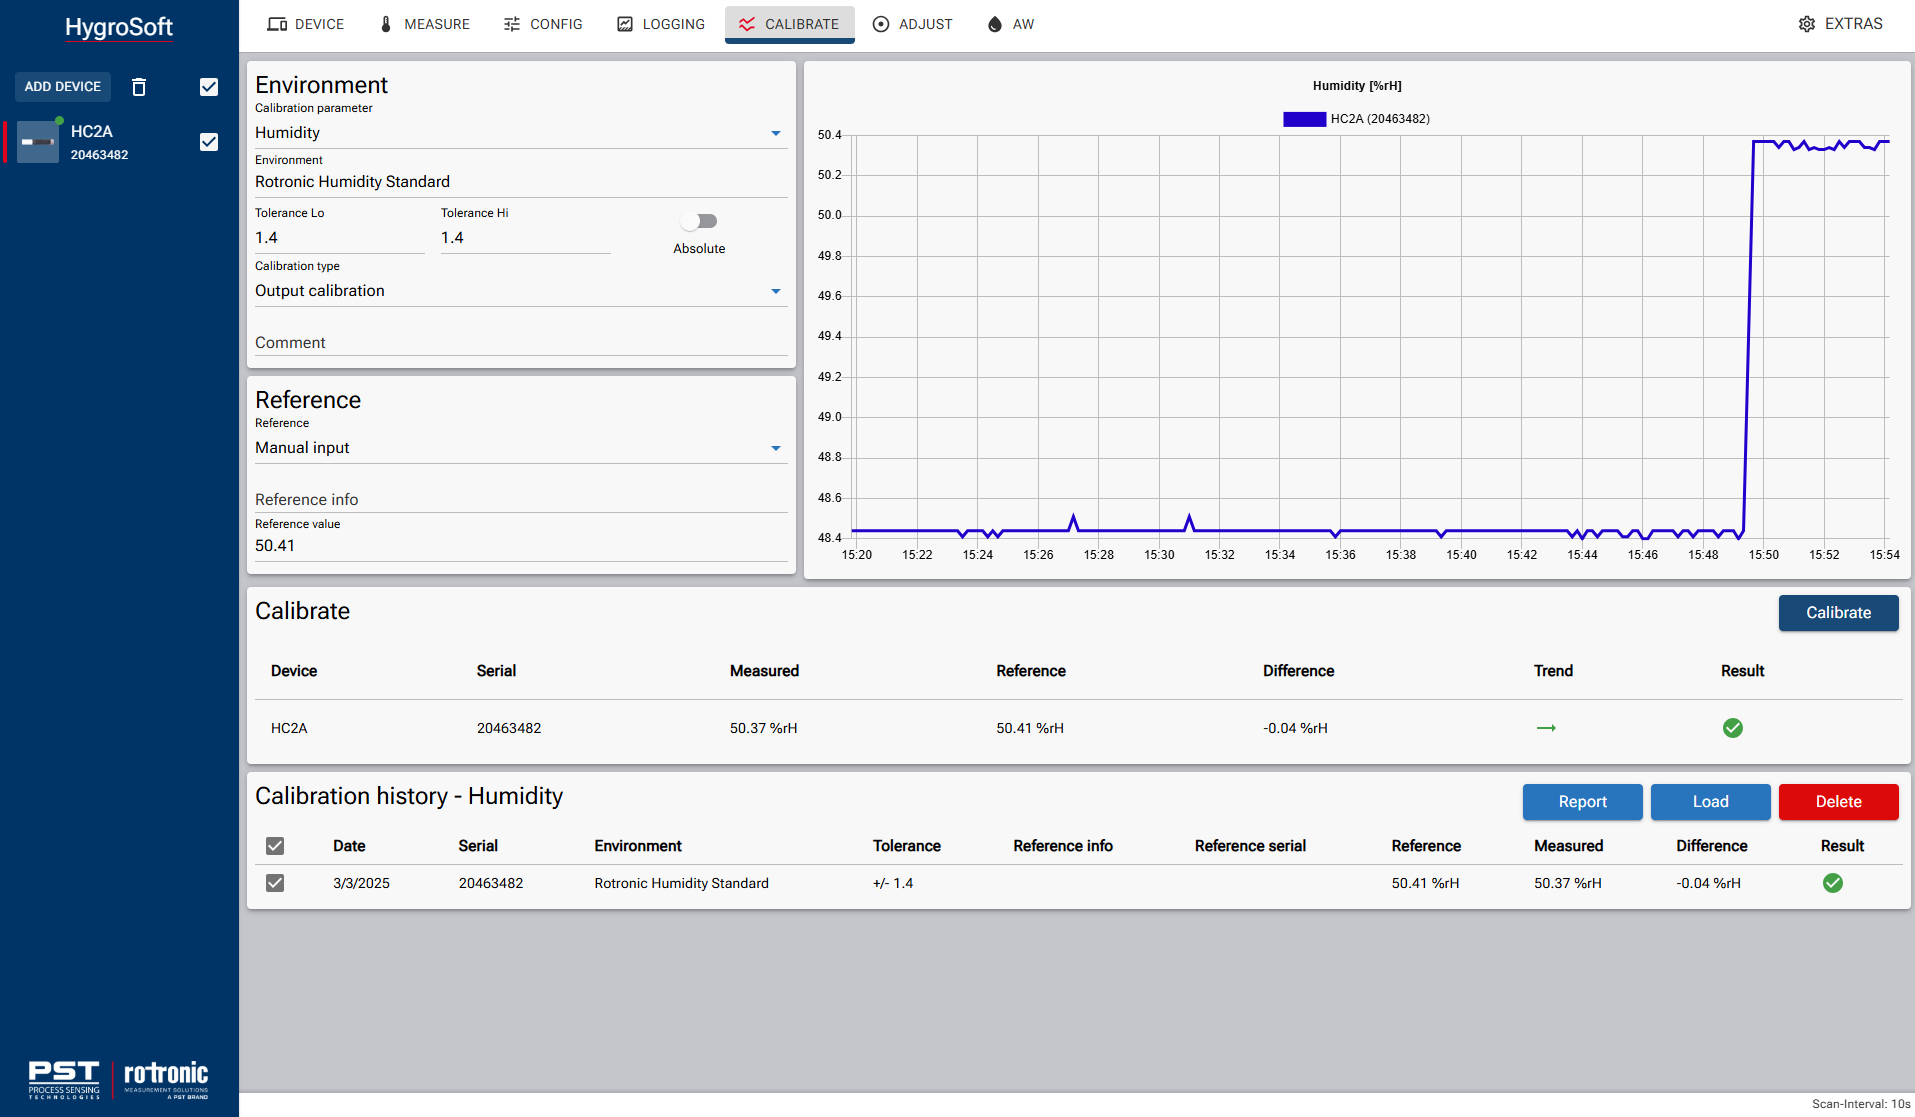
Adjustment check
After the adjustment has been successfully carried out, a calibration should be carried out to ensure that the newly adjusted probe is now within the specifications.
To do this, the process should be carried out in the same way as described here: 1. How to perform a calibration?
NOTE: The "output calibration" should now be selected instead of the initial "input calibration".