As per the device flow document standard RMS on premise installation uses port 80 for device communication and port 80/443 for end user communication: RMS Software and Device Flow Diagram.
In some organizations different ports may be required.
The below describes a test installation using different ports.
Important:
•Any changes to standard install present risks.
•Rotronic AG cannot provide support for every custom method of installation.
•The below is for information only.
First install RMS as normal and confirm operation using standard ports:
•Load and run RMS from the server web browser.
•SQL communication is unaffected.
Now configure the web server to use the desired ports.
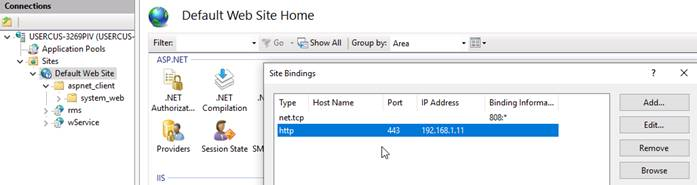
In IIS > Default Website, change ‘Bindings…’ HTTP >> Port= 443 and IP address = Server IP
Now load RMS and include the port eg 192.168.1.11:443/rms:
•In RMS go to Tools > Setup > System.
•Update RMS and wService PATH with <IP>:443.

All RMS LAN devices must now be configured with appropriate Host name, Service Path AND port.
The RMS-Convertor, within the Pairing settings enter the IP as <Server IP>:<port> eg 192.168.1.11:443.
Any API scripts will also require port changes in the address path.
Test and confirm stable operation. Be aware of different port / network rules in different areas of a customer site.
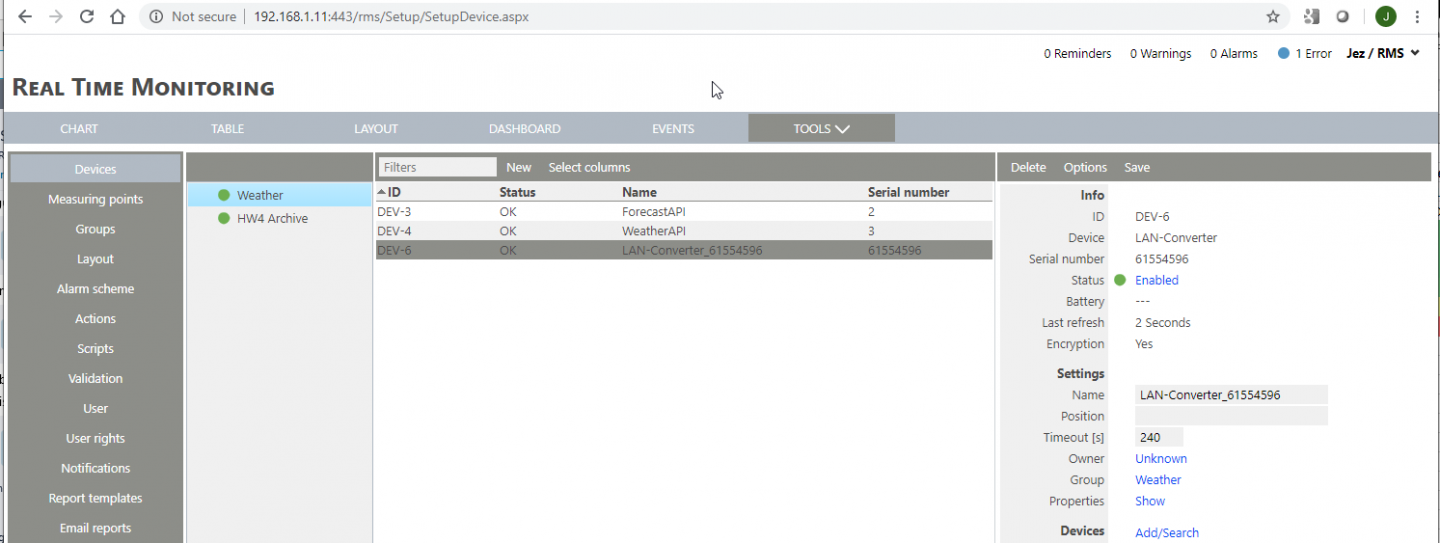
Successful RMS connection via port 443 (not-secure) and RMS device connection & API data feeds functioning normally via port 443: