Step 1 |
Double click on the folder 250.23166 and then on the folder "Dependencies" and do a right click on the npd48-web.exe (.NET-Framework V4.8.0) and run as administrator: 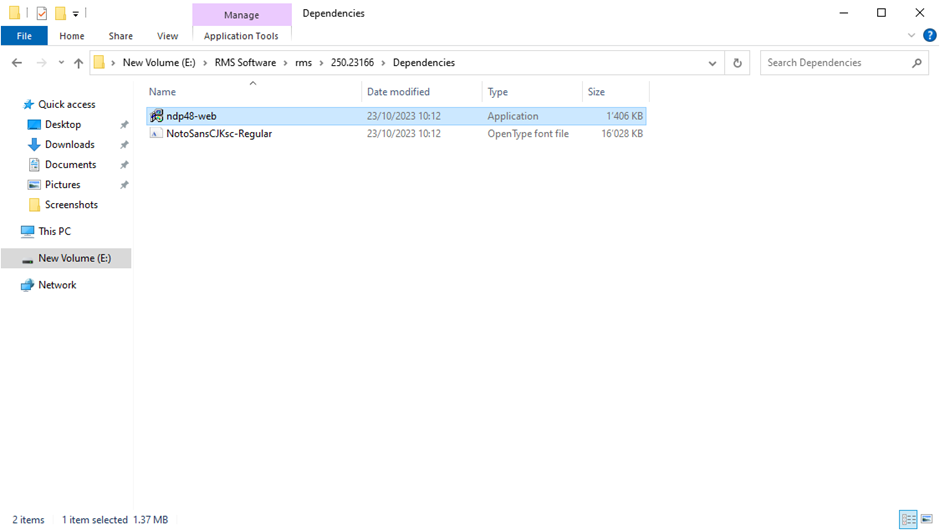 |
||||||||
Step 2 |
If .NET-Framework V4.8.0 is already installed, the follow window will appear, if so jump forward to Step 4: 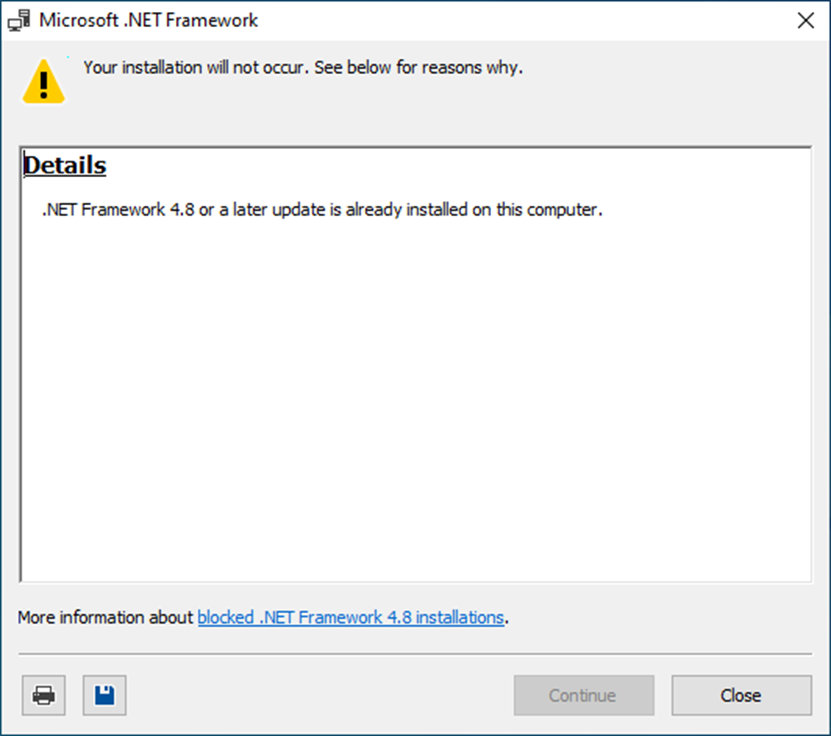 |
||||||||
Step 3 |
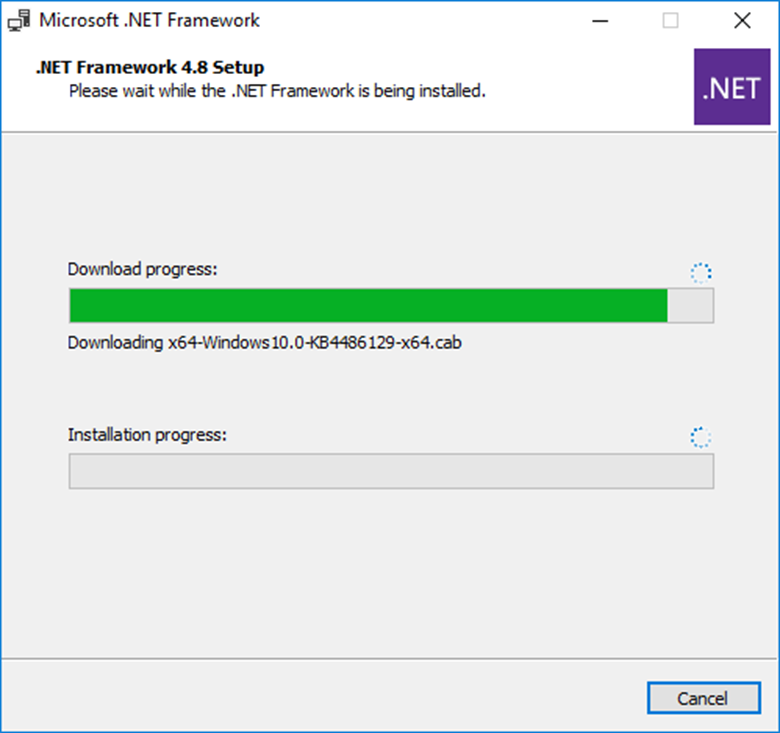
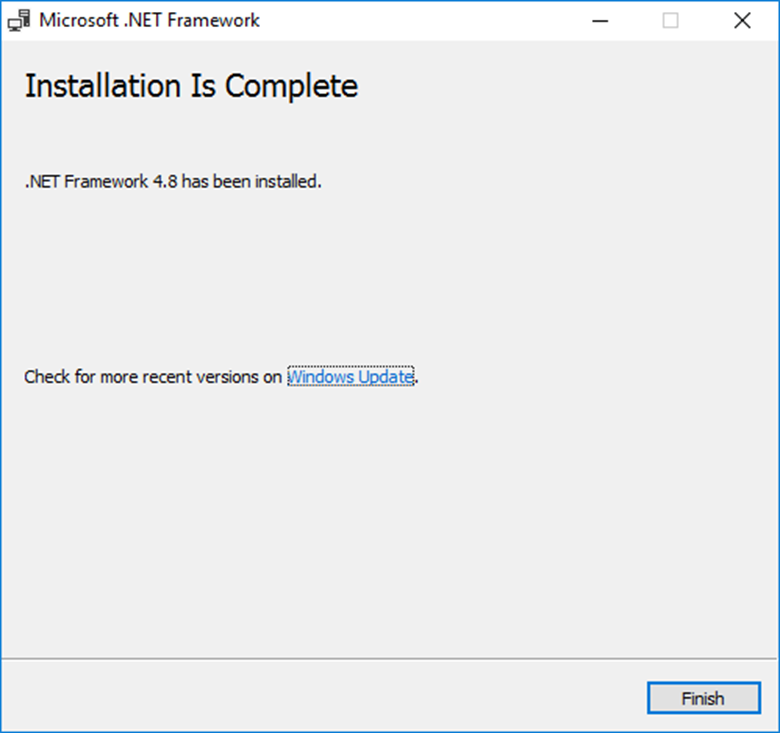
Installation of .NET-Framework V4.8.0: 
 |
||||||||
Step 4 |
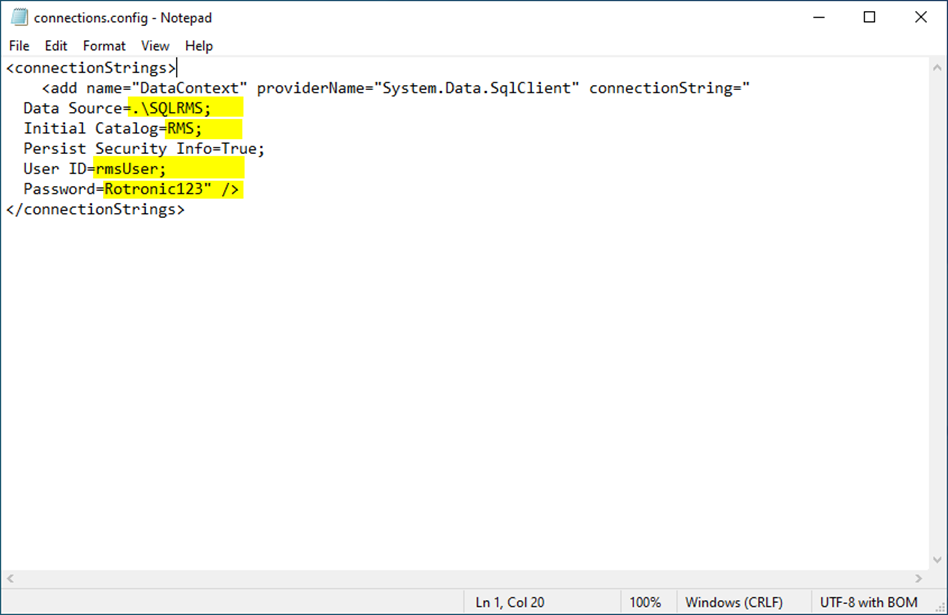
Setup the SQL Connection for the RMS Service Manager. Scroll down and open the file "Connection.config" in the folder ServiceManager by using a text editor.  |
||||||||
Step 5 |
The following information in the connection string must be modified. If you set up as the mentioned steps before, you've only to double check if everything is correct. If you can't save the file, open the text editor as administrator and modify the file again.
 |
||||||||
Step 6 |
Test the SQL Connection. Click on the Windows search bar at the bottom left. Type CMD or Command Prompt and run as administrator. 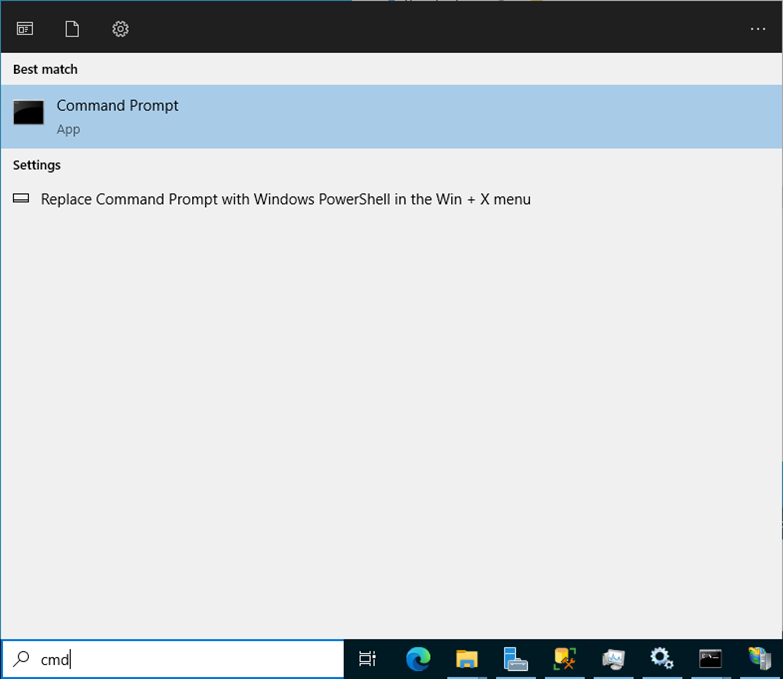
Type the desired drive letter. And then type "start <path of TestDatabase.cmd>". 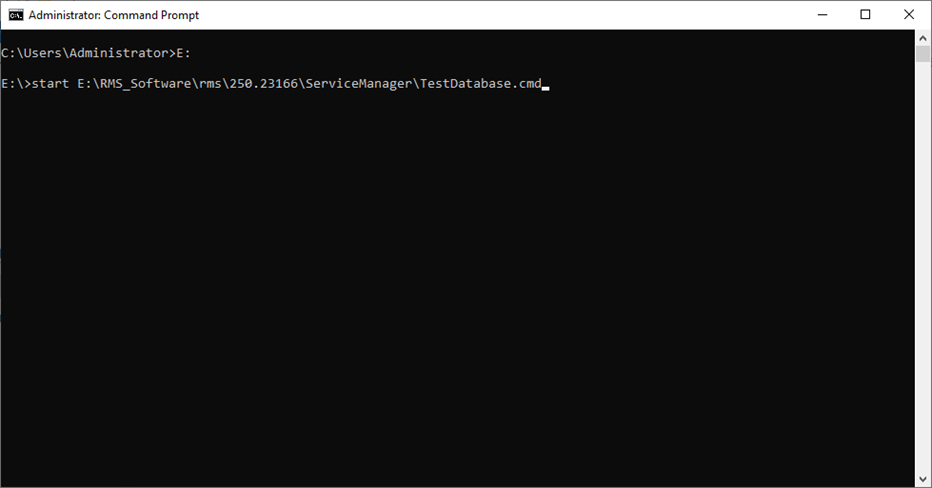 |
||||||||
Step 7 |
If the connection is successful, the follow message will appear: 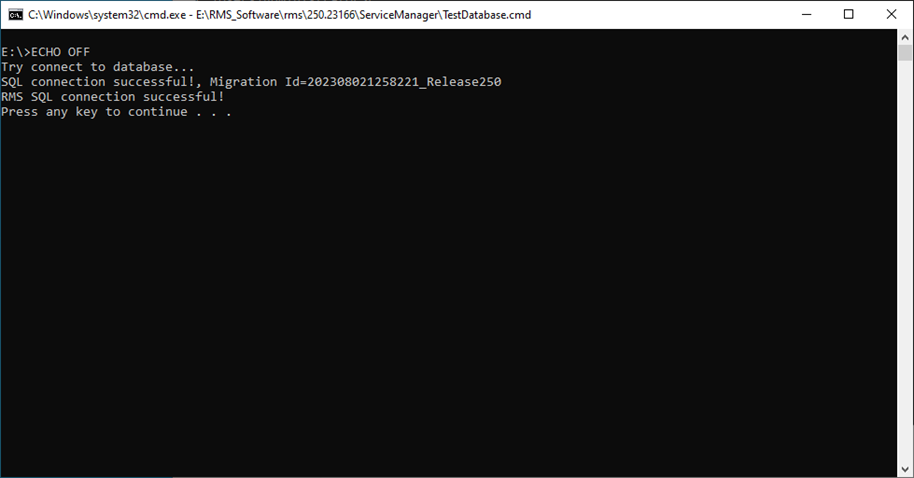
If the connection is not successful, the follow message will appear: 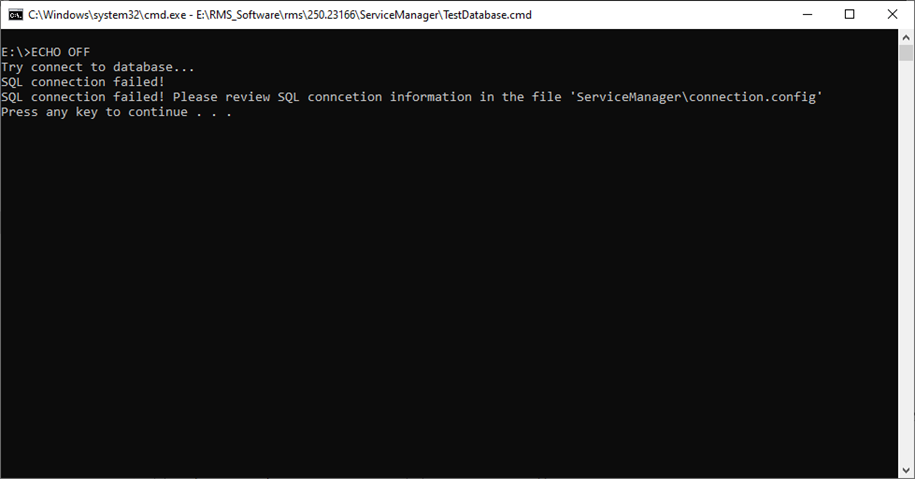 |
||||||||
Step 8 |
The path of the log files must be adjusted, as the default path is configured on C:. This path can be found under NLog.config. These must be adjusted in the following 4 folders: ServiceManager: 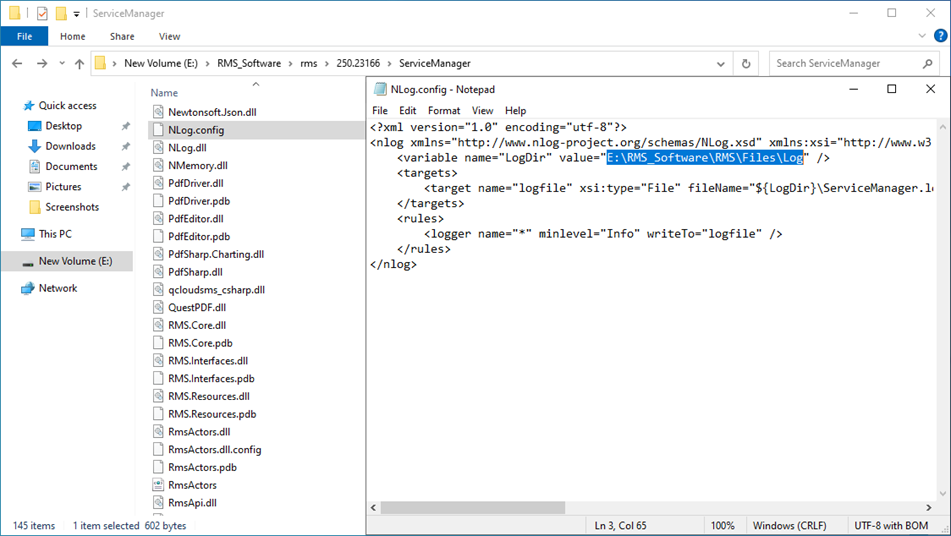
Service Monitor: 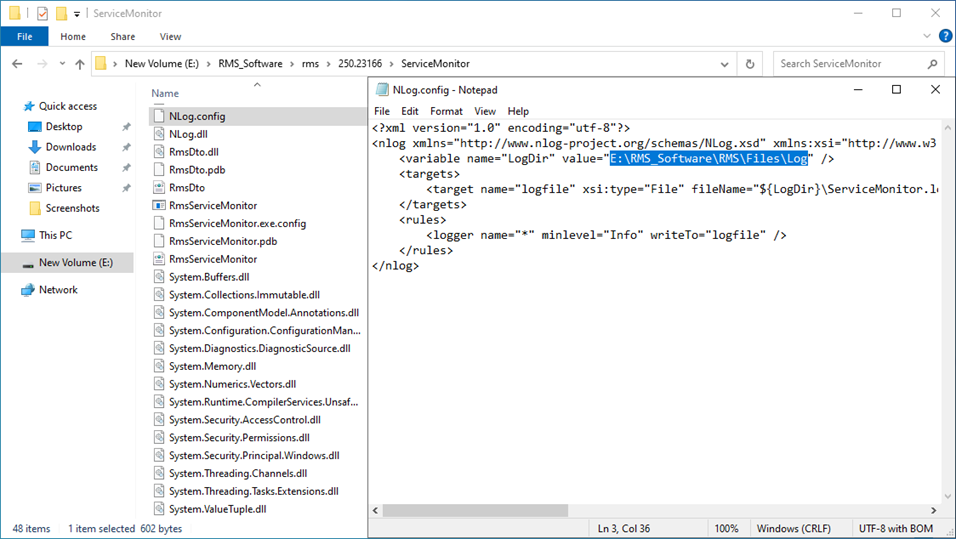
wPage: 
wService: 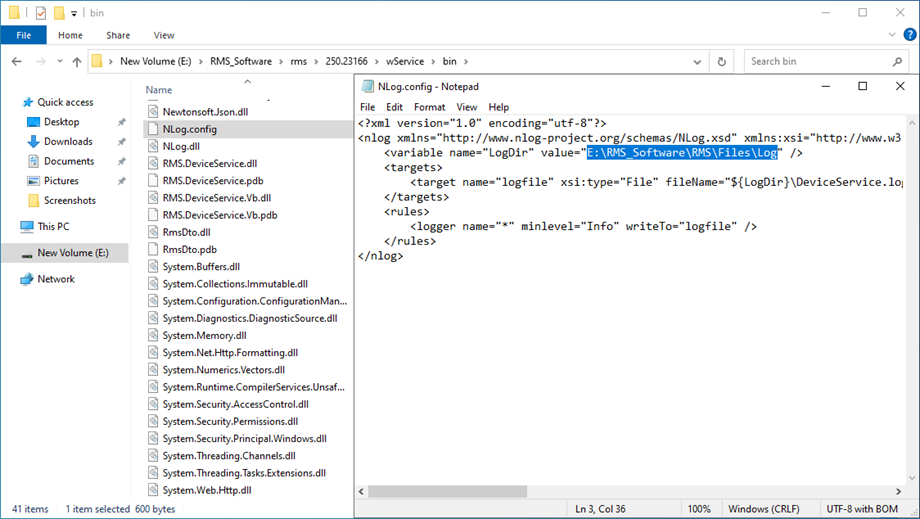 |
||||||||
Step 9 |
If the connection to the database is successful, click in the folder 250.23166 on the "installRMSV250.cmd" and run as administrator.
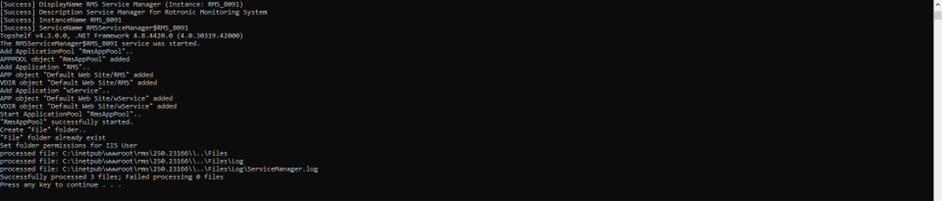
What the script does: •Check if an RMS application is already installed, •Check the database connection, •Install and start the RMS SQLMonitor, •Install and start the RMS ServiceManager, •Add the application Pool “RmsApplicationPool” to IIS, •Install the IIS Apps “RMS” and “wService”, •Create a folder “Files” in the “RMS” folder, •Set access permission for the “Files” folder. 
If the script isn’t working, because it tries to execute the script with C:, then please run the CMD again as administrator and enter the drive letter. Then enter start and the path to the install and confirm (otherwise please continue with step 10):  |
||||||||
Step 10 |
Please confirm each question during the script.
If SQLMonitor is not to be installed on the same server, the SQLMonitor folder can be moved to the DB server. There it can be executed on any path.
After the script is finished, you can close the window and go further with the next steps. 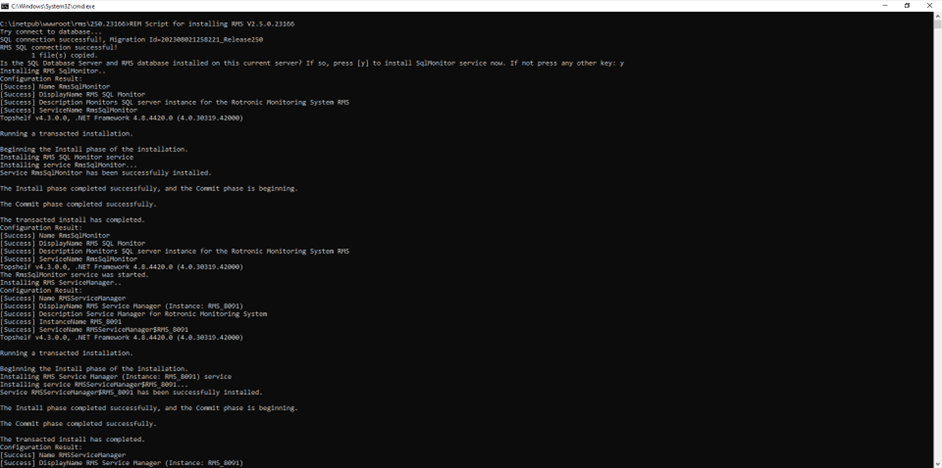
 |
||||||||
Step 11 |
Updated: 03.01.2024.