The RMS application is normally installed on C:, of this is not the case, then please follow these guidelines. Should the installation be carried out on C:, this chapter can be skipped.
Step 1 |
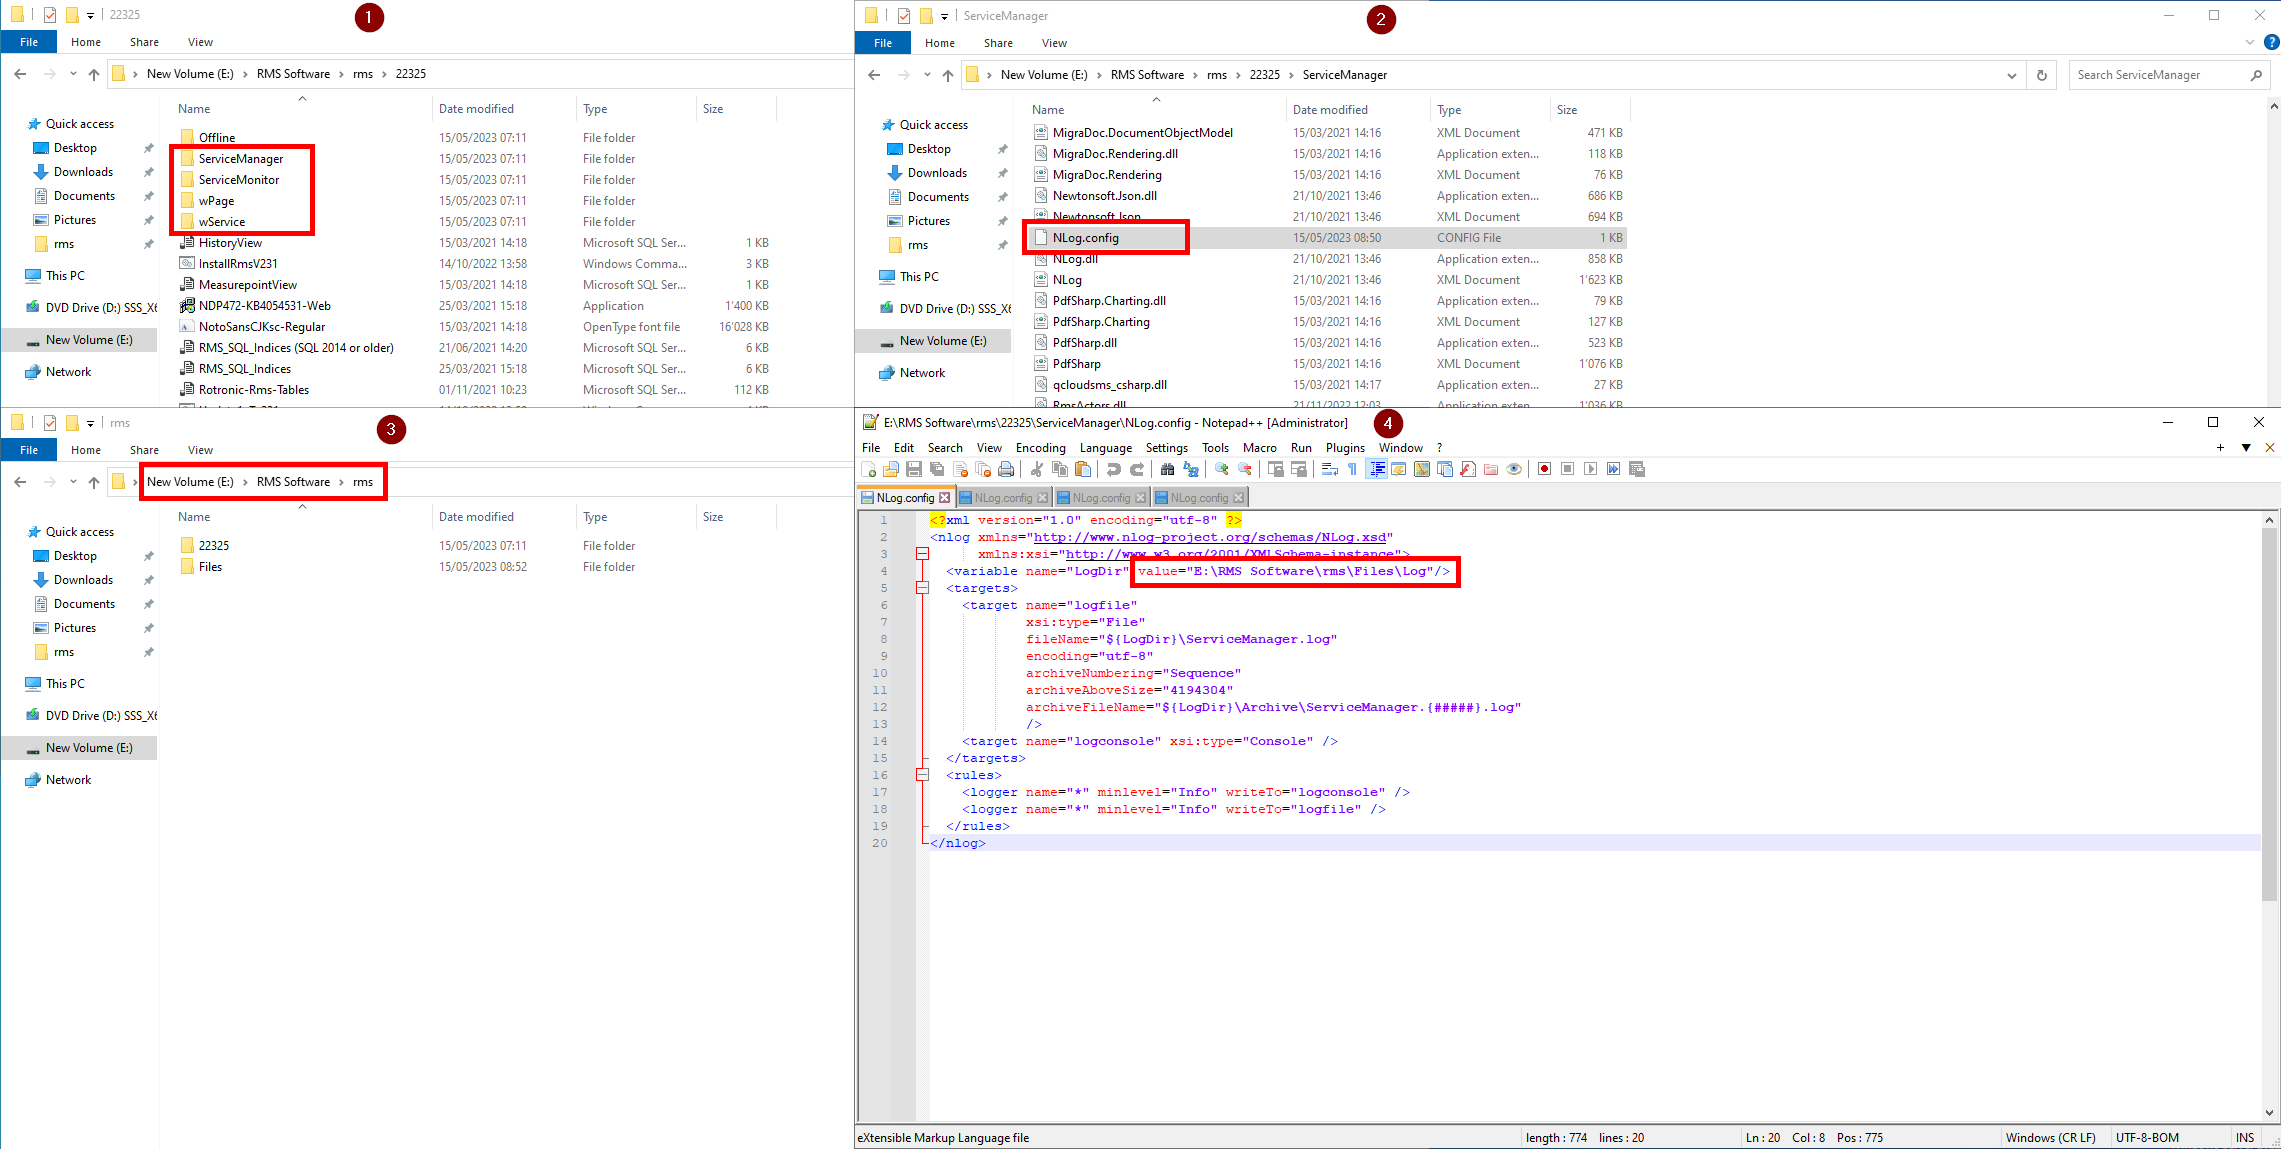
1.The path of the log files must be adjusted, as the default path is configured on C:. These must be adjusted in the following 4 folders: a.ServiceManager b.Service Monitor c.wPage d.wService 2.This path can be found under NLog.config. 3.If the path has not yet been set, we recommend referencing the path under rms. 4.You can find the path under point 4 in the image below. Please insert the new path here in all files. In this example, we are using E:.
|
|---|---|
Step 2 |
Run all steps of the Installation of the RMS Software V2.3.1. |
Step 3 |
In IIS, right click on Application Pool and Add Application Pool:
|
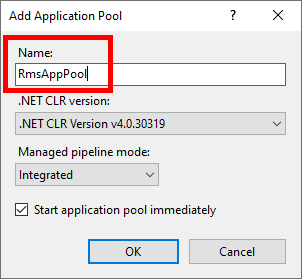
Step 4 |
Add RmsAppPool and click on OK:
|
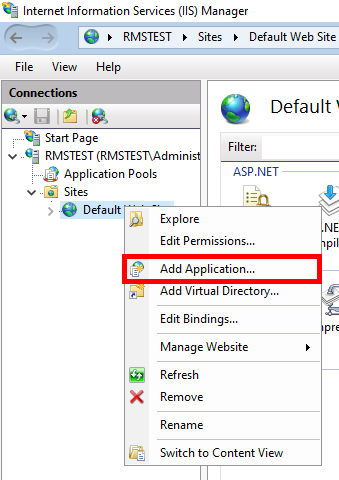
Step 5 |
Right click on Default Web Site and select Add Application...
|
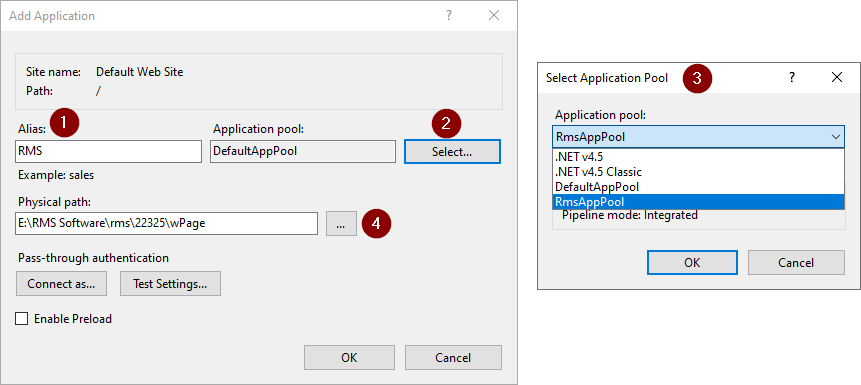
Step 6 |
1.Enter RMS under Alias. 2.Click on Select... to change the Application pool. 3.Within the drop down, select RmsAppPool and click on OK. 4.On the Physical path, add the wPage folder path.
|
Step 7 |
Right click on Default Web Site and select Add Application... 1.Enter wService in the alias. 2.Click Select... to change the application pool. 3.Within the drop down, select RmsAppPool and click on OK. 4.On the Physical path, add the wService folder path.
|
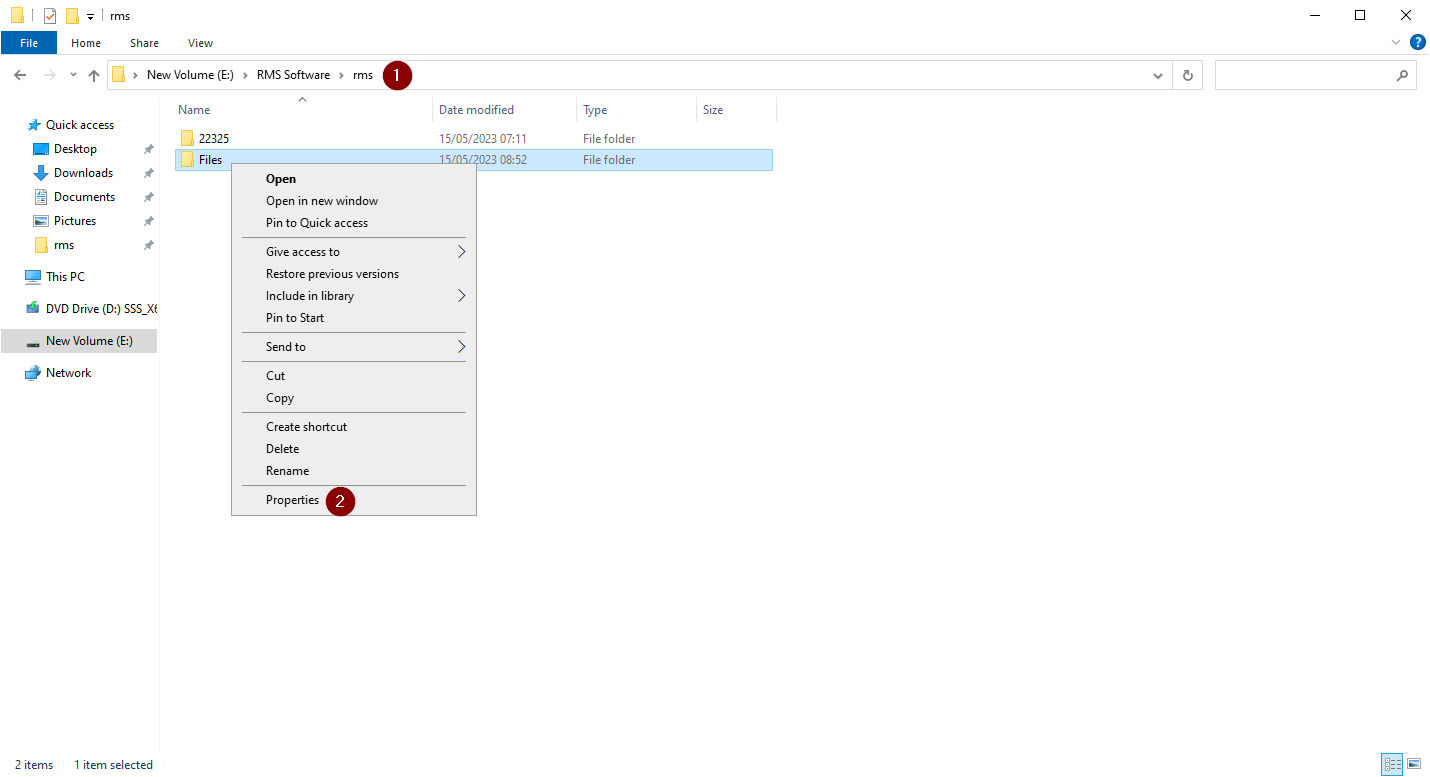
Step 8 |
1. Go to the Files folder defined above. 2. Click right on the Files and select Properties.
|
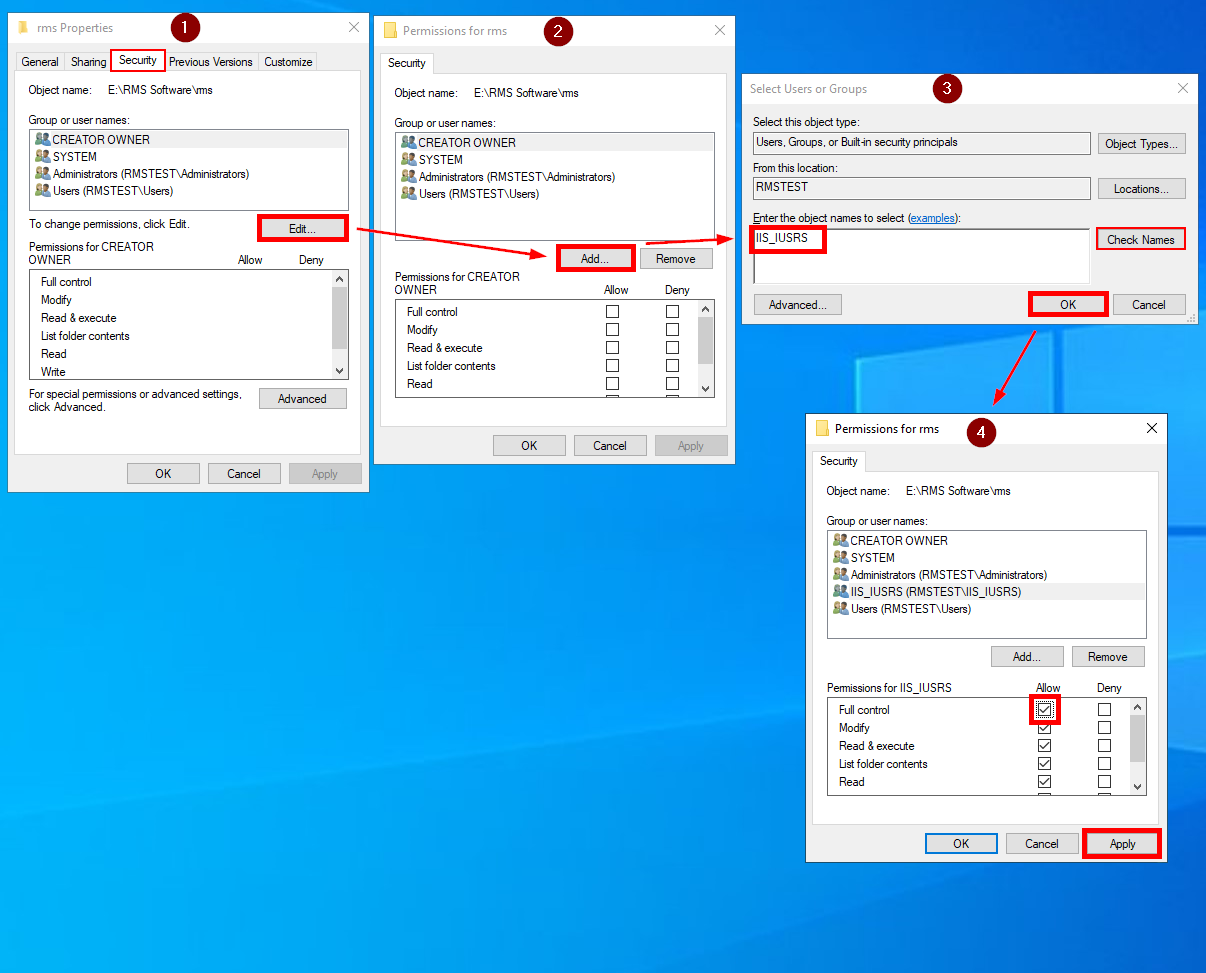
Step 9 |
1. Switch to Security and click on Edit... 2. Then click on Add... 3. Enter IIS_IUSRS and then click on Check Names. Continue with OK. 4. Select IIS_IUSRS and give Full control. Then click on Apply and continue with OK.
|
Step 10 |
Continue the installation process: Software Installation Testing. |