Step 1 |
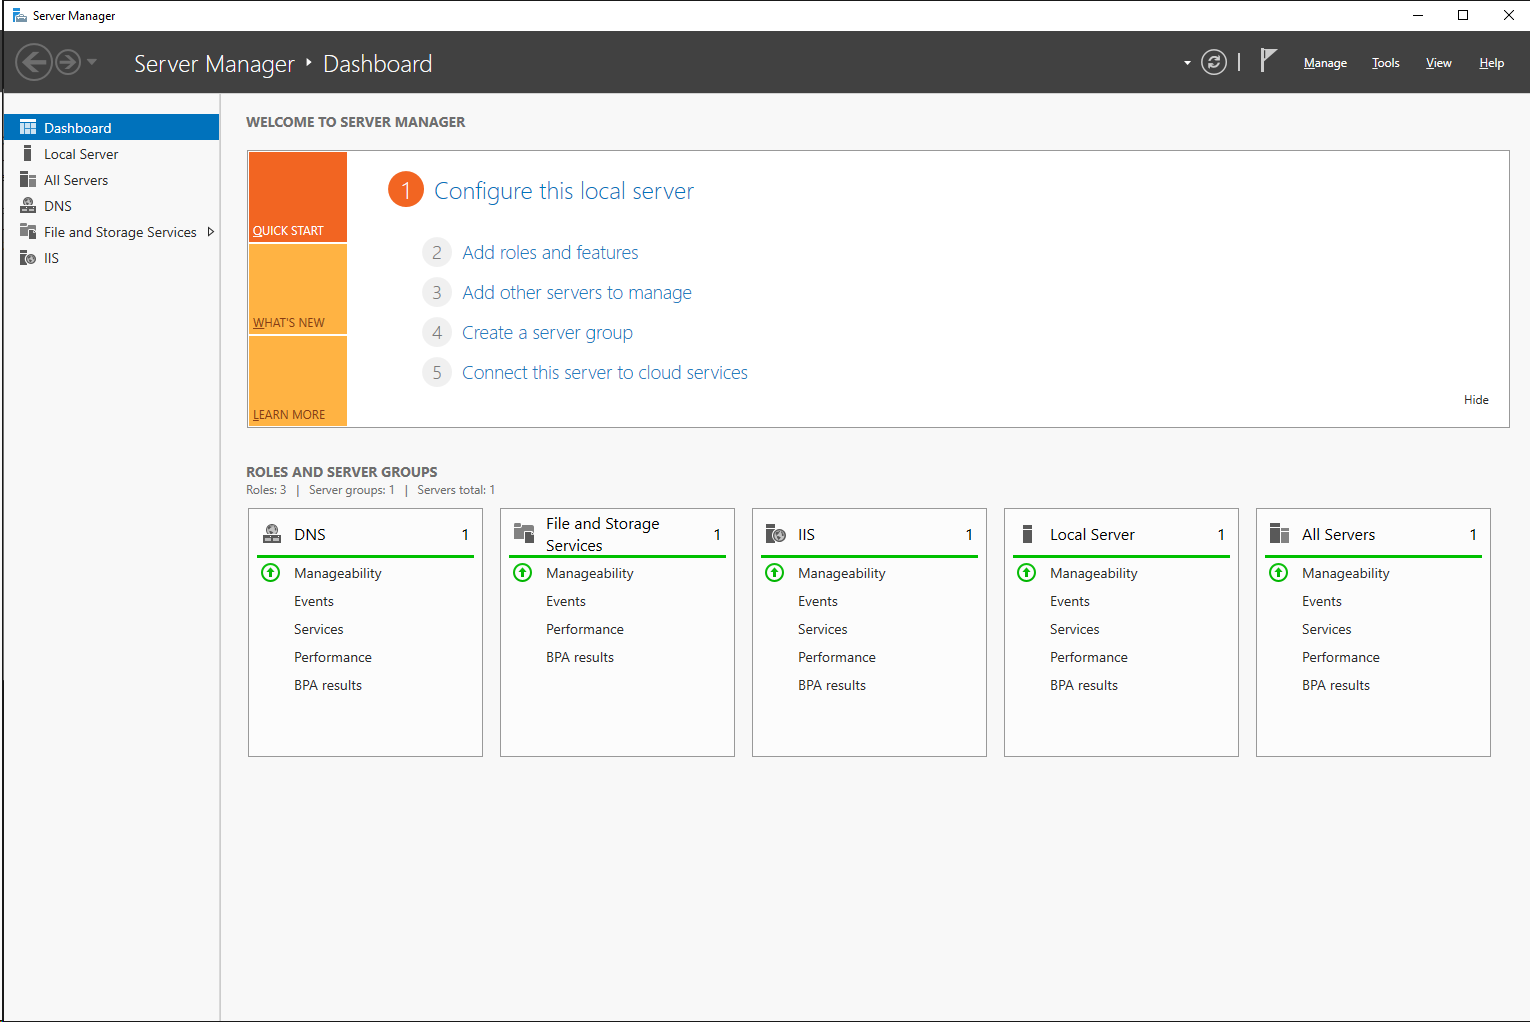
Using the Windows search function open the Server Manager app.
Select 2: Add roles and features.
|
|---|---|
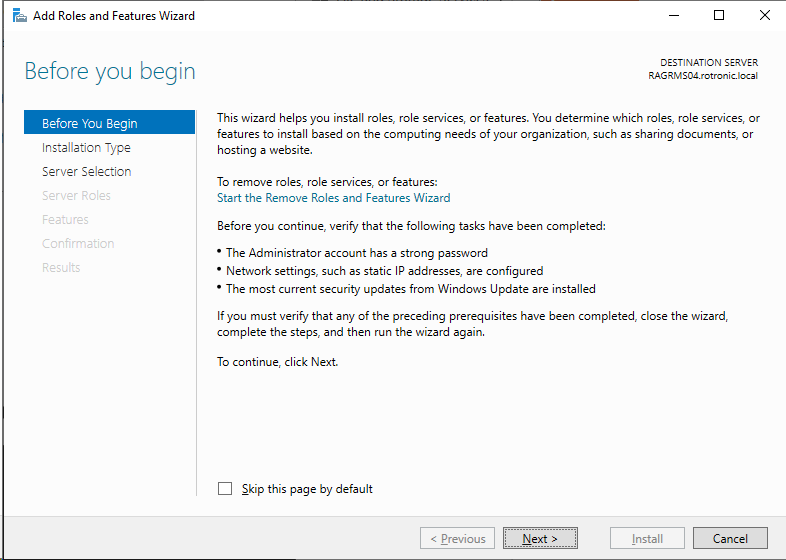
Step 2 |
Before you begin: Read the text and click on "Next".
|
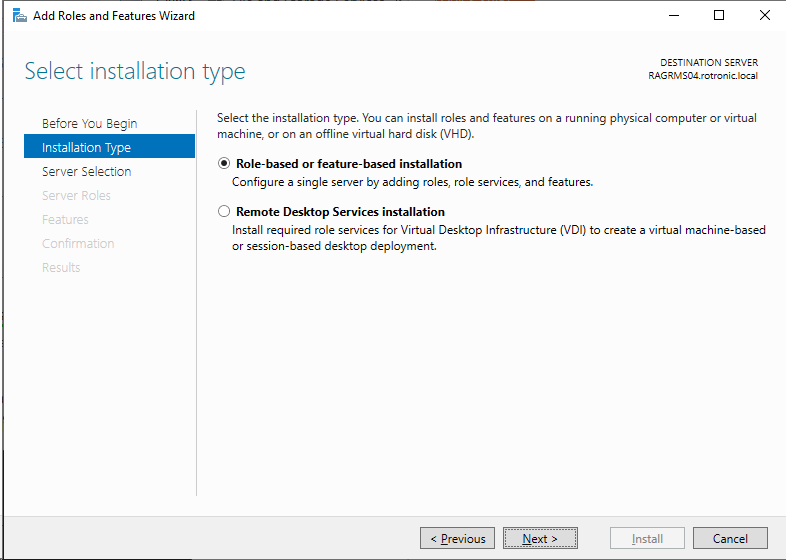
Step 3 |
Installation Type: Select "Role-based installation". Then click on "Next".
|
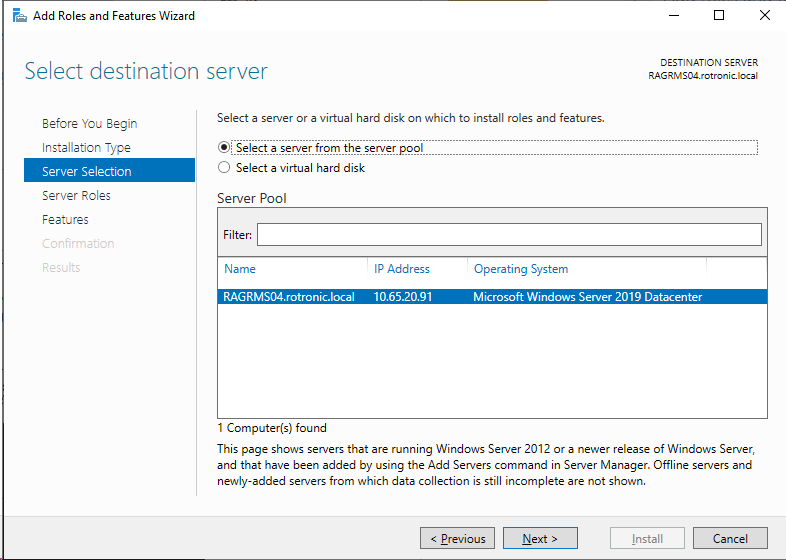
Step 4 |
Server Selection: Select a server from the server pool. Then click on "Next".
|
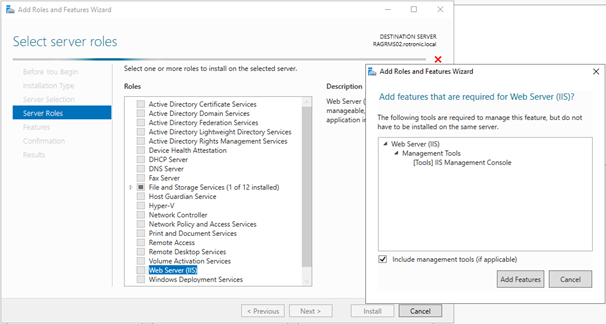
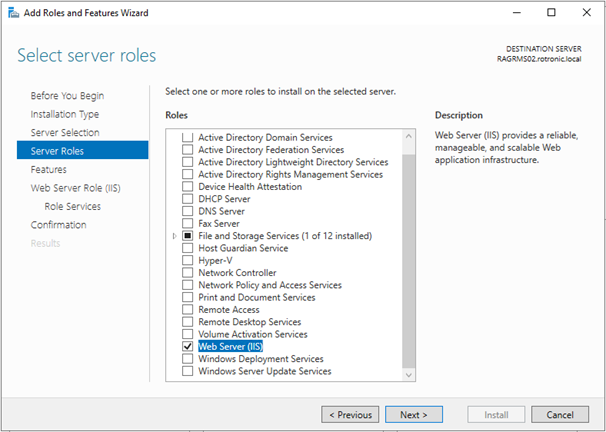
Step 5 |
Server Roles: Leave the selected settings but ensure that the "Web Server (IIS)" is selected. The "Add Roles and Features Wizard" will open, click on "Add Features".
Once clicked on "Add Features", the following tick will be added:
|
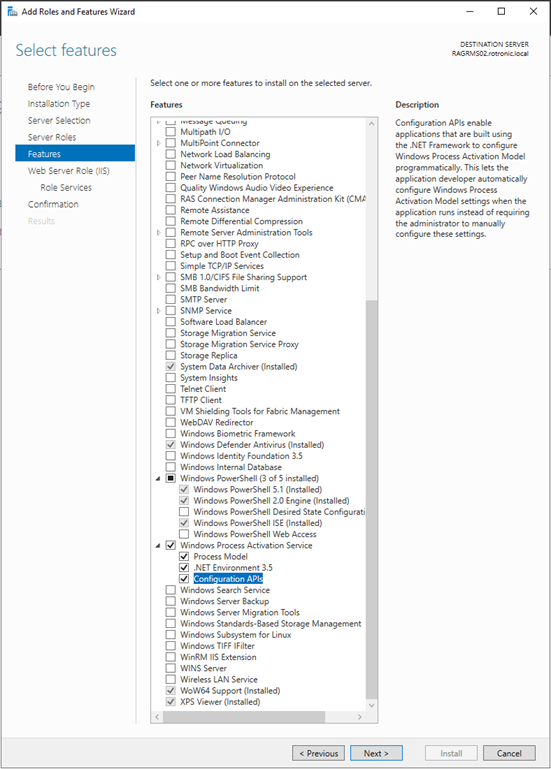
Step 6 |
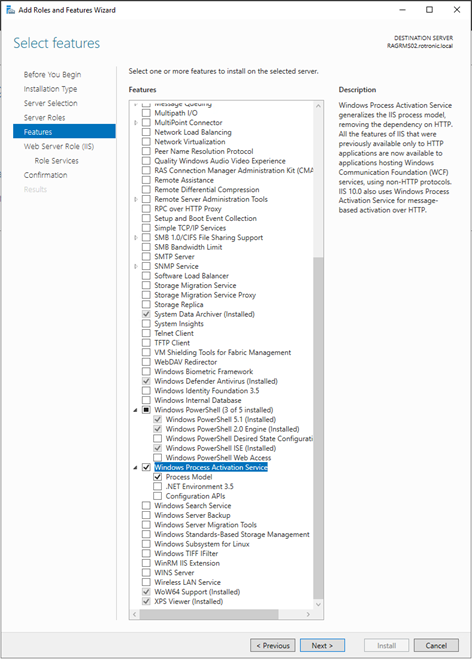
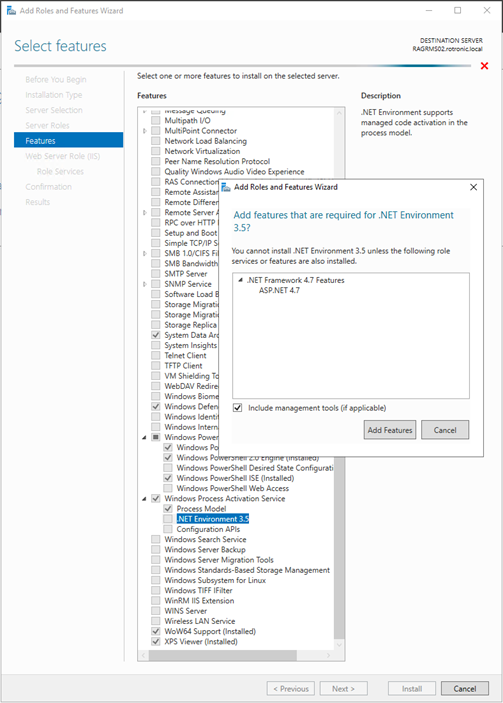
Features: Ensure that all of the features selected below are selected.
IMPORTANT: •System Data Archiver (Installed): activated. •Windows Defender Antivirus (Installed): activated •SMB 1.0/CIFS File Sharing Support (Installed): activated. •User Interfaces and Infrastructure: activated. oGraphical Management Tools and Infrastructure: activated. oServer Graphical Shell (Installed): activated. •Windows PowerShell: activated. oWindows PowerShell 4.0: activated. oWindows PowerShell 2.0 Engine: activated. oWindows PowerShell ISE: activated. •Windows Process Activation Service: oProcess Model: activated. oASP.NET 4.5 or newer: activated ("Add Roles and Features Wizard" will appear, select "Add Features"). oConfiguration APIs: activated. •WoW64 Support (Installed): activated. •XPS viewer (Installed): activated.
Then click on "Next". |
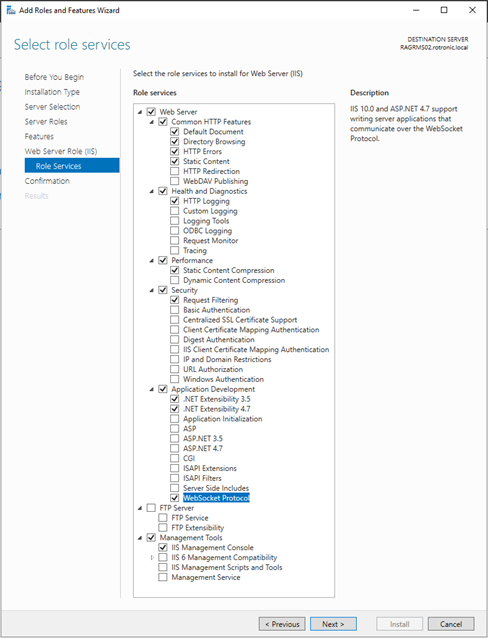
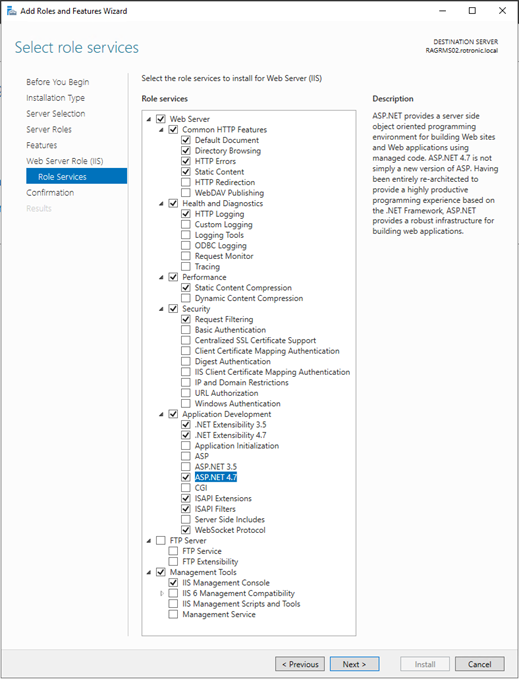
Step 7 |
Role Services: Ensure that all of the features selected below are selected.
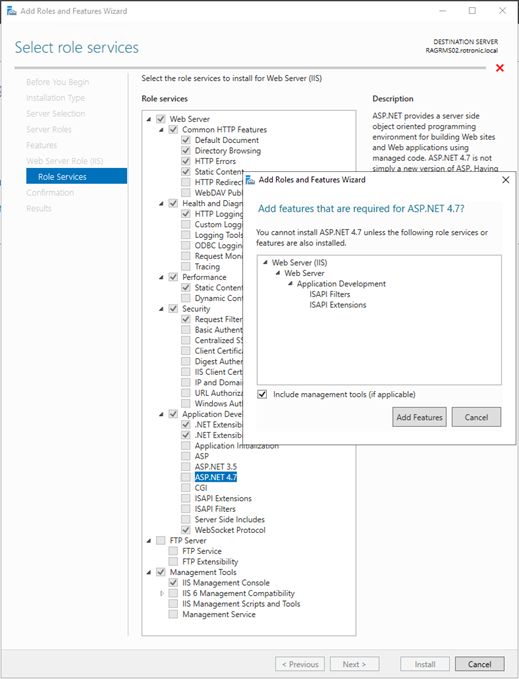
IMPORTANT: •Web Server: activated. oCommon HTTP Features: activated. ▪Default Document: activated. ▪Directory Browsing: activated. ▪HTTP Errors: activated. ▪Static Content: activated. oHealth and Diagnostics: activated. ▪HTTP Logging: activated. oPerformance: activated. ▪Static Content Compression: activated. oSecurity: activated. ▪Request Filtering: activated. oApplication development: ▪.Net Extensibility 3.5: activated. ▪.Net Extensivility 4.7: activated. ▪ASP.NET 4.5: activated ("Add Roles and Features Wizard" will appear, select "Add Features"). ▪ISAPI Extensions: activated. ▪ISAPI Filter: activated. ▪WebSocket protocol: activated. •Management Tools: activated. oIIS Management Console: activated.
Then click on "Next".
|
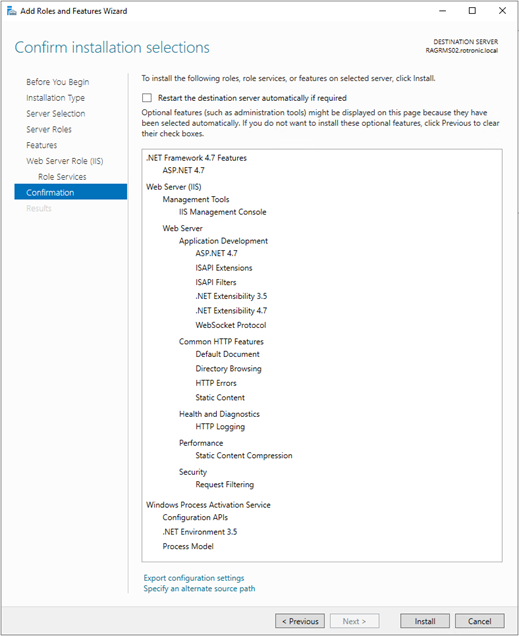
Step 8 |
Confirmation: Ensure that the necessary features are selected. Then click on "Install".
The installation progress is shown.
|
Step 9 |
Results: Ensure that the installation succeeded. The IIS WebServer is now enabled.
Then click on "Close".
|