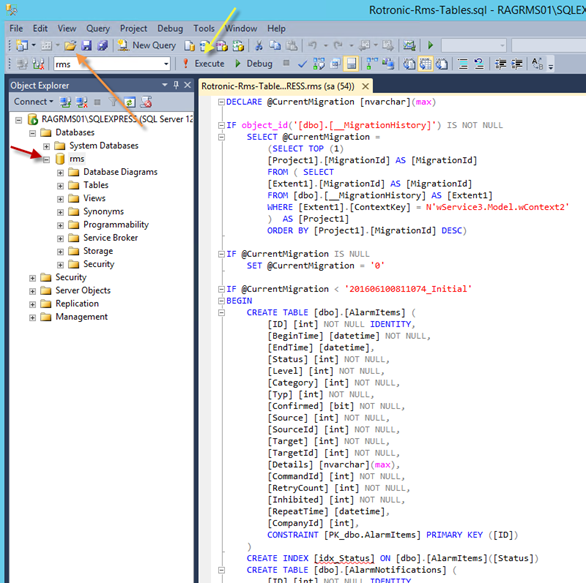
The empty database now needs the tables for the RMS. Proceed as follows:
Step 1 |
Select the RMS database (red arrow in Figure a) and select "Open file" (orange arrow in Figure a). Then load the script Rotronic-Rms-Tables.sql delivered with the software into the database.
|
 Figure a: View of the script "RMS-Tables.sql"
|
Step 2 |
Click "Execute" to run the script (yellow arrow in Figure a).
|
|
Step 3 |
Verify that the tables have been created by clicking the "+" symbol in the RMS database (about 30 tables in the folder "Tables"). Sometimes the SQL server management studio needs to be restarted to see the tables.
|
|
Step 4 |
Configuration of the RMS database is then finished. |
|