Step 1 |
To configure the IIS Web Server, select the server in "Server Manager Dashboard" > "IIS" and right click on "Internet Information Services (IIS) Manager". Start IIS Configurator 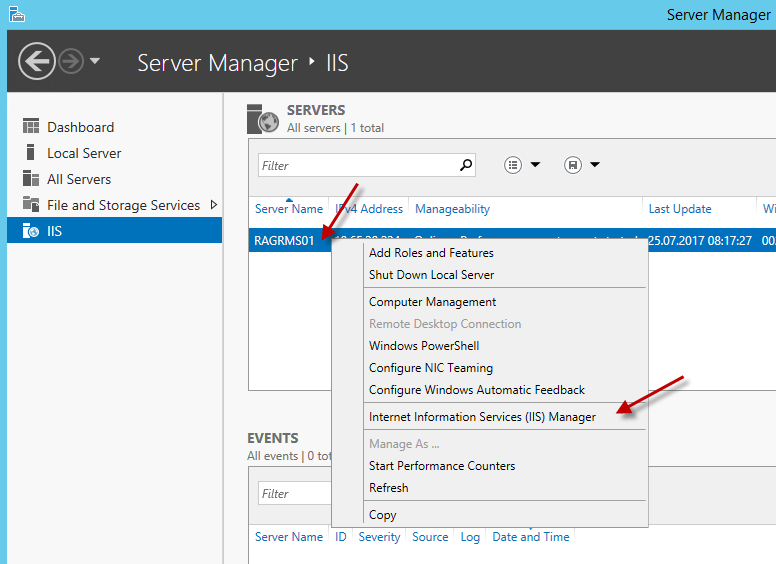
|
Step 2 |
Create the following two new websites under the default website by right clicking on the default website: oRMS owService
NOTE: The correct configuration of "Alias", "Application pool" and "Physical path". |
Step 3 |
Add sub-websites 
|
Step 4 |
Create the new website "RMS". The number "17087" is just an example, and will change with every SW version 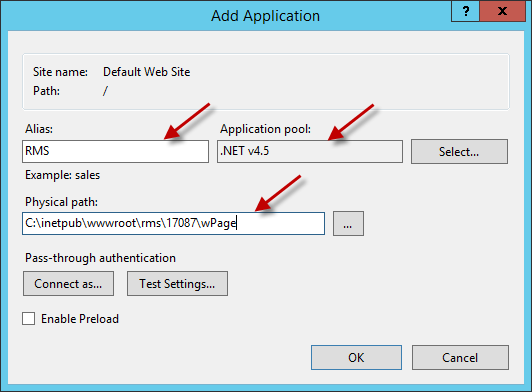
|
Step 5 |
Create the sub-website "wService". The number "17087" is just an example and will change with every SW version 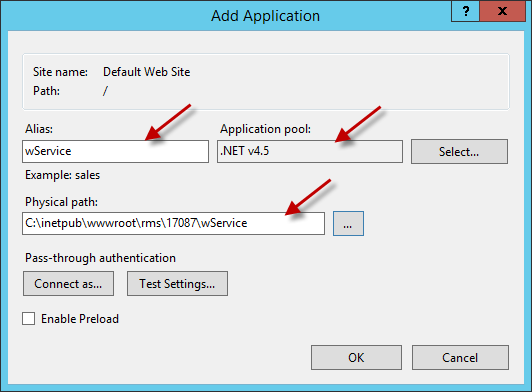
|
Step 6 |
The two websites shall be visible now.
In order to monitor CPU load and memory usage, IIS needs corresponding rights on the server. (needed for application pool ".NET V4.5" of wService and wPage) 1.Open the "Local Users and Groups" node using "Server manager" > "Dashboard" > "Tools" > "Computer management" > "Local Users and Groups" 2.Open the "Performance Monitor Users" group, and add the application pool identity you are using. For example, if your application pool is named ".NET V4.5" as shown above, then add the user "iis apppool\.NET V4.5". "iis apppool" is a special prefix for application pool identities. Select the location with the "Locations" button.
|
Step 7 |
Search user in selected location 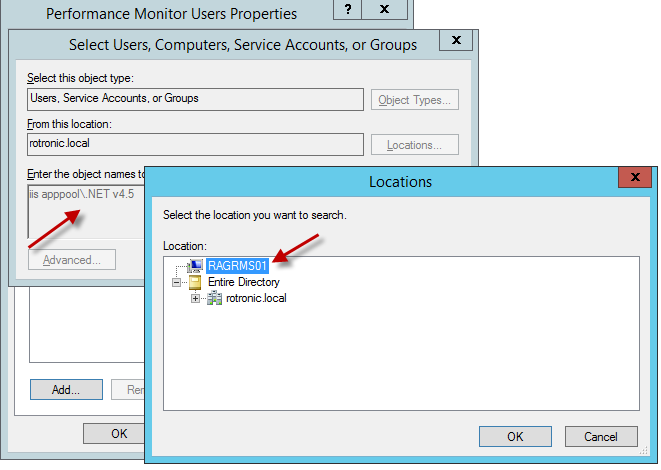
|
Step 8 |
This shall be then visible in member list afterward: The application pool is added to the performance monitor user list 
|
Step 9 |
Reset your server using "Server Manager" > "Local Server" > "TASKS" > "Shut Down Local Server" > "Local Users and Groups", so that the changes take affect |
Step 10 |
The web service configuration is now completed. Two new websites are now visible 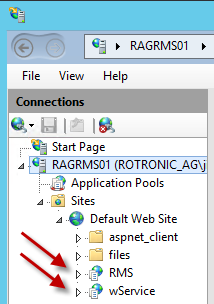
|
Step 11 |
For later storage of uploaded documents in RMS, a file path must be created on the server for storage of these documents. The path can be selected at will (recommended: C:\inetpub\wwwroot\rms_files), but it must be possible for the IIS web service to write to the folder (full access). To this end, right click on the folder properties and set. 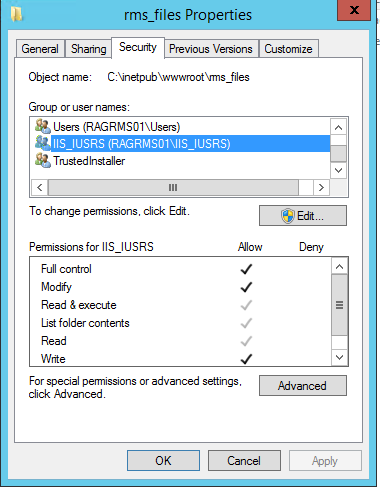 Figure : Folder properties for the document storage location
NOTE: This folder path must be entered in the "Documentation Path" field in "RMS System" setting during system Startup. When no IIS user is installed, please contact your IT department to install an IIS user. |
Step 12 |
Installation of the server software and database is now finished. |