To integrate the device, port 80 must be enabled in your network and a DHCP server must assign the IP address to the device. The device must be able to reach the server with the RMS server software or the Cloud.
The devices can also be given a static IP address if there is no DHCP server available in the network.
Integration of the device (Pairing) in 6 Steps:
Step 1 |
If you do not want to connect the device to the Rotronic Cloud, the server must be configured in the device. oConnect the device to the local network and start the RMS-Configuration software. oSearch for the device under "Device" > "Search" > "Network Device". The software finds all RMS devices in the local network. oEnter the host (server address) and the URL of the software services under "Settings". oFinish configuration with "Write". |
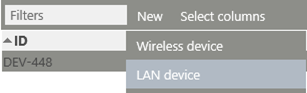
Step 2 |
Log in to the RMS software / Cloud. Select "Extras" > "Setup" > "Devices" > "New LAN Device"
|
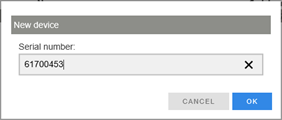
Step 3 |
Enter the serial number of the device. The device flashes orange.
|
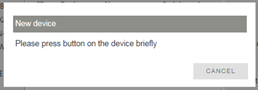
Step 4 |
Press the button on the device briefly. The device stops flashing.
|
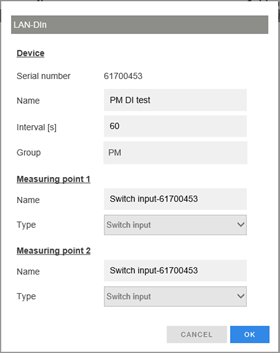
Step 5 |
Configure the device.
|
Step 6 |
Finish configuration.

|
You can find details in the instruction manual for the RMS server software: E-SM-RMS-WEB