Device Configuration
oConnect the device to the network
oConfigure the network settings using the RMS-Config SW (Download)
Step 1 |
Open the RMS-Config SW |
|
Step 2 |
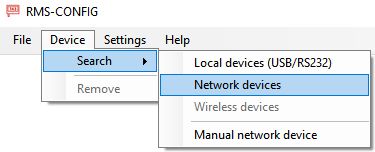
Click on "Device" > "Search" > "Network devices"
|
|
Step 3 |
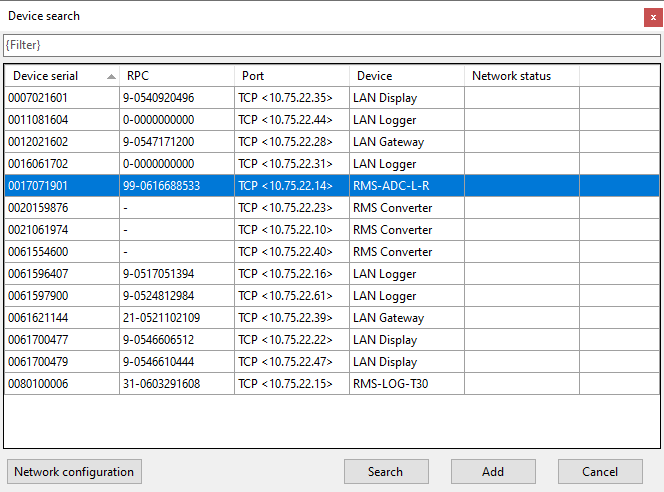
Choose the device
 |
|
Step 4 |
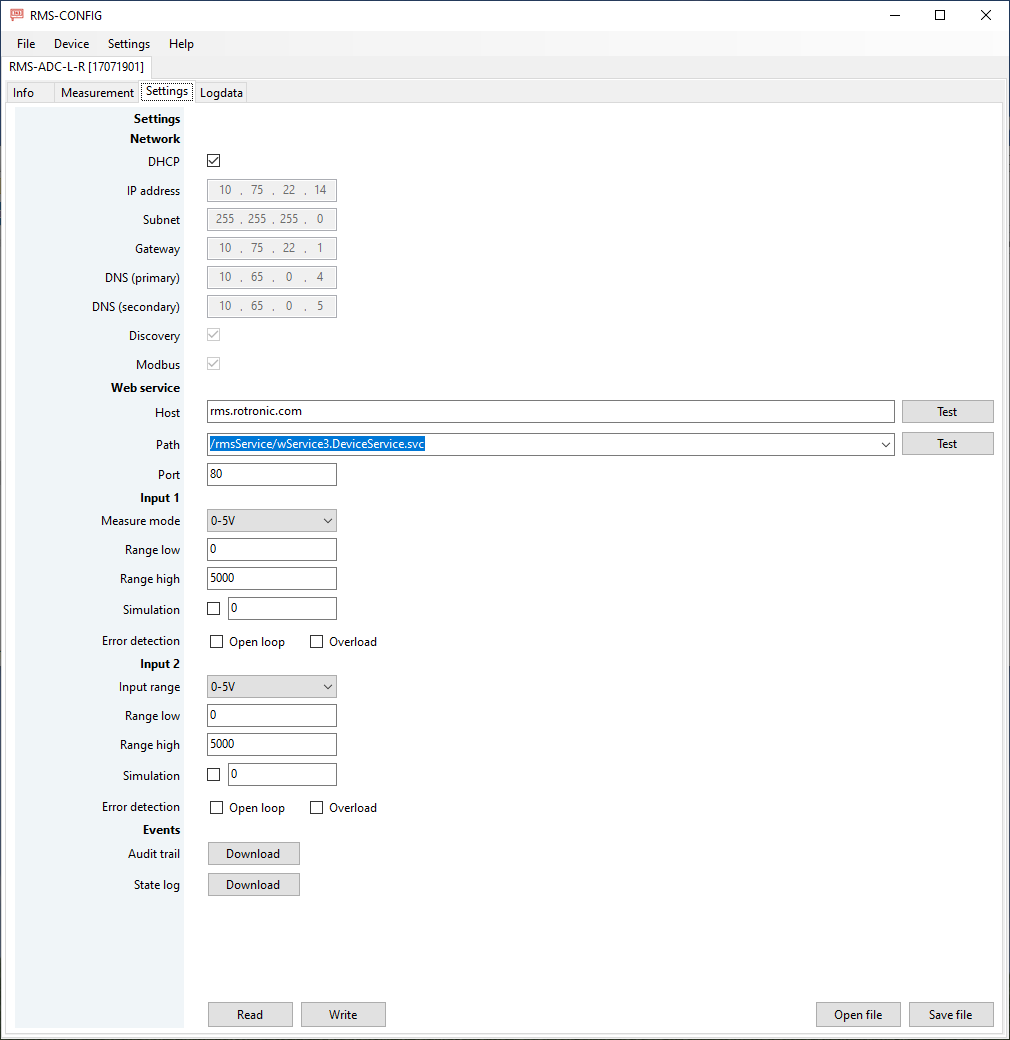
Click "Add" > "Settings" and configure the network settings. Also the analog inputs can be configured here, but it can be done also within RMS.
 |
Pairing / Integration into RMS
Step 1 |
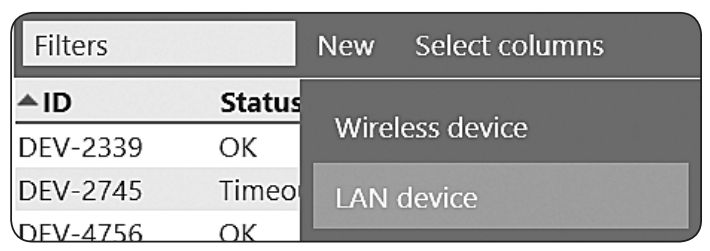
Open a web browser on your computer, log in to the RMS software and select "Tools" > "Setup" > "Device" > "New" > "LAN device"
|
Step 2 |
Enter the serial number and click "OK"
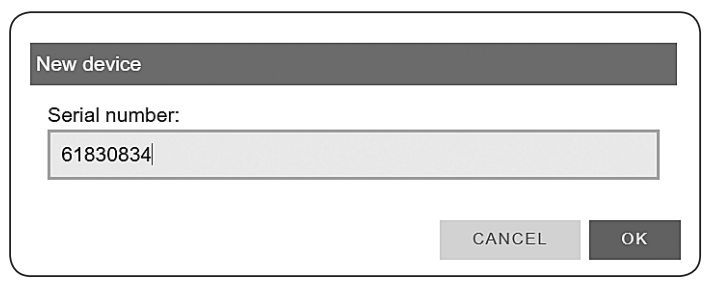
|
Step 3 |
Press the device's button
IMPORTANT: Press the button after the LED starts flashing orange.
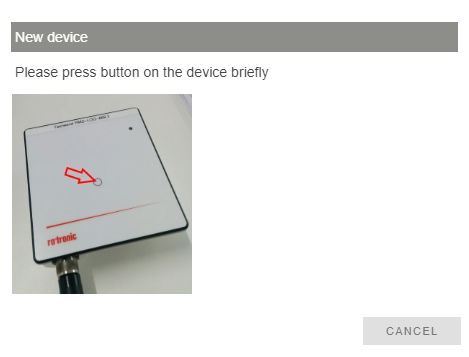
|
Step 4 |
The LED flashes green when connection is successful. |
oConfigure the device and measurement point
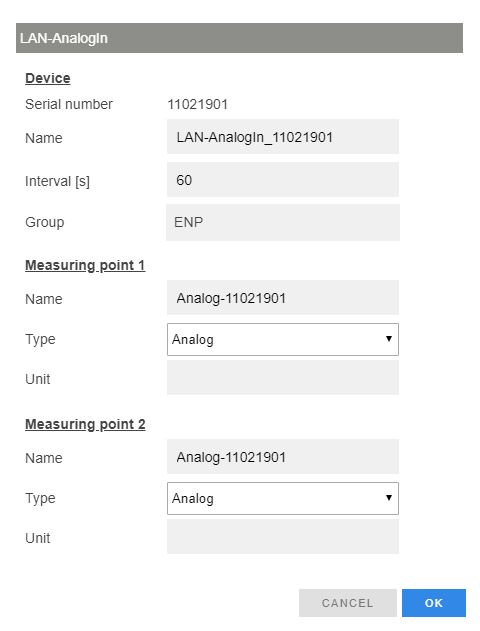
oConfigure the analog inputs (if not done with the RMS-Config)
▪Click on "Tools" > "Setup" > "Devices"
▪Choose the RMS-ADC-L-R
▪Click on "Properties Show"
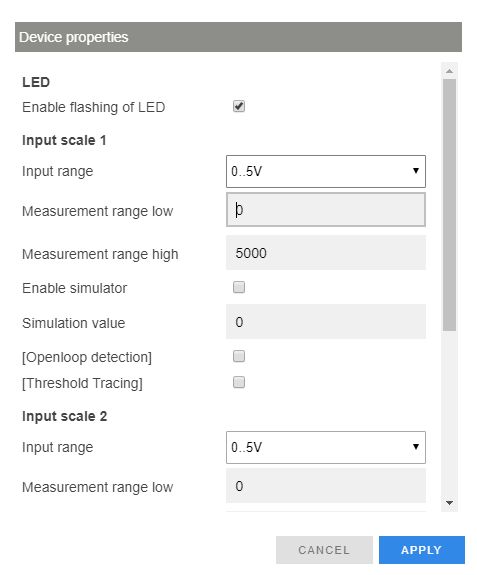
oConfigure the properties of the analog inputs as needed and finish with a click on "Apply"