In order to import a probe inventory number to RMS, the user will require the following:
•Measuring point serial number defined by the device.
•Probe inventory number defined by the user.
•The ProbeInventoryImport.csv file.
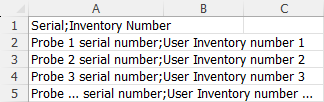
The user must complete fill out the ProbeInventoryImport.csv file with the following data:
1.Measuring point serial number
2.Corresponding user defined probe inventory number.
Example:
Once the ProbeInventoryImport.csv file completed follow the steps below.
Step 1 |
From the start page, click on "Tools" > "Setup":
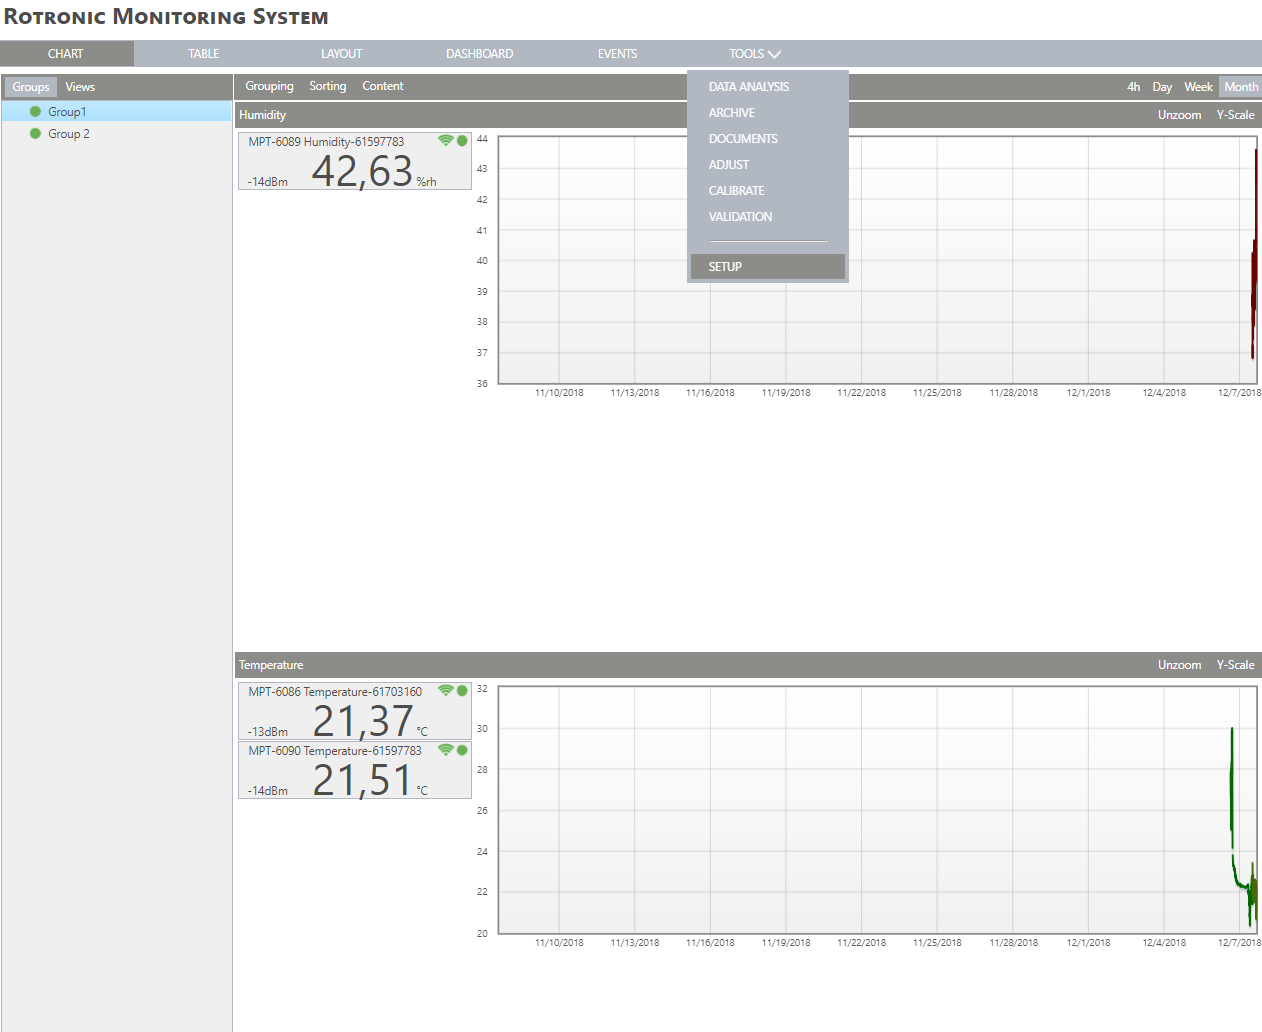
|
Step 2 |
On the left side, select "System": 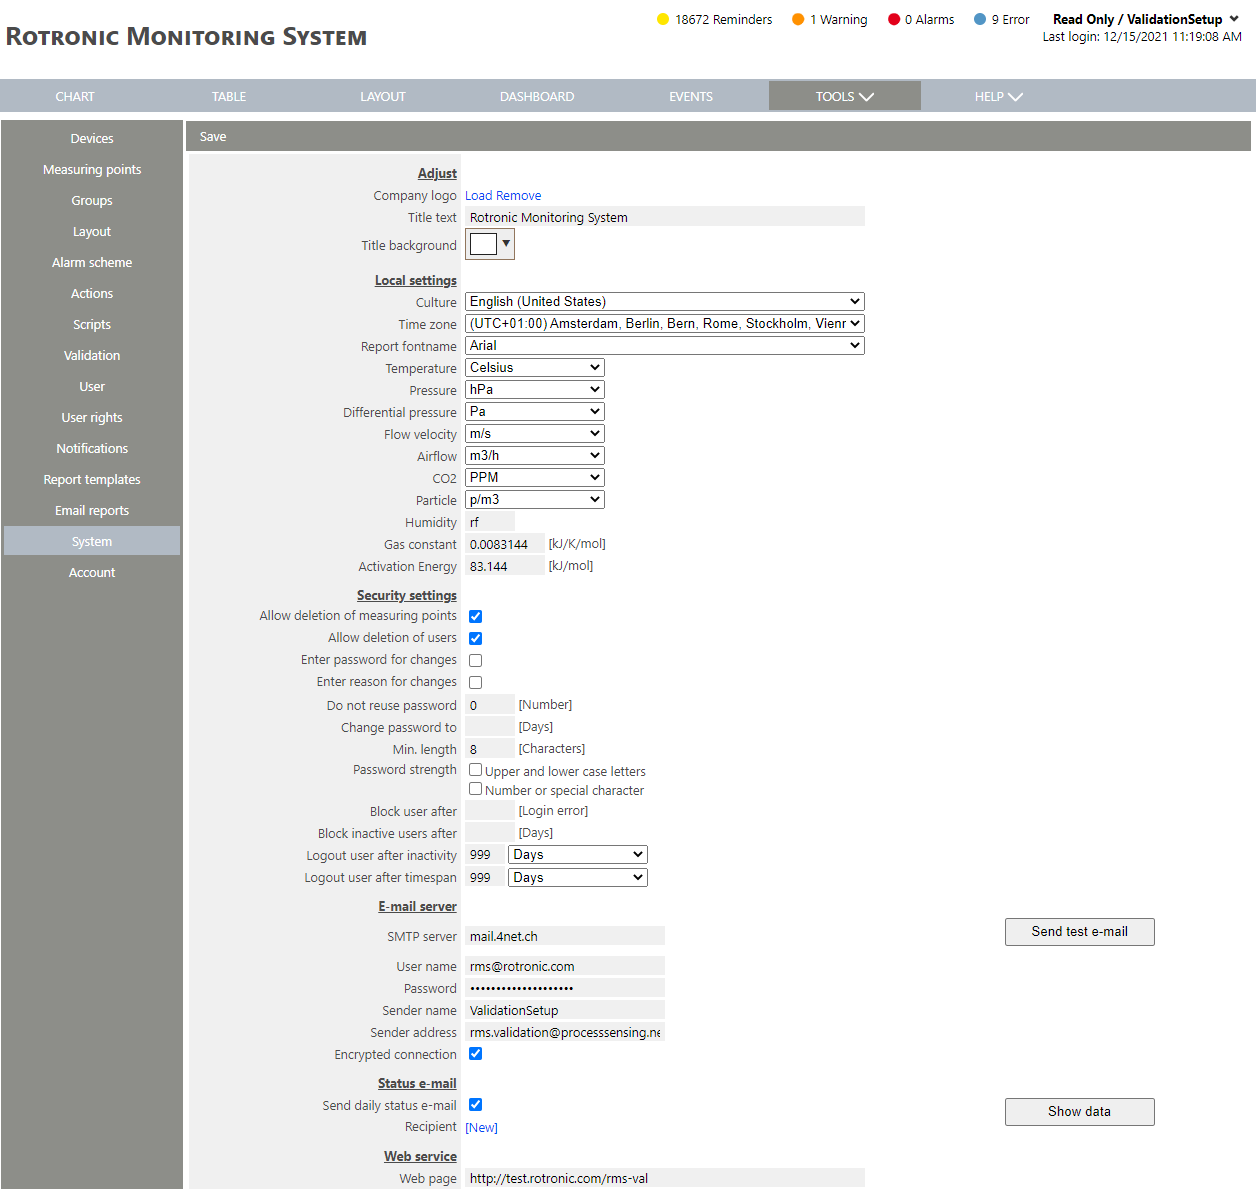
|
Step 3 |
Scroll down and to Import data and Click on "Probe inventory numbers and choose file": 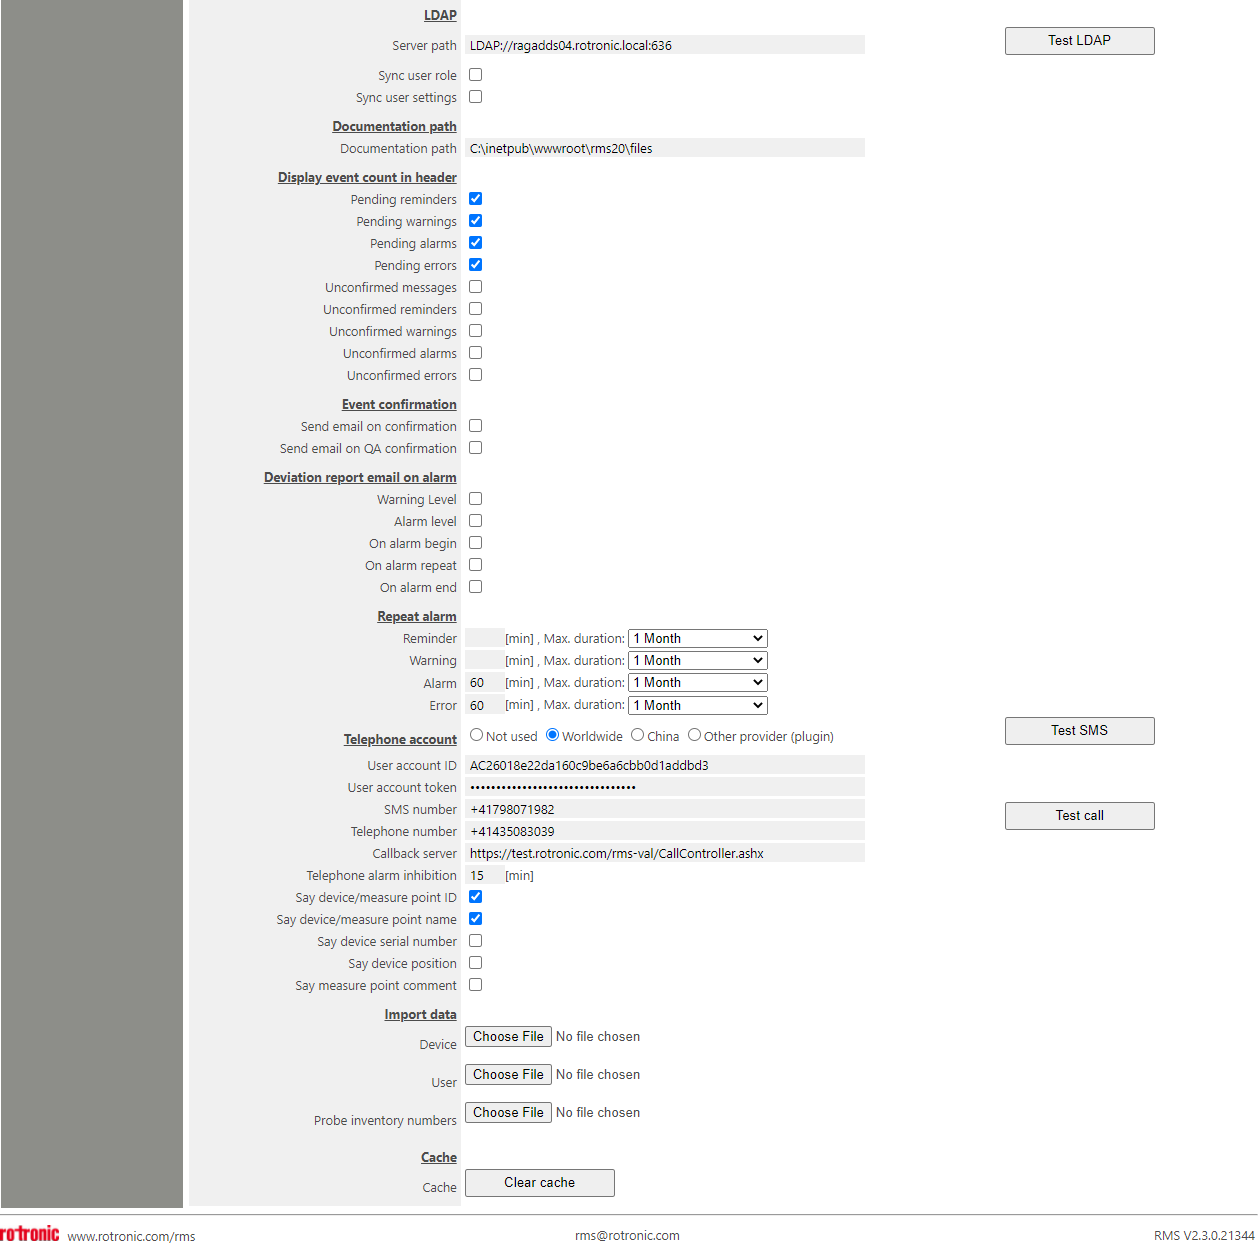 |
Step 4 |
Select the csv file. 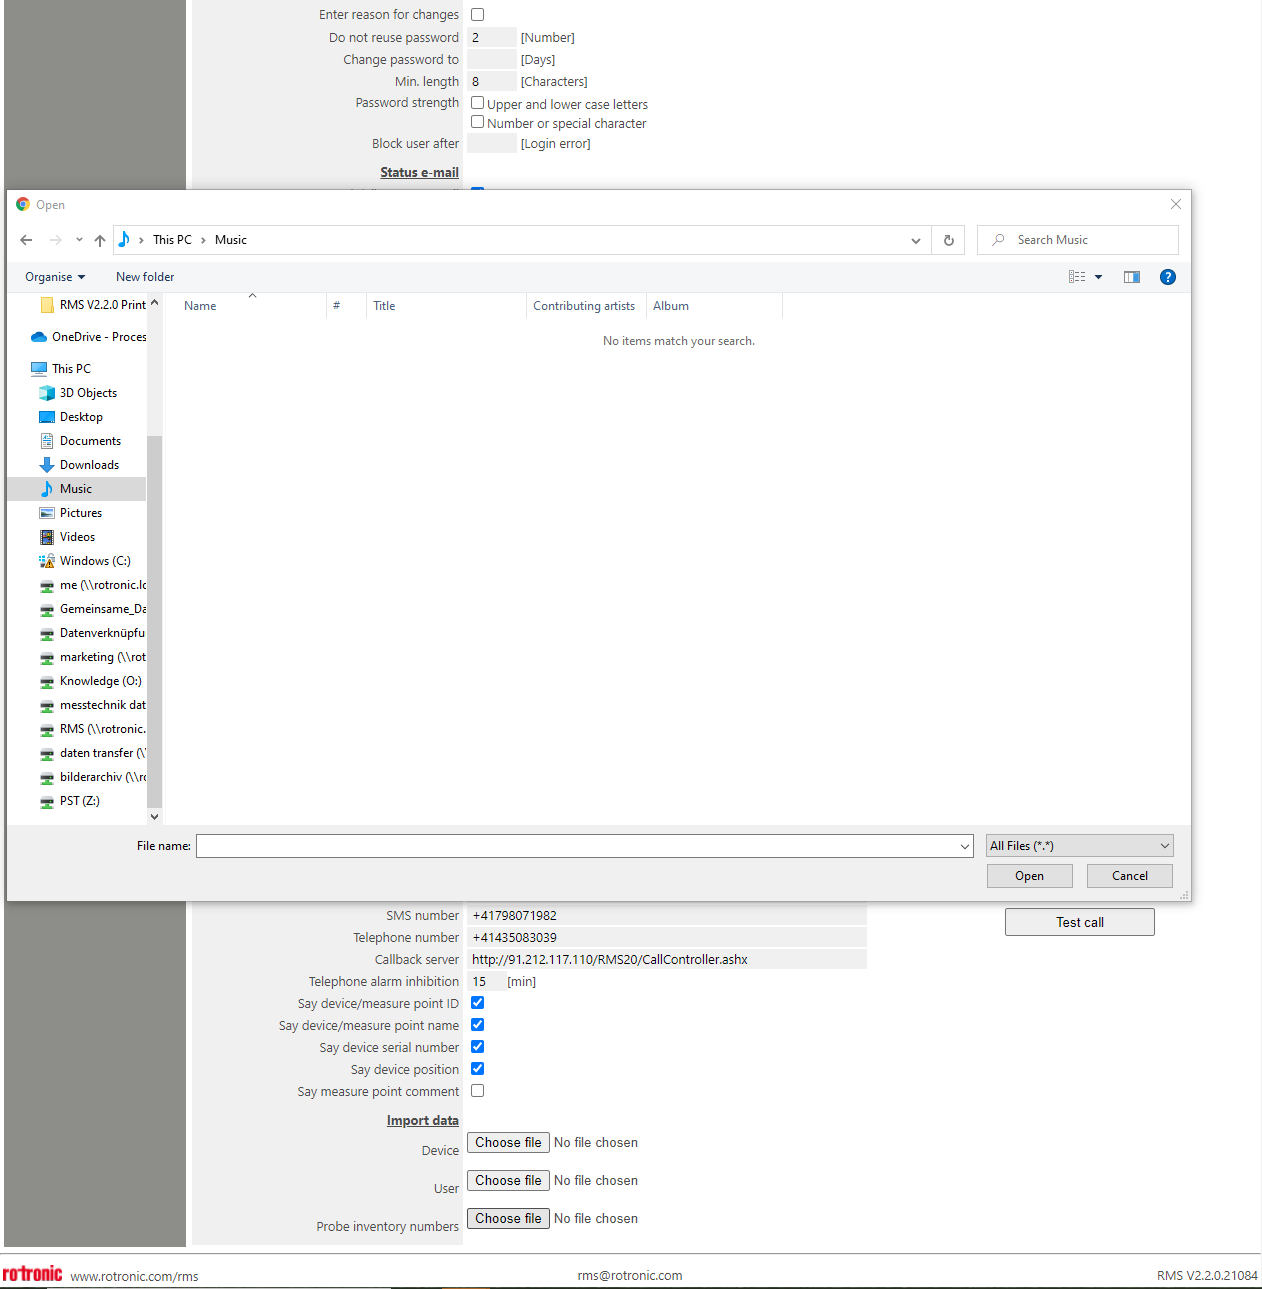 |
Step 5 |
RMS will show the amount of probe serial numbers imported: 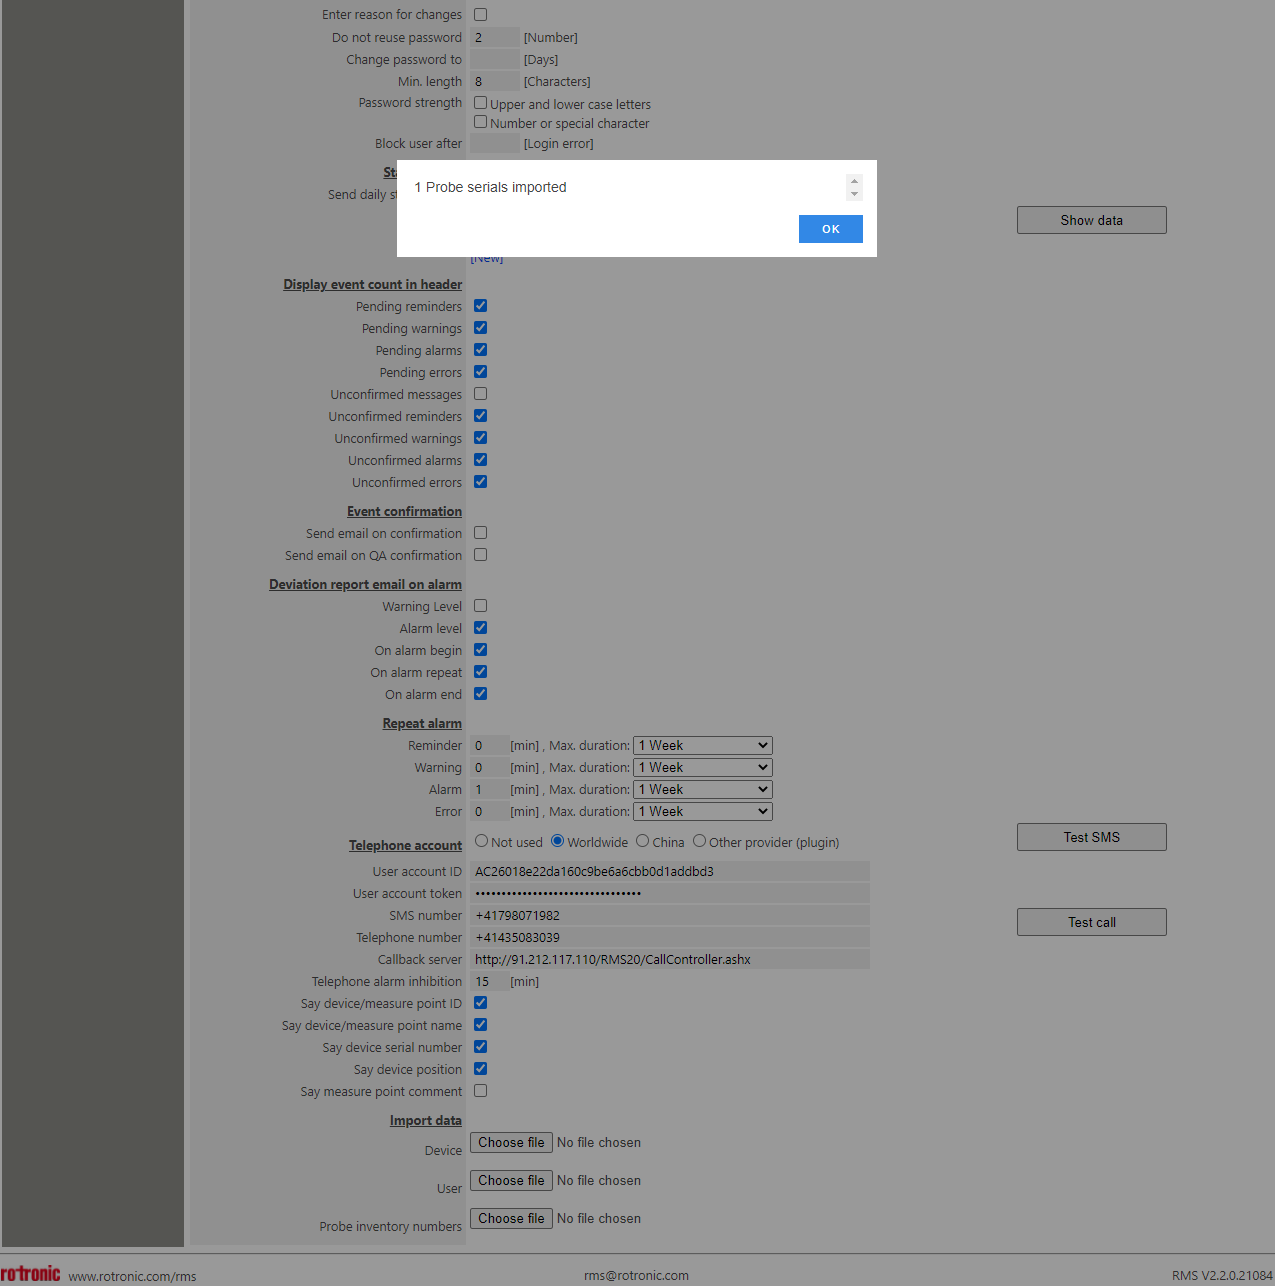 |
Step 6 |
The audit trail will show that a probe inventory number has been imported: 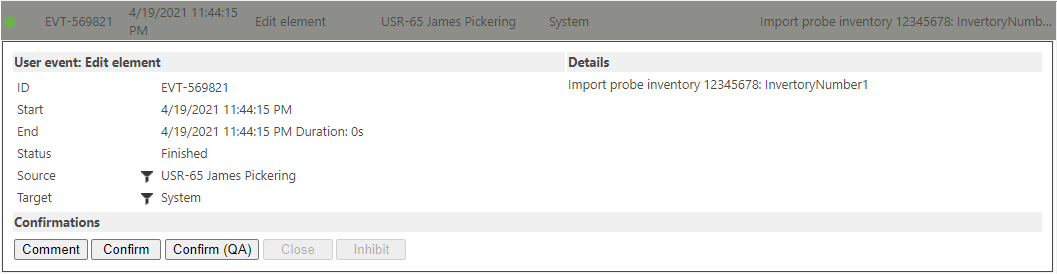 The user can also search for the probe inventory number in the audit trail. |
Step 7 |
The probe inventory number will be shown under the measuring point serial number in brackets: 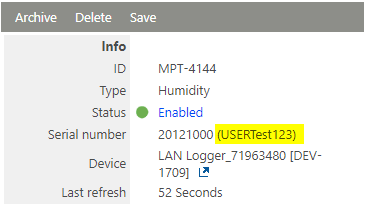 |